Logitech Harmony 520 User Manual - Page 11
Changing the Settings for your Harmony Remote, Learning Infrared IR Commands - remotes
 |
UPC - 097855063908
View all Logitech Harmony 520 manuals
Add to My Manuals
Save this manual to your list of manuals |
Page 11 highlights
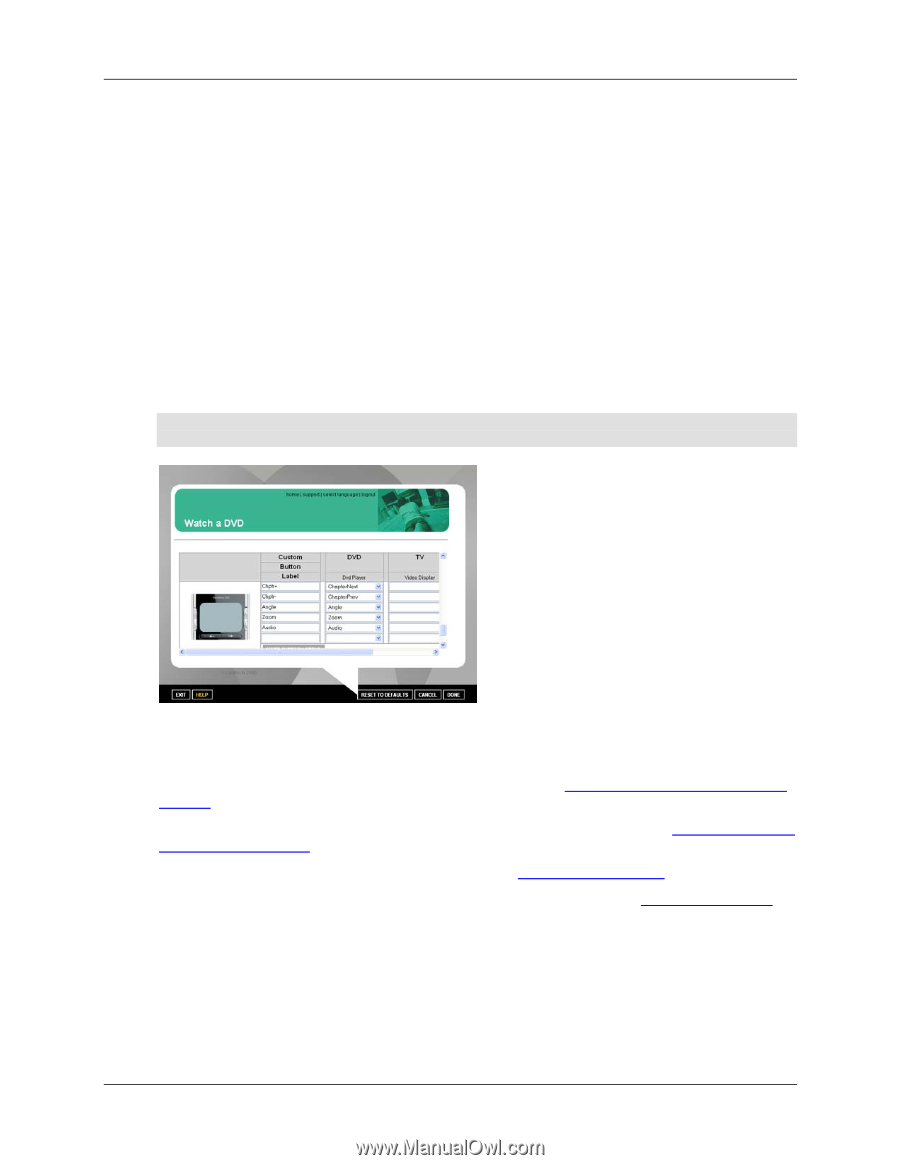
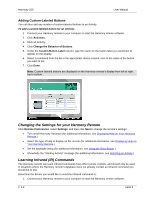
Harmony 520 User Manual Adding Custom-Labeled Buttons You can also add any number of custom-labeled buttons to an Activity. To add a custom-labeled button for an Activity: 1. Connect your Harmony remote to your computer to start the Harmony remote software. 2. Click Activities. 3. Click an Activity. 4. Click Change the Behavior of Buttons. 5. Under the Custom Button Label column, type the name for the button label you would like to appear on the display. 6. Select a command from the list in the appropriate device column, next to the name of the button you want to set. 7. Click Done. Note: Custom-labeled buttons are displayed on the Harmony remote's display from left to right, top to bottom. Changing the Settings for your Harmony Remote Click Remote Preferences, select Settings, and then click Next to change the remote's settings: • Turn on/off Harmony Assistant (for additional information, see Displaying Help on Your Harmony Remote.) • Select the type of help to display on the remote (for additional information, see Displaying Help on Your Harmony Remote.) • Set the backlight timing (for additional information, see Using the Glow Button.) • Show/Hide the "Starting Activity" message (for additional information, see Selecting an Activity.) Learning Infrared (IR) Commands The Harmony remote can learn infrared commands from other remote controls, and should only be used in situations where the Harmony remote's database does not already contain an infrared command you would like to use. Determine the device you would like to send the infrared command to: 1. Connect your Harmony remote to your computer to start the Harmony remote software. v. 1.2 page 9
-
 1
1 -
2
-
3
-
4
-
5
-
 6
6 -
 7
7 -
 8
8 -
 9
9 -
 10
10 -
 11
11 -
 12
12 -
 13
13 -
 14
14
 |
 |