Lowrance HDS-7 Gen3 Installation Manual US - Page 44
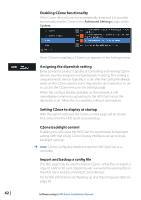
Enabling CZone functionality, Assigning the dipswitch setting, Setting CZone to display at startup,
 |
View all Lowrance HDS-7 Gen3 manuals
Add to My Manuals
Save this manual to your list of manuals |
Page 44 highlights
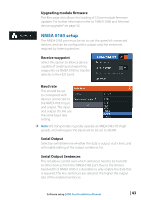
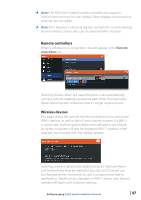
Enabling CZone functionality If the Czone device(s) are not automatically detected, it is possible to manually enable CZone in the Advanced Settings page, under System. Once CZone is enabled, a CZone icon appears in the Settings menu. Assigning the dipswitch setting Every Lowrance product capable of controlling and viewing CZone devices must be assigned a virtual dipswitch setting. This setting is unique for each device. Typically, it is set after the config file already exists on the CZone system, but it may also be set in advance. To do so, access the CZone menu on the Settings page. When the config is already available on the network, it will immediately commence uploading to the HDS Gen3 once the dipswitch is set. Allow this to complete, without interruption. Setting CZone to display at startup With this option selected, the CZone control page will be shown first, every time the HDS Gen3 is powered up. CZone backlight control Enabling this will cause the HDS Gen3 to synchronize its backlight setting with that of any CZone Display Interfaces set up to share backlight settings. note: CZone Config also needs to have the HDS Gen3 set as a controller. Import and backup a config file The files page may be used to import CZone config files, or export a copy to a Micro SD card. Importing will overwrite the existing file on the HDS Gen3 and all connected CZone devices. For further information see "Backing up and Importing user data" on page 50 42 | Software setup | HDS Gen3 Installation Manual
-
 1
1 -
2
-
3
-
4
-
5
-
6
-
7
-
8
-
9
-
10
-
11
-
12
-
13
-
14
-
15
-
16
-
17
-
18
-
19
-
20
-
21
-
22
-
23
-
24
-
25
-
26
-
27
-
28
-
29
-
30
-
31
-
32
-
33
-
34
-
35
-
36
-
37
-
38
-
 39
39 -
 40
40 -
 41
41 -
 42
42 -
 43
43 -
 44
44 -
 45
45 -
 46
46 -
 47
47 -
 48
48 -
 49
49 -
50
-
51
-
52
-
53
-
54
-
55
-
56
-
57
-
58
-
59
-
60
-
61
-
62
-
63
-
64
-
65
-
66
 |
 |
