Lowrance HDS-7 Gen3 Installation Manual US - Page 53
HDS Gen3 software upgrades - hds 7 gen2
 |
View all Lowrance HDS-7 Gen3 manuals
Add to My Manuals
Save this manual to your list of manuals |
Page 53 highlights
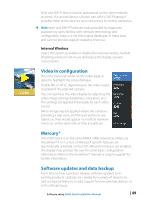
evo2, NSS evo2, NSS, NSO, NSE, Zeus, Zeus Touch, HDS Gen2, HDS Gen2 Touch, HDS Gen3). • User data file version 3 (with depth): Use with legacy Lowrance GPS chartplotters • User data file version 2 (no depth): Use with legacy Lowrance GPS chartplotters • GPX (GPS Exchange, no depth): Use with some other manufacturers' GPS products, and PC applications Once filetype is selected, choose 'export', and select destination SD card. The 'Serial port' option outputs the waypoints over NMEA 0183. The receiving GPS/PC will typically need to be set to allow import of waypoints. Settings database export Pressing the menu key when Setting database is highlighted will give the option to export the Settings database, or Export Czone config (Czone installation dependant). Choose desired option and select destination microSD card. Importing a database Later, if the HDS Gen3 has been restored to factory defaults or user data is accidentally deleted, simply return to the files page, highlight the backed up file, and select 'Import'. View file details for creation date. HDS Gen3 software upgrades The update file must be loaded to the root directory of a microSD card. Update may be initiated at boot up - simply insert the microSD card before turning unit on, boot unit, and follow on-screen instructions. Alternatively, in the files menu, locate the update file on the microSD card and select 'Upgrade', followed by 'This Display'. Accept the prompt to reboot the unit, and wait a few moments as the unit restarts. Do not remove the microSD card or repower the HDS Gen3 until the process is completed (this will typically take no more than a couple of minutes). Software upgrade of remote device It is possible to run an update remotely from one display and apply it to another display, provided they are networked via ethernet. This is only possible for displays without an SD card slot. Software setup | HDS Gen3 Installation Manual | 51
-
 1
1 -
2
-
3
-
4
-
5
-
6
-
7
-
8
-
9
-
10
-
11
-
12
-
13
-
14
-
15
-
16
-
17
-
18
-
19
-
20
-
21
-
22
-
23
-
24
-
25
-
26
-
27
-
28
-
29
-
30
-
31
-
32
-
33
-
34
-
35
-
36
-
37
-
38
-
39
-
40
-
41
-
42
-
43
-
44
-
45
-
46
-
47
-
 48
48 -
 49
49 -
 50
50 -
 51
51 -
 52
52 -
 53
53 -
 54
54 -
 55
55 -
 56
56 -
 57
57 -
 58
58 -
59
-
60
-
61
-
62
-
63
-
64
-
65
-
66
 |
 |
