Mackie 802-VLZ3 Owner's Manual - Page 14
Control Room Outputs, 11. Phones, 12. Phantom Switch And Led, 13. Tape Input - review
 |
View all Mackie 802-VLZ3 manuals
Add to My Manuals
Save this manual to your list of manuals |
Page 14 highlights
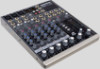
802-VLZ3 MIC 1 XDR2 MIC PRE MIC 2 XDR2 MIC PRE MIC 3 XDR2 MIC PRE 1 1 1 MAIN OUT BALANCED L 17 BAL/UNBAL R L 16 R 802 MONO 2 BAL OR UNBAL 2 BAL OR UNBAL L +4 MIC L L MAIN OUT LINE IN 1 LINE IN 2 BAL 18 LINE IN 3 OR 3 UNBAL MAIN OUTPUT 13 R 14 R 15 4 4 R LEVEL TAPE IN TAPE OUT AUX SEND BAL/UNBAL BAL/UNBAL BAL/UNBAL 5 6 INSERT U M-1IC0GdABIVN 5 6 INSERT U M-1IC0GdABIVN LINE IN 4 5 LOW CUT 100 Hz 18dB/OCT MIC GAIN 3 MONO L BAL OR UNBAL 3 MONO L BAL OR UNBAL 8 L R9 L3 R4 10 L 12 PHANTOM POWER R 7 7 7 R R 11 0 60 0 60 0 60 +15dB - 45dB +15dB - 45dB GAIN GAIN GAIN LINE IN 5-6 LINE IN 7-8 ST RETURN ALT OUTPUT CR OUTPUT PHONES 10. CONU TROALUXROOMU OUATUPXUTS U AUX U AUX 12.U PHAAUNXTOM SWITUCH aAnUdX LED MASTER U STEREO RETURN These TRS 1⁄4" balanced/unbalanced outputs This global swPPROiEStTch controSlEsNDthe phantom power supply OO OO allow you+1t5o listen to so+1m5 ething othe+r15than the ma+1i5n OO OO OO OO for c+1o5ndenser micropho+1n0es plugged into the+2m0 ic [1] OO mix. TheUse ouEtpQuts arUe oftenEQused tUo run EaQnice pUair ofEQ inpUuts. SEeQe the phanPtOoWmERpower details on page 11 powered stud1i2oHkHI mz onitors in12HakHI zcontrol roo1m2HkHI.zThe source12HkHI z before u1s2HiknHI zg this swCiOtcNhTR.OL LEFT RIGHT is sele-c15te+d15using the-15so+u15rce matr-i1x5 [+3150] switch-1e5s + 1 5 U U U U (see page 19). You can choose to listen to the main mix, MID MID MID MID the alt 3-4 ste2r.5ekHoz bus (see m2.5kuHzte/alt 3-4 o2n.5kHpzage 16), 2.5kHz soloed-15chU+a15nnels, or-1t5hUe+1t5ape inpu-t15. UT+h15e volume-15isU+15 -15 +15 ROOM 0dB=0dBu PUress the switch iSnOtUoRCeEngage phantom po20wer to the three mi2.cM5kIDHiznputs. Press the switch out T-1h5 e+1L5ED will comeMoAnINwMhIXen phantom to tu1r5n it off. powe10r is engaged. 6 U adjustable witLhOWthe controlLrOoWom/submixLO[W32] knob. LOW 80Hz 80Hz 80Hz 80Hz -15 +15 -15 +15 -15 +15 -15 +15 LOWPhantom power is supplied to all 3three mic 80Hz ALT 3-4 0 -15 +15 inputs at once, therefore, do not u2 se a 11. PHONESPAN PAN PAN PAN PANribbon microphone TAPE in any of these4 inputs This stereo jack will drive any standard headphone to when phantom power is engaged. 7 LEVEL SET 10 very louLdRlevels. "iPodL "R-type and coLmRputer headpL hRones can also1be used here2, with a 1/4" 3m-a4le to 1/8" f5em-6ale stereo AMaLUTd3Ta-E4pter. MUTE ALT 3-4 MUTE ALT 3-4 MUTE ALT 3-4 PRE FADER PRE FADER PRE FADER PRE FADER To leSaOrLnO how signaSOlsLOare routedStOoLOthese outpSuOtLsO, see source matUrix [30] on paU ge 19. The leUvel is adjustedU LR 173-.8TAPE INPUT 20 30 MUTE ASSIGN ALCT 3o-4nnect your comTOpMuAINteMrIXaudio outputs, or tape RUDE PrReEcFAoDrEdR er's outputs here, using standard hSOiL-Ofi (RCA) SOLO cableUs. U OO MAX U PHONES with the phones knob [31], and the source is whatever Use these jacks for convenient tape playback of your the control room output is playing, such as the main mixes. You'll be able to review a mix and then rewind OO OO mix, the LaElVt+E13L2-d4B stereo LbEuV+Es1L,2dsBoloed chLaEVn+En1L2edBls, or theLEtVa+E1pL2deB input. If you're wiring your own cable for the phones OO OO OO OO andLEtVr+Ey12LdaBnotherCpTLaRsOs OwMi+t1/0hSdUoBBuMtIXrepatchingMoArINd+1Mi2sdItBXurbing the mixer levels. You can also use these jacks with a OO output, follow s tandard conventions: portable tape or CD player to feed music to a PA system Tip = Left channel between sets. Ring = Right channel Sleeve = Common ground WARNING: The headphone amp is loud, and can cause permanent ear damage. Even intermediate levels may be painfully loud with some earphones. BE CAREFUL! Always turn the phones [31] knob all the way down before connecting headphones. Keep it down until you've put the phones WARNING: engaging both the tape and assign to main mix b uttons in the control room source [30] matrix can create a feedback path between tape input and tape output. Make sure your tape deck is not in record, record-pause, or input monitor mode, when you engage these switches, or make sure the control room / submix [32] level knob is fully counterclockwise (off). on. Then turn it up slowly. 14 802-VLZ3
-
 1
1 -
2
-
3
-
4
-
5
-
6
-
7
-
8
-
 9
9 -
 10
10 -
 11
11 -
 12
12 -
 13
13 -
 14
14 -
 15
15 -
 16
16 -
 17
17 -
 18
18 -
 19
19 -
20
-
21
-
22
-
23
-
24
-
25
-
26
-
27
-
28
 |
 |
