Mackie SR408 / SR568 Owner's Manual - Page 45
Previewing Mute Groups
 |
View all Mackie SR408 / SR568 manuals
Add to My Manuals
Save this manual to your list of manuals |
Page 45 highlights
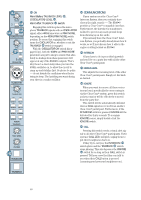
The mute configurations of each Group add together (if you're Boolean-savvy, this is a logical OR function). For example, if Group 1 mutes Channels 1 and 2, and Group 2 mutes Channels 3 and 4, engaging both Groups 1 and 2 mutes Channels 1 through 4. Deselecting Group 2 unmutes Channels 3 and 4, while Channels 1 and 2 remain muted. You cannot have a Group from two different Sets engaged at the same time. In fact, in order to change from one Set to another, all the Groups must be turned off by either deselecting them individually (by pressing the number button) or by pressing the CLEAR button. Then the Up/Down Arrow buttons become active and you can select a new Set. One caveat: If the same channel appears in two different Groups, turning off one Group turns off (unmutes) the shared muted channel even if the other Group is engaged. For example, if Group 3 mutes Channels 5 and 6, and Group 4 mutes Channels 6 and 7, engaging both Groups mutes Channels 5 through 7. Deselecting Group 4 unmutes Channels 6 and 7, leaving only Channel 5 muted in Group 4. To reset Group 4 back to normal, deselect and reselect it, or, if you don't want to unmute the channels that are muted, use Preview mode to deselect and reselect it (see "Previewing Mute Groups" below). To avoid this scenario, you should refrain from assigning the same channel to different Groups. However, there may be situations where this is useful, so we leave it to you to make this choice. Previewing Mute Groups Preview mode lets you see the mute configuration of a Group without actually engaging it. This gives you the option of "looking ahead" at a forthcoming change in the mute configuration of the console to be sure that it is the one you really want. 1. Select a Group. 2. Press the MUTE PREVIEW button. The LED above the MUTE PREVIEW button lights. 3. Select a different Group. The MUTE PREVIEW LED begins to blink, and the MUTE LEDs for the channels assigned to the selected Group light. You are only previewing the Group - the channels are not actually muted. You can deselect the current Group. The MUTE LEDs for the channels assigned to the Group turn off. Don't be alarmed! The channels that were muted prior to entering Preview mode remain muted, even if their LEDs are turned off. Remember, in Preview mode the MUTE LEDs are just showing you what might be if you decide to DO IT, not what actually is. You can go to a different Set by deselecting all the Groups in the current Set, and pressing the Up/Down Arrow buttons to proceed to a different Set. You now have all the Groups in the new Set available to preview. You can manually add a channel to the Preview by pressing its MUTE button. Its MUTE LED lights, but it's not actually muted yet. 4. Once you've decided on a new Group or modified a Group configuration, press DO IT and the new Group(s) plus any manually muted channels engage. 5. Notice that the PREVIEW LED is still lit. You are still in Preview mode, and free to preview another Group if you so desire. Otherwise, press MUTE PREVIEW to exit Preview mode. 0 1 2 3 4 5 6 7 8 9 0-9 MODE GRP SNAP ULTRA MUTE™ SYSTEM BY PASS MUTE PREVIEW STORE CLEAR DO IT 45
-
 1
1 -
2
-
3
-
4
-
5
-
6
-
7
-
8
-
9
-
10
-
11
-
12
-
13
-
14
-
15
-
16
-
17
-
18
-
19
-
20
-
21
-
22
-
23
-
24
-
25
-
26
-
27
-
28
-
29
-
30
-
31
-
32
-
33
-
34
-
35
-
36
-
37
-
38
-
39
-
 40
40 -
 41
41 -
 42
42 -
 43
43 -
 44
44 -
 45
45 -
 46
46 -
 47
47 -
 48
48 -
 49
49 -
 50
50 -
51
-
52
-
53
-
54
-
55
-
56
-
57
-
58
-
59
-
60
-
61
-
62
-
63
-
64
-
65
-
66
-
67
-
68
-
69
-
70
-
71
-
72
-
73
-
74
-
75
-
76
-
77
-
78
-
79
-
80
-
81
-
82
-
83
-
84
-
85
-
86
 |
 |
