Magellan eXplorist 400 Manual - English (for the UK) - Page 56
Creating a Multi-Leg Route, Routes, New route, Add POI, Insert POI, Delete POI, Replace POI
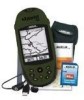 |
UPC - 763357111613
View all Magellan eXplorist 400 manuals
Add to My Manuals
Save this manual to your list of manuals |
Page 56 highlights
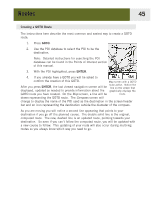
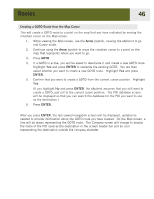
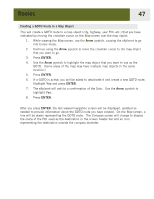
Routes 49 Creating a Multi-leg Route The eXplorist will provide you with an empty list for your route, and you can use the POIs saved in the POI database to create the route. All the tools you'd need to create the route will be described here. Steps in creating a multi-leg route: 1. Press MENU. 2. Use the Arrow joystick to highlight Routes. 3. Press ENTER. 4. Use the Arrow joystick to highlight New route. 5. Press ENTER. 6. Add POI is highlighted. Press ENTER. 7. The POI database is shown. Search the database for the POI you want to use as the starting POI for the route. 8. Continue pressing ENTER with Add POI highlighted. Select the next POI for the route from the POI database. 9. [Optional] As you are creating the route you may want to edit what you have already entered. You can insert, delete, or replace a POI that is already in the route list. Inserting: Use the Arrow joystick to highlight the POI that you want to insert a new leg before. Press MENU, highlight Insert POI, and press ENTER. Search the POI database for Create Route screen the new POI. The new POI will be inserting into the route you are creating. Deleting: Use the Arrow joystick to highlight the POI you want to delete from the route. Press MENU, highlight Delete POI and press ENTER. Replacing: Use the Arrow joystick to highlight the POI you want to replace. Press MENU, highlight Replace POI, and press ENTER. Search the POI database for the new POI. The POI you select will replace the POI that was originally highlighted. 10. When you have added all of the legs to the route you are creating, use the Arrow joystick to highlight Save Route. 11. Press ENTER. 12. Use the Arrow joystick and the ENTER button to input a name, up to ten characters, for the route. 13. Highlight OK. 14. Press ENTER. 15. Locate the file you want to save the newly created route into and press ENTER.
-
 1
1 -
2
-
3
-
4
-
5
-
6
-
7
-
8
-
9
-
10
-
11
-
12
-
13
-
14
-
15
-
16
-
17
-
18
-
19
-
20
-
21
-
22
-
23
-
24
-
25
-
26
-
27
-
28
-
29
-
30
-
31
-
32
-
33
-
34
-
35
-
36
-
37
-
38
-
39
-
40
-
41
-
42
-
43
-
44
-
45
-
46
-
47
-
48
-
49
-
50
-
 51
51 -
 52
52 -
 53
53 -
 54
54 -
 55
55 -
 56
56 -
 57
57 -
 58
58 -
 59
59 -
 60
60 -
 61
61 -
62
-
63
-
64
-
65
-
66
-
67
-
68
-
69
-
70
-
71
-
72
-
73
-
74
-
75
-
76
-
77
-
78
-
79
-
80
-
81
-
82
-
83
-
84
-
85
-
86
-
87
-
88
-
89
-
90
-
91
-
92
-
93
-
94
-
95
-
96
-
97
-
98
-
99
-
100
-
101
-
102
-
103
-
104
-
105
-
106
-
107
-
108
-
109
-
110
-
111
-
112
-
113
-
114
-
115
-
116
-
117
-
118
-
119
 |
 |
