Magellan eXplorist 500 Manual - English (for the UK) - Page 52
Creating a GOTO Route - updates
 |
UPC - 763357109405
View all Magellan eXplorist 500 manuals
Add to My Manuals
Save this manual to your list of manuals |
Page 52 highlights
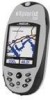
Routes 45 Creating a GOTO Route The instructions here describe the most common and easiest way to create a GOTO route. 1. Press GOTO. 2. Use the POI database to select the POI to be the destination. Note: Detailed instructions for searching the POI database can be found in the Points of Interest section of this manual. 3. With the POI highlighted, press ENTER. 4. If you already have a GOTO you will be asked to confirm the creation of this GOTO. Map screen with a GOTO route active. Notice the After you press ENTER, the last viewed navigation screen will be line on the screen that displayed, updated as needed to provide information about the graphically displays the GOTO route you have created. On the Map screen, a line will be route. drawn representing the GOTO route. The Compass screen will change to display the name of the POI used as the destination in the screen header bar and an icon representing the destination outside the diameter of the compass. As you are moving you will notice a second line appearing that points to your destination if you go off the planned course. The double solid line is the original, computed route. The new, dashed line is an updated route, pointing towards your destination. So even if you can't follow the computed route, you will be updated with a new course to follow. This updating of your route will also occur during multi-leg routes so you always know which way you need to go.
-
 1
1 -
2
-
3
-
4
-
5
-
6
-
7
-
8
-
9
-
10
-
11
-
12
-
13
-
14
-
15
-
16
-
17
-
18
-
19
-
20
-
21
-
22
-
23
-
24
-
25
-
26
-
27
-
28
-
29
-
30
-
31
-
32
-
33
-
34
-
35
-
36
-
37
-
38
-
39
-
40
-
41
-
42
-
43
-
44
-
45
-
46
-
 47
47 -
 48
48 -
 49
49 -
 50
50 -
 51
51 -
 52
52 -
 53
53 -
 54
54 -
 55
55 -
 56
56 -
 57
57 -
58
-
59
-
60
-
61
-
62
-
63
-
64
-
65
-
66
-
67
-
68
-
69
-
70
-
71
-
72
-
73
-
74
-
75
-
76
-
77
-
78
-
79
-
80
-
81
-
82
-
83
-
84
-
85
-
86
-
87
-
88
-
89
-
90
-
91
-
92
-
93
-
94
-
95
-
96
-
97
-
98
-
99
-
100
-
101
-
102
-
103
-
104
-
105
-
106
-
107
-
108
-
109
-
110
-
111
-
112
-
113
-
114
-
115
-
116
-
117
-
118
-
119
 |
 |
