Makita LS1216L Owners Manual - Page 23
Adjusting the position of laser line - laser adjustment
 |
View all Makita LS1216L manuals
Add to My Manuals
Save this manual to your list of manuals |
Page 23 highlights
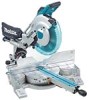
Make sure that the pointers on the arm holder point to 0° on the bevel scale plate on the arm. If they do not point to 0°, loosen the 1 screws which secure the pointers and adjust them so that they will point to 0°. 1. Bevel scale plate 1 2. Pointer 009527 1. Vertical vise 2 009490 (2) 45° bevel angle 1 2 3 4 009608 1. Pointer 2. Scale plate 3. Left 45 ゚ bevel angle adjusting bolt 4. Right 45 ゚ bevel angle adjusting bolt Adjust the 45° bevel angle only after performing 0° bevel angle adjustment. To adjust left 45° bevel angle, loosen the lever and tilt the blade to the left fully. Make sure that the pointer on the arm holder points to 45° on the bevel scale on the arm. If the pointer does not point to 45°, turn the left 45° bevel angle adjusting bolt on the side of the arm until the pointer points to 45°. To adjust right 45° bevel angle, perform the same procedure described above. Adjusting the position of laser line For model LS1216L only 1. Workpiece 2. Laser line 1 WARNING: • As the tool is plugged when adjusting the position of laser line, take a full caution especially at switch action. Pulling the switch trigger accidentally cause an accidental start of the tool and personal injury. CAUTION: • Never look into the laser beam directly. Direct laser beam causes damage to your eyes. • LASER RADIATION Do not stare into beam. • Never apply a blow or impact to the tool. A blow or impact causes the incorrect position of laser line, damage to the laser beam emitting part or a short life of the tool. When adjusting the laser line appears on the left side of the saw blade 1 4 5 2 3 1. Screw to change the movable range of the adjusting screw 2. Adjusting screw 3. Hex wrench 4. Laser line 5. Saw blade 009514 2 009526 23
-
 1
1 -
2
-
3
-
4
-
5
-
6
-
7
-
8
-
9
-
10
-
11
-
12
-
13
-
14
-
15
-
16
-
17
-
 18
18 -
 19
19 -
 20
20 -
 21
21 -
 22
22 -
 23
23 -
 24
24 -
 25
25 -
 26
26 -
 27
27 -
 28
28 -
29
-
30
-
31
-
32
-
33
-
34
-
35
-
36
-
37
-
38
-
39
-
40
-
41
-
42
-
43
-
44
-
45
-
46
-
47
-
48
-
49
-
50
-
51
-
52
-
53
-
54
-
55
-
56
-
57
-
58
-
59
-
60
-
61
-
62
-
63
-
64
-
65
-
66
-
67
-
68
-
69
-
70
-
71
-
72
-
73
-
74
-
75
-
76
-
77
-
78
-
79
-
80
-
81
-
82
-
83
-
84
 |
 |
