Makita XRU02Z Instruction Manual - Page 9
Assembly
 |
View all Makita XRU02Z manuals
Add to My Manuals
Save this manual to your list of manuals |
Page 9 highlights
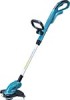
Nylon cutting head NOTICE: • The bump feed will not operate properly if the Nylon cutting head is not rotating. 1. Nylon cutting head Installing the front grip 1 2 1. Front grip 2. Clamping nut 3. Hex bolt 1 012404 The nylon cutting head is a single string trimmer head provided with a bump & feed mechanism. To cause the nylon cord to feed out, the cutting head should be bumped against the ground while the tool is running. As the nylon cord is feeding out it will automatically be cut to the proper length by the cutter on the guard. NOTE: • If the nylon cord does not feed out while bumping the head, rewind/replace the nylon cord by following the procedures described under "Installing or removing the Nylon cutting head" and "Winding a new Nylon cord on the spool." • Do not bump the tool to the concrete or asphalt surface. Bumping to this kind of objects may cause the tool damage. ASSEMBLY WARNING: • Always be sure that the tool is switched off and battery cartridge is removed before carrying out any work on the tool. Failure to switch off and remove the battery cartridge may result in serious personal injury from accidental start-up. • Never start the tool unless it is completely assembled. Operation of the tool in a partially assembled state may result in serious personal injury from accidental start-up. 3 012394 Put the front grip on the front grip holder and secure it with a hex bolt and the clamping nut provided with the string trimmer as shown in the figure. At this time, the hex bolt needs to be installed from the side in which the hex bolt lock port is located and the clamping nut needs to be installed from the opposite side. NOTE: • The front grip has a edge-to-edge cut slit in its mounting area. Using this slit allows you to easily install the front grip on the front grip holder. The front grip angle is adjustable. To adjust the front grip angle, loosen the claming nut, set the front grip at an proper angle according to your work and then tighten the nut clockwise firmly. Installing the guard CAUTION: • While installing the guard, be careful not to contact the nylon cord cutter provided on the guard. Contact with the cutter could result in personal injury. 1 1. Guard 2. Screws 3. Cutter cover 3 2 012393 Mount the guard by fitting it on to the motor housing so that the Nylon cord is not pinched between the guard and the motor housing, and then secure it with two screws. Before starting the trimmer, take away the cutter cover from the cord cutter. Installing or removing the Nylon cutting head WARNING: • Before installing or removing the Nylon cutting head (both spool cover and spool, and hereafter called this way), make sure that the tool is switched off and the battery cartridge is removed from the tool. 9
-
 1
1 -
2
-
3
-
 4
4 -
 5
5 -
 6
6 -
 7
7 -
 8
8 -
 9
9 -
 10
10 -
 11
11 -
 12
12 -
 13
13 -
 14
14 -
15
-
16
-
17
-
18
-
19
-
20
-
21
-
22
-
23
-
24
-
25
-
26
-
27
-
28
-
29
-
30
-
31
-
32
-
33
-
34
-
35
-
36
-
37
-
38
-
39
-
40
 |
 |
