Marantz AV9000 AV9000 USER'S MANUAL - Page 19
Basic Operation
 |
View all Marantz AV9000 manuals
Add to My Manuals
Save this manual to your list of manuals |
Page 19 highlights
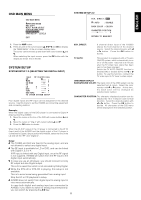
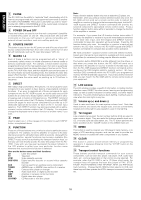
ENGLISH DIGITAL COPY Select the digital source of the DIGITAL output with or button for digital dubbing to the CD-R recorder or MD deck. The source is switched in the following sequence. SOURCE → DIG.1 → DIG.2 → DIG.3 → DIG.4 → OFF → SOURCE → To determine each source, display the desired source and press the OK button or / button. Notes: VCR1 and TAPE outputs can only send a signal from an analog source connected to the AV9000. If you select a source which is only connected to a digital input, no signal will be available to ouput to a VCR1 or TAPE deck from the analog output. If you expect to do dubbing from digital source equipment to analog equipment, then you should connect the digital equipment's analog outputs into the AV9000's analog inputs in addition to making the digital connections. Conversely, a digital source may only be dubbed using the DIGITAL output, which must in turn be connected to a digital input of a digital recording device such as the DR-700 or DR-17 CD recorder. Remember-you can only dub analog to analog or digital to digital. MULTI ROOM SELECT MULTI ROOM SELECT MULTI ROOM : OFF VISUAL : TV AUDIO : TUNER VOLUME : VARIABLE LEVEL : - 90dB RETURN TO MAIN/EXIT BASIC OPERATION LISTENING TO THE TUNER MANUAL TUNING 1. To select the tuner as the source, turn the INPUT SELECTOR knob !9 on the front panel or press the TUNER button . on the remote. 2. Press the BAND button D4 on page 1 at TUNER MODE on the remote to select the desired frequency band if required. 3. Press the AUTO TUNING button !4 on the AV9000 to display the frequency. 4. Turn the GYRO TUNING knob !6 on AV9000 or press or button on the remote. 5. If FM is selected, press the MODE button D5 on the remote to select the desired audio mode. AUTO TUNING (USING THE AV9000) Light up the "AUTO TUN" indicator by pressing the AUTO TUNING button !4 and turn the GYRO TUNING knob !6. AUTO TUNING (USING THE REMOTE CONTROL UNIT) or button is pressed for more than 1 second to start Auto tuning function. (FM) MODE Button Operation When "AUTO" indicator is on in the display, FM stations which broadcast in stereo will be received in stereo and the "STEREO" indicator lights. When "AUTO" indicator is off, all the FM stations will be received in monaural regardless of whether or not they are broadcasting in stereo. MULTI ROOM: To switch on the Multi-room output, move " " with or button. VISUAL: Select the visual source of the Multi-room output with or button. AUDIO: Select the audio source of the Multi-room output with or button. VOLUME: Select whether the Multi-room output level is to be made variable or fixed with or button. LEVEL: Adjust the Multi-room output level with or button. Notes: As described in the notes above, multi-room sources must also be analog. You cannot transmit a digital signal using the multi-room function. If "VOLUME" is set to "FIXED", the multi-room output level cannot be adjusted. PRESET TUNING With this unit you can preset up to 50 FM/AM stations in any order. For each station, you can memorize the frequency and reception mode if desired. 1-a. Manual Presetting (Using the AV9000) 1. Refer to the "MANUAL TUNING" or "AUTO TUNING" section above to tune in a desired station. 2. Press the MEMO button !8. "MEMO" indicator starts blinking on the display. While "MEMO" is still blinking (approx. 5 seconds), select the preset number by turning the GYRO TUNING knob !6, then press the MEMO button again. 3. When a number has been properly input, "MEMO" indicator stops blinking and goes out. The station is now stored in the specified preset memory location. STATION NAME INPUT STATION NAME INPUT PRESET NUMBER : 1 FM 87 .50 MHz AUTO NAME : : CHARACTERS ABCDEFGHIJKLMNOPQRST UVWXYZ1234567890 - + / 1-b. Manual Presetting (Using the remote unit) 1. Tune in a desired station. 2. Press the M (MEMO) button ⁄3. 3. Enter the desired preset number with ten keypad ⁄2. * When entering a single digit number (2, for example), either input "02" or just input "2" and wait for a few seconds. * If a number other than 1-50 is entered by mistake, that number flashes in the display to indicate that it is invalid and the display returns to the original frequency display. RETURN TO MAIN/EXIT 2. Auto Presetting This function automatically scans the AM and FM band and enters all stations with proper signal strength into the memory. Use this menu to add names to your preset stations. This function is available only for AV9000. 1. Enter the preset number you wish to name using the PRESET button !5 and then scrolling with the GYRO TUNING knob !6 1. Press the BAND button D4 on page 1 at TUNER MODE on the remote to select the FM band. until you reach the desired preset station. 2. The station will be displayed (including the name if you have already assigned one). In either case, the cursor will blink at the first letter of the station name. 3. Press the OK button or use the / buttons on the remote to position the cursor where you want it. 2. Tune in the lowest receivable frequency. 3. While pressing the MEMO button !8, turn the GYRO TUNING knob !6 to up. Auto memory starts at this point. 4. "MEMO " will blink on the display. 5. Each time the tuner finds a station, the scanning will pause and 4. Use the / buttons to select the disired character 5. Place the cursor over the character you wish to enter using the / / / buttons. Press the OK button when you are at the character you want. 6. Repeat steps 3 to 5 to enter additional characters. You can enter up to 8 characters in total. 14
-
 1
1 -
2
-
3
-
4
-
5
-
6
-
7
-
8
-
9
-
10
-
11
-
12
-
13
-
 14
14 -
 15
15 -
 16
16 -
 17
17 -
 18
18 -
 19
19 -
 20
20 -
 21
21 -
 22
22 -
 23
23 -
 24
24 -
25
-
26
-
27
-
28
-
29
-
30
-
31
-
32
-
33
-
34
-
35
-
36
-
37
-
38
-
39
-
40
-
41
 |
 |
