Marantz DV7010 User Guide - Page 15
Setting the OSD Language, On-Screen Display Language, Setting the TV screen size
 |
View all Marantz DV7010 manuals
Add to My Manuals
Save this manual to your list of manuals |
Page 15 highlights
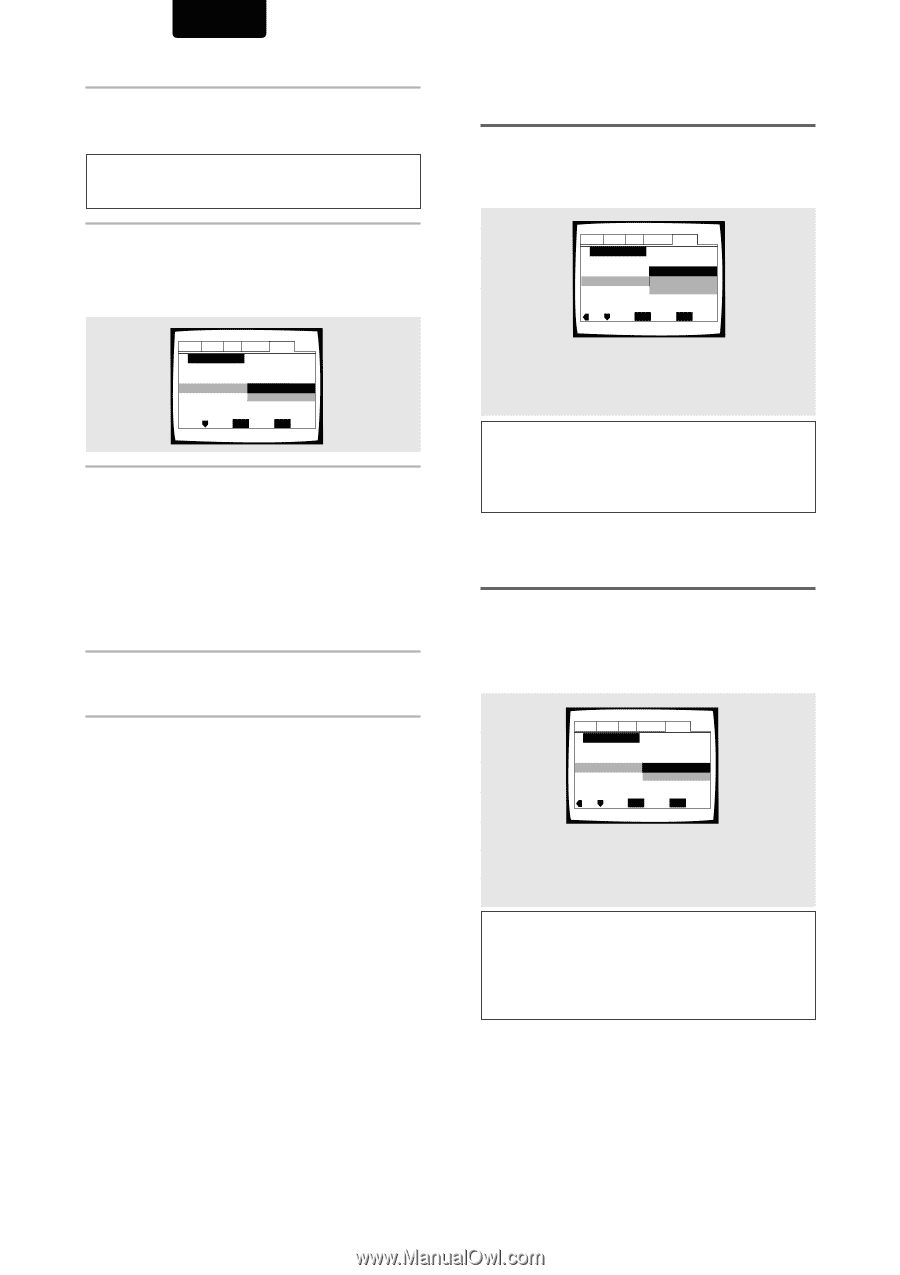
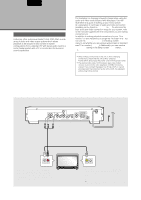
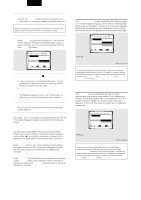
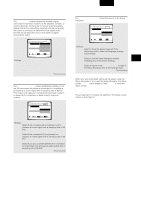
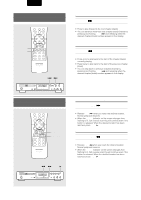
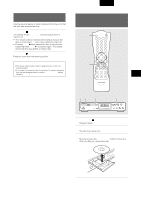
ENGLISH 1 Press Power button on the front panel. • Press the POWER button on the Front panel to turn the power on, and press it again to turn the power off. Note When it is required to remote control the power mode of this DVD player, be sure to leave this switch in the power on mode. 2 Press SETUP. When SETUP is pressed for the first time, the following screen appears. Though the Setup Navigator may be used more than once, this screen only appears the first time SETUP is pressed. Audio1 Audio2 Video Language General Setup Navigator Setup Navigator Start Auto Start Off Move ENTER Select SETUP Exit 3 Use the cursor buttons (5/∞) to make a selection. • If you are going to use the Setup Navigator, it is not necessary to change the setting on the first screen. Please proceed to the next step. • If you do not want to set up the player using the Setup Navigator, use the cursor button (∞) to select [Auto Start Off] at this time. The Setup Navigator function may still be used at a later time in manual Setup screen menu operation (page 22). 4 Press ENTER. The selection is entered and the next Setup Navigator screen appears. Use steps 3 and 4 as a basis for entering selections on the all of the Setup Navigator screens described on the following pages. To change the answer to a prior question Use the cursor button (2) to return to previous screens. Please note, however, that you cannot go forward using the cursor button (3), so it will be necessary to answer all the questions that occur after the screen that was returned to. To exit the Setup Navigator Press SETUP while on any of the screens to exit the Setup Navigator. Please note that if the Setup Navigator is exited before all the questions are answered, no settings are changed. To return to the Setup screen Press RETURN. The Setup Navigator is exited and the Setup screen General menu screen appears. Please note that no settings are changed if RETURN is pressed before the Setup Navigator is finished. Setting the OSD Language (On-Screen Display Language) The [OSD Language] screen establishes the OSD language, or on-screen display language, which refers to the language that is used by the player in menus and on-screen messages. Additionally, the language that is established at this setting will also be used for the default audio and subtitle language. Audio1 Audio2 Video Language General Setup Navigator Language English OSD Language français Español Move ENTER Select SETUP Exit Settings: English* français Español * Factory setting Note In addition to setting the OSD language, the audio and subtitle language are also set at this time. If you wish to change the audio or subtitle language to a different language, make changes in the Setup screen Language menu [Audio Language] and [Subtitle Language] as needed (page 29, 31). Setting the TV screen size The [TV Type] screen establishes the size, or more appropriately the width to height ration of your television or monitor. The width-to-height ratio of conventional TVs is 4:3, while the width-to-height ratio of wide screen and highdefinition TVs is 16:9. This width-to-height ratio is called the aspect ratio. Audio1 Audio2 Video Language General Setup Navigator TV Connection TV Type Widescreen (16:9) Standard (4:3) Move ENTER Select SETUP Exit Settings: Widescreen (16:9)* Standard (4:3) * Factory setting Note There are two screen formats that can be used to display wide-screen format DVDs: letter box and pan & scan. When [Standard (4:3)] is selected in the Setup Navigator, the letter box screen format is automatically selected. To switch the preference to the pan & scan format, make changes in the Setup screen Video menu [TV Screen] setting (page 26). 16
-
 1
1 -
2
-
3
-
4
-
5
-
6
-
7
-
8
-
9
-
 10
10 -
 11
11 -
 12
12 -
 13
13 -
 14
14 -
 15
15 -
 16
16 -
 17
17 -
 18
18 -
 19
19 -
 20
20 -
21
-
22
-
23
-
24
-
25
-
26
-
27
-
28
-
29
-
30
-
31
-
32
-
33
-
34
-
35
-
36
-
37
-
38
-
39
-
40
-
41
-
42
-
43
-
44
-
45
-
46
-
47
-
48
-
49
-
50
-
51
-
52
 |
 |