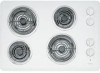
Maytag MEC4430W Installation Instructions
Maytag MEC4430W - 30 in. Electric Cooktop Manual
 |
UPC - 883049184685
View all Maytag MEC4430W manuals
Add to My Manuals
Save this manual to your list of manuals |
Maytag MEC4430W manual content summary:
- Maytag MEC4430W | Installation Instructions - Page 1
,4 CM) TableofContents/Tabledes Mati@res BUILT-IN COOKTOP SAFETY 2 INSTALLATION REQUIREMENTS 2 Tools and Parts 2 Location Requirements 2 Electrical Requirements 3 INSTALLATION INSTRUCTIONS 4 Install Cooktop 4 Make Electrical Connection 5 Complete Installation 6 SleCURITle DE LA TABLE DE - Maytag MEC4430W | Installation Instructions - Page 2
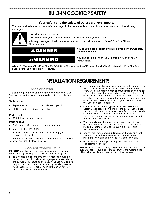
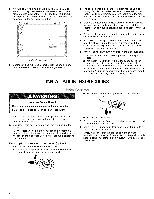
very important. We have provided many important safety messages in this manual and on your appliance. Always read and obey all safety messages. This is the if future servicing becomes necessary. • Use the countertop opening dimensions that are given with these Installation Instructions. Given - Maytag MEC4430W | Installation Instructions - Page 3
Hazard Disconnect power before servicing. Use 8 gauge copper wire. Electrically ground cooktop. Failure to follow these instructions can result in death ANSI/NFPA 70-latest edition or CSA Standards C22.1-94, Canadian Electrical Code, Part 1 and C22.2 No. O-M91-1atest edition, and all local codes and - Maytag MEC4430W | Installation Instructions - Page 4
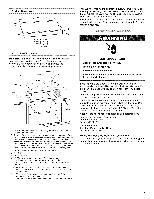
as possible between the junction box and the cooktop so that the cooktop can be moved if servicing becomes necessary in the future. Do not cut the conduit. The length of conduit provided is for serviceability of the cooktop. A UL listed or CSA approved conduit connector must be provided at each end - Maytag MEC4430W | Installation Instructions - Page 5
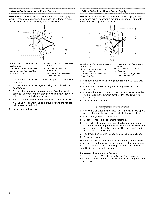
the edge of the coil element opposite the receptacle. Electrical Shock Hazard Disconnect power before servicing. Use 8 gauge copper wire. Electrically ground cooktop. Failure to follow these instructions can result in death, fire, or electrical shock. This cooktop is manufactured with the frame - Maytag MEC4430W | Installation Instructions - Page 6
Comp÷ e 1. Check that all parts are now installed. If there is an extra part, go back through the steps to Troubleshooting" section in the Use and Care Guide for further information. If you need Assistance or Service: Please reference the "Assistance or Service" section of the Use and Care Guide - Maytag MEC4430W | Installation Instructions - Page 7
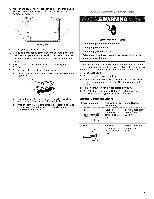
signifient • Risque possible de d_cbs ou de blessure grave si vous ne suivez pas imm_diatement les instructions. Risque possible de d_cbs ou de blessure grave si vous ne suivez pas les instructions. Tousles messages de s_curit_ vous diront quel est le danger potentiel et vous disent comment r_duire - Maytag MEC4430W | Installation Instructions - Page 8
IMPORTANT : En cas d'installation d'une hotte ou d'un ensemble hotte/micro-ondes au-dessus de la cuisiniere, suivre les instructions fournies avec I'ensemble concernant les dimensions de degagement & respecter au-dessus de la surface de la table de cuisson. • Latabledecuissodnoitetrespecifiquet - Maytag MEC4430W | Installation Instructions - Page 9
Un connecteur de conduit homologue est dej& fourni & la table de cuisson. Si le domicile est equipe d'un c&blage en aluminium, suivre les instructions suivantes : 1. Raccorder une section de c&ble en cuivre massif aux conducteurs en queue de cochon. 2. Connecter le c&blage en aluminium & la section - Maytag MEC4430W | Installation Instructions - Page 10
INSTALLATION Risque du poids excessif Utiliser deux ou plus de personnes pour d_placer et installer la table de cuisson. Le non=respect de cette instruction peut causer une biessure au dos ou d'autre blessure. 1= Enlever les materiaux d'expedition et le ruban adhesif de la table de cuisson. Enlever - Maytag MEC4430W | Installation Instructions - Page 11
de courant _lectrique avant rentretien. Utiliser du fil en cuivre de calibre 8. Relier la table de cuisson a la terre. Le non-respect de ces instructions peut causer un d_cbs, un incendie ou un choc _lectrique. Cette table de cuisson est preconfigur6e avec le chassis connecte au conducteur nu de - Maytag MEC4430W | Installation Instructions - Page 12
et d'entretien pour plus de renseignements. Si vous avez besoin d'assistance ou de service : Consulter la section "Assistance ou service" du Guide d'utilisation et d'entretien ou contacter le marchand aupr_s duquel la table de cuisson a et6 achetee. W10274252A © 2009. All rights reserved
-
 1
1 -
 2
2 -
 3
3 -
 4
4 -
 5
5 -
 6
6 -
 7
7 -
8
-
9
-
10
-
11
-
12
 |
 |
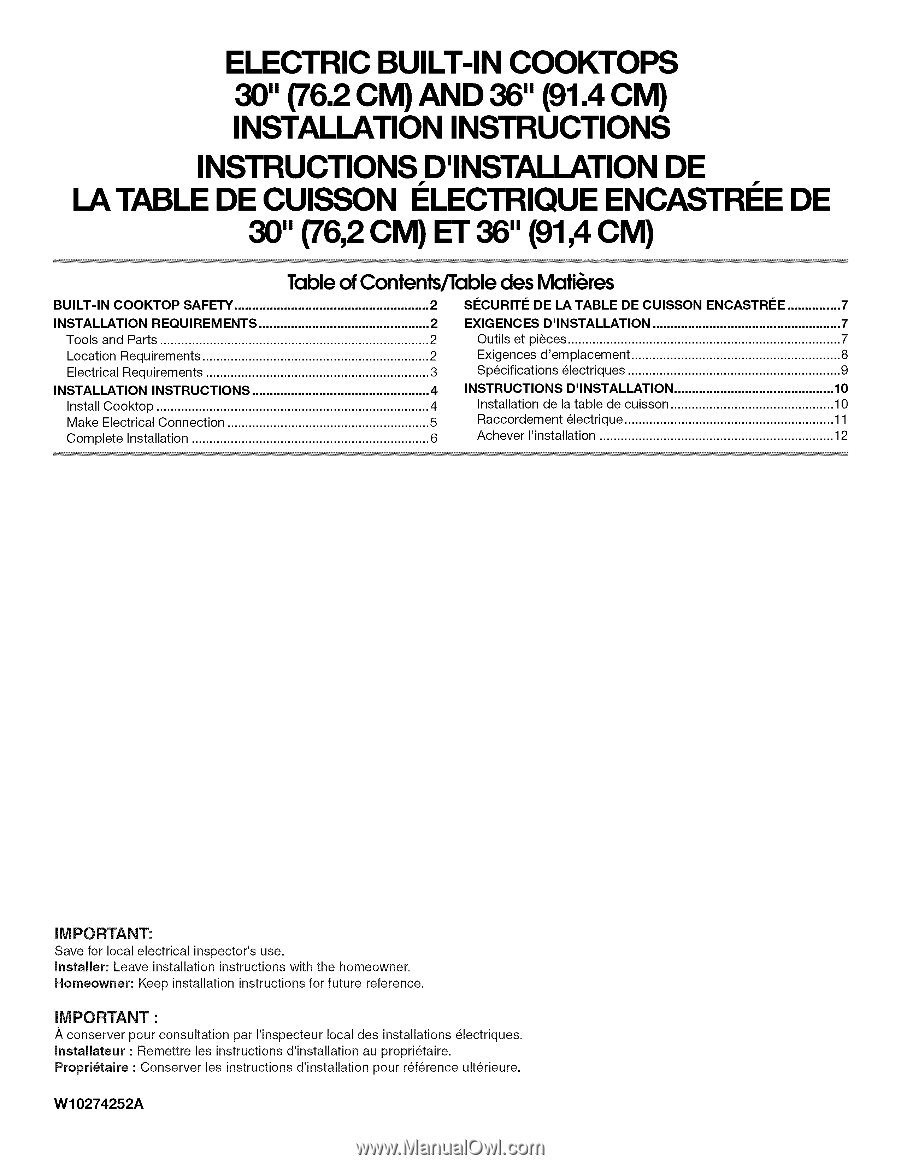
ELECTRIC BUILT-IN
COOKTOPS
30" (76.2
CM)
AND 36" (91.4
CM)
INSTALLATION INSTRUCTIONS
INSTRUCTIONS
D'INSTALLATION
DE
LA TABLE DE CUISSON
I_LECTRIQUE ENCASTRI_E DE
30" (76,2 CM) ET 36" (91,4 CM)
TableofContents/Table
desMati@res
BUILT-IN
COOKTOP
SAFETY
.......................................................
2
INSTALLATION
REQUIREMENTS
................................................
2
Tools
and Parts
............................................................................
2
Location Requirements
................................................................
2
Electrical
Requirements
...............................................................
3
INSTALLATION
INSTRUCTIONS
..................................................
4
Install
Cooktop
.............................................................................
4
Make Electrical Connection
.........................................................
5
Complete
Installation
...................................................................
6
SleCURITle DE LA TABLE DE CUlSSON
ENCASTRleE
...............
7
EXIGENCES
D'INSTALLATION
.....................................................
7
Outils et pieces
.............................................................................
7
Exigences
d'emplacement
...........................................................
8
Specifications
electriques
............................................................
O
INSTRUCTIONS
D'INSTALLATION
.............................................
10
Installation
de
la table
de cuisson
..............................................
10
Raccordement
electrique
...........................................................
11
Achever
I'installation
..................................................................
12
iMPORTANT:
Save for local electrical
inspector's
use.
Installer:
Leave installation
instructions
with the homeowner.
Homeowner:
Keep installation
instructions
for future
reference.
iMPORTANT:
,&,
conserver
pour consultation
par I'inspecteur
local des installations
61ectriques.
Installateur
: Remettre
les instructions
d'installation
au propri6taire.
Propri6taire
: Conserver
les instructions
d'installation
pour r6f6rence
ult6rieure.
W10274252A