Maytag MGD9700SQ Use and Care Guide - Page 14
Reverse the hinge and hinge bracket, Reinstalling the door
 |
UPC - 883049033686
View all Maytag MGD9700SQ manuals
Add to My Manuals
Save this manual to your list of manuals |
Page 14 highlights
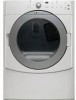
5. Lift the inner door assembly off of the outer door assembly. Unsnap the handle from the outer door assembly, move it to the other side, and snap in. Set the outer door assembly aside. 3. Reassemble the inner and outer door assemblies with the 6 screws. Reverse the hinge and hinge bracket 1. Place the inner door, screw head side up, on the work surface. 2. Remove the 4 screws that hold the hinge to the door. 4. Replace the 2 handle screws for the door handle of the door assembly. 5. Remove the plug strip or label. Style 1: Remove the plug strip. s Use a small flat-blade screwdriver to remove the plug strip in the door opening. Slide the head of the screwdriver under the top portion of the plug strip, being certain not to scratch the dryer surface. Lift up. Repeat in the middle and at the bottom. Remove the plug strip in the door opening and insert in the opposite side. 3. Remove the 2 screws that hold the handle bracket to the door. Style 2: Remove the label. s Peel off the label located on the opposite side of the door opening covering the hinge mounting holes. Apply the label over the original hinge holes. 6. Insert a screw in the second opening from the top of the hinge opening and partially tighten. Hang the door by placing the top hinge keyhole over the second screw head and tighten the screw. By putting this screw in first, the door will hang in place while you insert and tighten the remaining 4 screws. 4. Move hinge to the other side and reattach with the 4 screws removed in Step 2. 5. Move handle bracket to the other side and reattach with the 2 screws removed in Step 3. 6. Set the inner door assembly aside. Reinstalling the door 1. Check for fingerprints on the glass. Clean if necessary. 2. Place the inner door assembly into the outer door assembly. Align the hinge in the opening on the side. To fit correctly, the inside door assembly edge is completely inside the outside door assembly edge. A B C A. Dryer door B. Dryer C. Insert this screw first. 7. Close the door and check that it latches securely. 14
-
 1
1 -
2
-
3
-
4
-
5
-
6
-
7
-
8
-
 9
9 -
 10
10 -
 11
11 -
 12
12 -
 13
13 -
 14
14 -
 15
15 -
 16
16 -
 17
17 -
 18
18 -
 19
19 -
20
-
21
-
22
-
23
-
24
-
25
-
26
-
27
-
28
-
29
-
30
-
31
-
32
-
33
-
34
-
35
-
36
-
37
-
38
-
39
-
40
-
41
-
42
-
43
-
44
-
45
-
46
-
47
-
48
-
49
-
50
-
51
-
52
-
53
-
54
-
55
-
56
-
57
-
58
-
59
-
60
-
61
-
62
-
63
-
64
-
65
-
66
-
67
-
68
-
69
-
70
-
71
-
72
-
73
-
74
-
75
-
76
 |
 |
