Meade LX850 User Manual - Page 13
Assembly - german equatorial mount
 |
View all Meade LX850 manuals
Add to My Manuals
Save this manual to your list of manuals |
Page 13 highlights
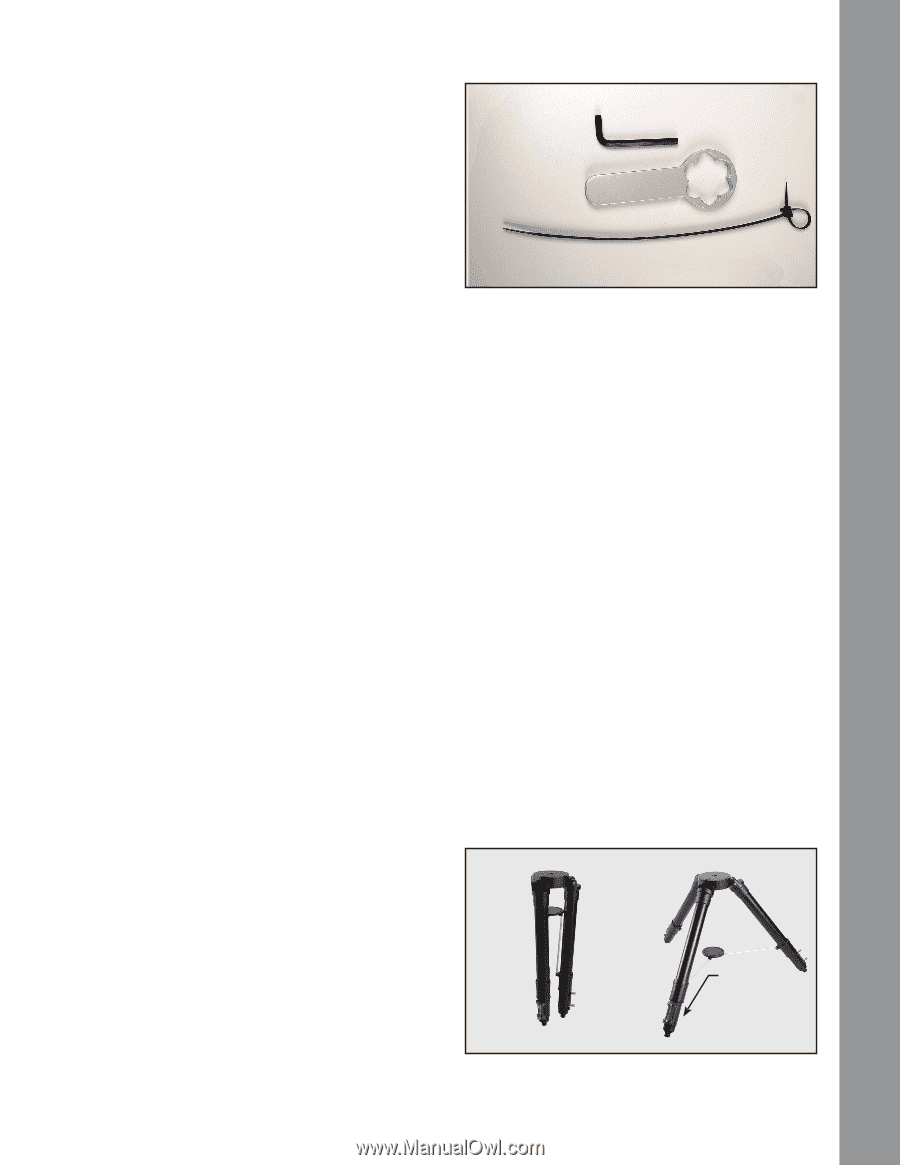
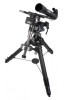
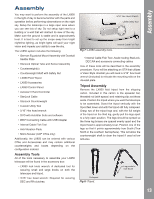
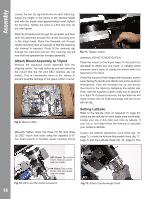
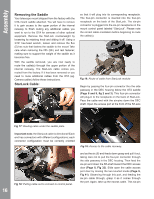
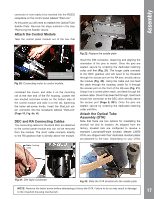
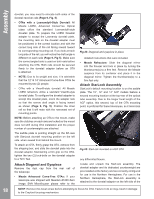
Assembly Assembly You may want to perform the assembly of the LX850 in the light of day to become familiar with the parts and operation before performing observations on the night sky. Setup the telescope in a large open area where you can see lots of sky. Do not setup right next to a building or a wall that will obstruct its view of the sky. Make sure the ground is stable and is approximately level. It is best to set up the scope away from bright nighttime lighting, as bright lights will spoil your night vision and impede your ability to see the sky. The LX850 system includes the following: • German Equatorial Mount Assembly with Dovetail Saddle Plate • StarLock Optical Tube and Sensor Assembly • Counterweight(s) • Counterweight Shaft with Safety Nut • LX850 Field Tripod • LX850 Accessories • LX850 Control Panel • Autostar II Hand Controller • StarLock Cable • StarLock Counterweight • Custom Utility Tool • 5/16" Hex head wrench • DVD with AutoStar Suite and software • #507 Connecting Cable with USB Adapter • Internal Cable Fish Tool • Anti-Vibration Pads • Micro-focuser (ACF OTAs only) Additionally, the LX850 can be ordered with various OTAs and Accessories and may contain additional counterweights and boxes depending on the configuration ordered. Assembly Tools All of the tools necessary to assemble your LX850 telescope will be found in the accessory box: • LX850 lock knob wrench: A dedicated tool for securing small and large knobs on both the telescope and tripod. • 5/16" hex head wrench: Required for securing DEC and RA clutches. 5/16" Hex Head Wrench LX850 Utility Tool Fig 7: LX850 assembly tools. Internal Cable Fish Tool • Internal Cable Fish Tool: Assist routing StarLock, DEC,RA and accessory connecting cables Use of these tools will be described in the assembly procedure. If you will be attaching an OTA that utilizes a Vixen Style dovetail you will need a 3/16" hex head wrench (included) to relocate the mounting rails on the dovetail plate. Tripod Assembly Remove the LX850 field tripod from the shipping carton. Included in this carton is the spreader bar, threaded rod (with spacer) and retaining clip; set these aside. Position the tripod where you want the telescope to be assembled. Stand the tripod vertically with the tripod feet down and with the tripod still fully collapsed. Grasp two of the tripod legs and, with the full weight of the tripod on the third leg, gently pull the legs apart to a fully open position. The legs should be spread so the three leg braces are spaced evenly apart and the tripod head is approximately level. Position one of the legs so that it points approximately true South (True North in the southern hemisphere). This will allow the counterweight shaft to clear the tripod if used at low latitudes. Collapsed Fig 8: Tripod. Leg points to true South Opened 13
-
 1
1 -
2
-
3
-
4
-
5
-
6
-
7
-
 8
8 -
 9
9 -
 10
10 -
 11
11 -
 12
12 -
 13
13 -
 14
14 -
 15
15 -
 16
16 -
 17
17 -
 18
18 -
19
-
20
-
21
-
22
-
23
-
24
-
25
-
26
-
27
-
28
-
29
-
30
-
31
-
32
-
33
-
34
-
35
-
36
-
37
-
38
-
39
-
40
-
41
-
42
-
43
-
44
-
45
-
46
-
47
-
48
-
49
-
50
-
51
-
52
-
53
-
54
-
55
-
56
-
57
-
58
-
59
-
60
 |
 |