Meade LX90-ACF 10 inch User Manual - Page 20
Star Alignment
 |
View all Meade LX90-ACF 10 inch manuals
Add to My Manuals
Save this manual to your list of manuals |
Page 20 highlights
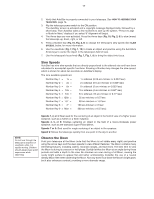
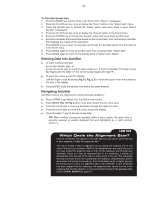
20 observing sites location, date and time. Note: Press any key to abort the GPS fix. You will then be prompted to enter the time, date and location. 9. Star Alignment - The Autostar then chooses two stars to align upon. When the telescope slews to the first star for alignment, it may not appear in the field of view in the eyepiece. The alignment star should be easily recognized and be the brightest star in the area of the sky where the telescope is pointing. Use the Arrow keys to move the telescope until the star is visible and centered in the eyepiece. Press ENTER. If that area of the sky is obscured by an object, you can prompt AutoStar to chose an alternate star by pressing either one of the two Scroll Keys. Repeat procedure for the second alignment star. When the procedure is performed correctly, "Alignment Successful" displays. If Autostar does not display this message, perform this procedure again. NOTE: Autostar locates alignment stars based on the date, time, and location entered. The alignment stars may change from night to night. All that is required is for the observer to center the selected stars in the eyepiece when prompted. NOTE: The GO TO key also allows you to perform a "spiral search". A spiral search is useful when the telescope slews to an object, but that object is not visible in the eyepiece after the telescope finishes it search. (This sometimes occurs during an alignment procedure.) Press GO TO when the slew is finished and the telescope starts slewing in a spiral pattern at a very slow speed around the search area. Look through the eyepiece and when the object does become visible, press MODE to stop the spiral search. Then use the Arrow keys to center the object.
-
 1
1 -
2
-
3
-
4
-
5
-
6
-
7
-
8
-
9
-
10
-
11
-
12
-
13
-
14
-
 15
15 -
 16
16 -
 17
17 -
 18
18 -
 19
19 -
 20
20 -
 21
21 -
 22
22 -
 23
23 -
 24
24 -
 25
25 -
26
-
27
-
28
-
29
-
30
-
31
-
32
-
33
-
34
-
35
-
36
-
37
-
38
-
39
-
40
-
41
-
42
-
43
-
44
-
45
-
46
-
47
-
48
-
49
-
50
-
51
-
52
-
53
-
54
-
55
-
56
-
57
-
58
-
59
-
60
 |
 |
