Metabo GP 400 Operating Instructions - Page 8
Initial Operation, Cleaning, Accessories
 |
View all Metabo GP 400 manuals
Add to My Manuals
Save this manual to your list of manuals |
Page 8 highlights
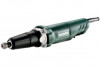
en ENGLISH 5 Slide switch * 6 Main handle 7 Switch-on lock 8 Trigger * *equipment-specific maintain a steady position and concentrate on your work. Machines with slide switch: 5 I 0 I 0 5. Initial Operation Before plugging in the device, check that the rated mains voltage and mains frequency, as specified on the rating label, match your power supply. 6. Use 6.1 Collet chucks The tool's shank diameter must correspond exactly to the collet bore of the collet chuck (1)! Various collet chucks are available for different shank diameters. See Accessories section. Switching on: Push the slide switch (5) forward. For continuous activation, now tilt downwards until it engages. Switching off: Press the rear end of the slide switch (5) and release. Machines with safety switch (with dead-man function): (Machines with the designation WP...) 56 6.2 Fitting the tools Pull the mains plug from the socket. Only use tools that are suited to the no-load speed of your machine. See Technical Specifications. The tool's shank diameter must correspond exactly to the collet bore of the collet chuck (1)! In the case of mounted points or mandrels, the permimssaixbilme ulemngotphesnpeshcaifinekdlebnygththel0moarnmufaaxcitmuruemr must not be exceeded! lo Switching on: Slide the switch-on lock (7) in the direction of the arrow and press the trigger (8). Switching off: release the trigger switch (8). 6.4 Working instructions Grinding, sanding, polishing or using wire brushes: Press down the machine evenly and move it from side to side over the surface. Routing: Press down the machine evenly. Separating: Always work against the run of the disc (see illustration). Otherwise there is the danger of the machine kicking back from the cut out of control. Guide the machine evenly at a speed suitable for the material being processed. Do not tilt, apply excessive force or sway from side to side. Insert the tool (with the full length of the shank) in the collet chuck (1). 7. Cleaning (3) Bring the spindle to a standstill with the 13-mm spanner provided for this purpose. Using the 19-mm spanner, tighten the collet chuck nut (2). If there is no tool inserted in the collet chuck, you can tighten the collet chuck manually rather than with the spanner. 7.1 Motor cleaning To clean the motor, apply jets of compressed air through the rear ventilation slots of the machine regularly, frequently and thoroughly. The machine must be held firmly in this case. 8. Accessories 6.3 Switching On and Off Always guide the machine with both hands. Switch on first, then guide the accessory towards the workpiece. Use only genuine Metabo accessories. Use only accessories that fulfil the requirements and specifications listed in these operating instructions. Avoid inadvertent starts: always switch the tool off when the plug is removed from the mains socket or if there has been a power cut. Fit accessories securely. Secure the machine if it is operated in a bracket. Loss of control can cause personal injury. In continuous operation, the machine continues running if it is forced out of your hands. Therefore always hold the machine with 8 both hands using the handles provided (4), (6), A Collets (including nut) dia. 3 mm = 6.31947 dia. 1/8" = 6.31948 dia. 6 mm = 6.31945
-
 1
1 -
2
-
 3
3 -
 4
4 -
 5
5 -
 6
6 -
 7
7 -
 8
8 -
 9
9 -
 10
10 -
 11
11 -
 12
12 -
 13
13 -
14
-
15
-
16
-
17
-
18
-
19
-
20
-
21
-
22
-
23
-
24
 |
 |
