Miele T 8023 C Operating and Installation manual - Page 32
Installation site 28, Transporting the dryer to
 |
View all Miele T 8023 C manuals
Add to My Manuals
Save this manual to your list of manuals |
Page 32 highlights
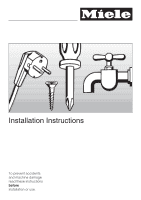
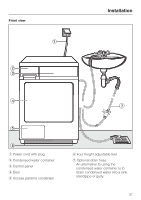
Installation Rear view Installation site ,Do not install the dryer in an area where it can be blocked, e.g. behind a door. ,This appliance is not intended to be mounted in a wall or other vertical surface of a building or cabinet. The unit is allowed for built-in application. a Handle for transportation (arrows) b Air intake opening to cool the condenser c Power cord with plug d Condensate drain hose e Accessories for connection to a sink standpipe Transporting the dryer to the installation site The rear excess end of the lid has a handle box for transport. ^ Use the front dryer feet and the rear excess end to transport the dryer from the packaging base to the installation site. 28
-
 1
1 -
2
-
3
-
4
-
5
-
6
-
7
-
8
-
9
-
10
-
11
-
12
-
13
-
14
-
15
-
16
-
17
-
18
-
19
-
20
-
21
-
22
-
23
-
24
-
25
-
26
-
 27
27 -
 28
28 -
 29
29 -
 30
30 -
 31
31 -
 32
32 -
 33
33 -
 34
34 -
 35
35 -
 36
36 -
 37
37 -
38
-
39
-
40
 |
 |
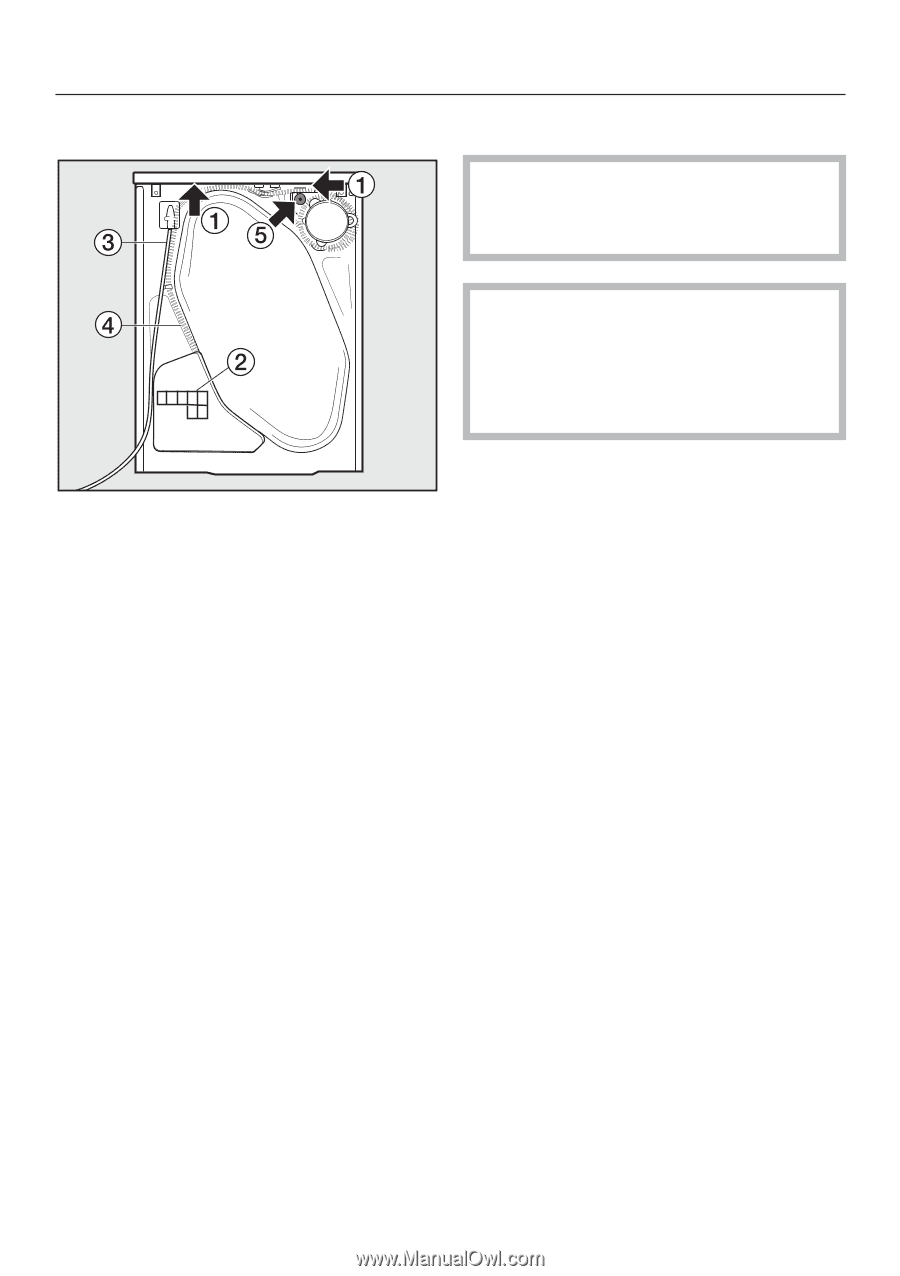
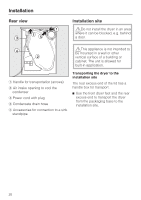
Rear view
a
Handle for transportation (arrows)
b
Air intake opening to cool the
condenser
c
Power cord with plug
d
Condensate drain hose
e
Accessories for connection to a sink
standpipe
Installation site
,
Do not install the dryer in an area
where it can be blocked, e.g. behind
a door.
,
This appliance is not intended to
be mounted in a wall or other
vertical surface of a building or
cabinet. The unit is allowed for
built-in application.
Transporting the dryer to the
installation site
The rear excess end of the lid has a
handle box for transport.
^
Use the front dryer feet and the rear
excess end to transport the dryer
from the packaging base to the
installation site.
Installation
28