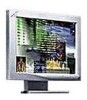
NEC LCD1810 MultiSync LCD1810 Setup Sheet - Page 9
I.1, I.1, J.1A, J.1B, K.1, L.1 - manual
 |
UPC - 050927216145
View all NEC LCD1810 manuals
Add to My Manuals
Save this manual to your list of manuals |
Page 9 highlights
Quick Start cont. 3. Remove connector cover on back of monitor (Figure I.1). Connect the BNC cables and AC adapter cable to the appropriate connectors on the back of the monitor. Connect the blue BNC cable to the BNC connector labeled B, the green BNC cable to the BNC connector labeled G/Sync, the red BNC cable to the BNC connector on the monitor labeled R. If you have a fourth BNC connector (Composite Sync), connect it to the BNC connector on the monitor labeled HS/CS. If you have a fifth BNC connector (Vertical Sync), connect it to the BNC connector on the monitor labeled VS (Figure I.1). Place the 15-pin VGA to BNC Cable under Clip A (Figure J.1A). Then place the 15-pin VGA to BNC cable under Clip B (Figure J.1B) Replace connector cover. NOTE: Incorrect cable connections may result in irregular operation, damage display quality/components of LCD module and/or shorten the module's life. 4. Connect one end of the power cord to the AC HS/CS Adapter and the other end to the power outlet VS (Figure K.1). 5. Turn on the monitor (Figure L.1) and the computer. R 6. To complete the setup of your MultiSync LCD monitor: A. Set the resolution to 1280 x 1024 @ 60 Hz. G(/SYNC) B NOTE: For download information on the Windows® 95/98 INF file for your MultiSync LCD monitor, refer to the References section of this User's Manual. Figure I.1 B. Use the following OSM™ controls: • Auto Adjust Contrast • Auto Adjust • Image Adjust - Fine NOTE: Manual adjustment of the H/V Position and Image Adjust H. Size/Fine controls may be required to complete setup of your MultiSync monitor. For a full description of these OSM controls, refer to the Controls section of this User's Manual. 7. Refer to User's Manual in the NEC LCD Setup Software CD case for installation and operation of this software. NOTE: If you have any problems, please refer to the Troubleshooting section of this User's Manual. Figure K.1 Power Button Figure L.1 Clip A Clip B Figure J.1A Figure J.1B 7 78133813.wpc 9 10/28/99, 3:21 PM
-
 1
1 -
2
-
3
-
 4
4 -
 5
5 -
 6
6 -
 7
7 -
 8
8 -
 9
9 -
 10
10 -
 11
11 -
 12
12 -
 13
13 -
 14
14 -
15
-
16
-
17
-
18
-
19
-
20
-
21
-
22
-
23
-
24
-
25
-
26
-
27
-
28
-
29
-
30
-
31
-
32
-
33
-
34
-
35
-
36
-
37
-
38
-
39
-
40
-
41
-
42
-
43
-
44
-
45
-
46
-
47
-
48
-
49
-
50
-
51
-
52
-
53
-
54
-
55
-
56
-
57
-
58
-
59
-
60
-
61
-
62
-
63
-
64
-
65
-
66
-
67
-
68
-
69
-
70
-
71
-
72
-
73
-
74
-
75
-
76
-
77
-
78
-
79
-
80
 |
 |
