NEC NC2402ML Installation Manual - Page 94
Mounting the Lens Unit
 |
View all NEC NC2402ML manuals
Add to My Manuals
Save this manual to your list of manuals |
Page 94 highlights
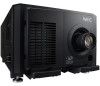
Setting Up Your Projector 2-7. Mounting the Lens Unit The lens units that can be attached to this projector are shown in the following table. NC-60LS12Z NC-60LS14Z NC-60LS16Z NC-60LS19Z NC-60LS24Z NC-60LS39Z MODEL 1.20 - 1.81 1.40 - 2.05 1.59 - 2.53 1.90 - 3.25 2.40 - 3.90 3.90 - 6.52 Magnifying NOTE • The other NEC optional lenses are not available on this model. • The projector and lenses are made of precision parts. Do not subject them to shock or excessive forces. • Remove the lens unit when moving the projector. If not, the lens could be subject to shock while the projector is being moved, damaging the lens and the lens shift mechanism. • When removing or installing the lens unit, return the position of the lens to the center before turning off the power to the projector. If the position of the lens is not returned to center, the front cover will interfere with the lens and the cover cannot be removed or installed. • When installing or removing the lens unit, first confirm that the main power switch to the projector is off, and then disconnect the AC power supply. After the AC power supply has been disconnected, allow the projector to sufficiently cool before starting this work. • Never touch the lens surface while the projector is operating. • Be very careful not to let dirt, grease, etc., on the lens surface and not to scratch the lens surface. • Perform these operations on a flat surface over a piece of cloth, etc., to prevent the lens from getting scratched. • When leaving the lens off the projector for long periods of time, mount the lens mount cap on the projector to prevent dust or dirt from getting inside. NOTE • If you remove the lens cover, a tamper event is detected by the tamper detection circuit. When you start the projector after attaching the cover, the following error message is displayed on the LCD screen of the projector main unit. -- "IMB: Service Door Tamper" (When NP-90MS01 mounted) • Encrypted contents cannot be displayed while an error message is being displayed. Refer to "3-2. Recovering from Tamper Errors" (page 103) for details on how to clear the error message. 94
-
 1
1 -
2
-
3
-
4
-
5
-
6
-
7
-
8
-
9
-
10
-
11
-
12
-
13
-
14
-
15
-
16
-
17
-
18
-
19
-
20
-
21
-
22
-
23
-
24
-
25
-
26
-
27
-
28
-
29
-
30
-
31
-
32
-
33
-
34
-
35
-
36
-
37
-
38
-
39
-
40
-
41
-
42
-
43
-
44
-
45
-
46
-
47
-
48
-
49
-
50
-
51
-
52
-
53
-
54
-
55
-
56
-
57
-
58
-
59
-
60
-
61
-
62
-
63
-
64
-
65
-
66
-
67
-
68
-
69
-
70
-
71
-
72
-
73
-
74
-
75
-
76
-
77
-
78
-
79
-
80
-
81
-
82
-
83
-
84
-
85
-
86
-
87
-
88
-
 89
89 -
 90
90 -
 91
91 -
 92
92 -
 93
93 -
 94
94 -
 95
95 -
 96
96 -
 97
97 -
 98
98 -
 99
99 -
100
-
101
-
102
-
103
-
104
-
105
-
106
-
107
-
108
-
109
-
110
-
111
-
112
-
113
-
114
-
115
-
116
-
117
-
118
-
119
-
120
-
121
-
122
-
123
-
124
-
125
-
126
-
127
-
128
-
129
-
130
-
131
-
132
-
133
-
134
-
135
-
136
-
137
-
138
-
139
-
140
-
141
-
142
-
143
-
144
-
145
-
146
-
147
-
148
-
149
-
150
 |
 |
