NEC NC2402ML Installation Manual - Page 95
Part names of Lens Mount, This illustrates the factory default settings.
 |
View all NEC NC2402ML manuals
Add to My Manuals
Save this manual to your list of manuals |
Page 95 highlights
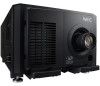
Setting Up Your Projector This chapter illustrates the factory default settings. 2-7-1. Part names of Lens Mount Lens unit fall prevention metal fitting Lens control connector Release lever Lens stopper Lens mount cap 1 Remove the lens cover. For removing the lens cover, refer to "1-5-1. Removing and Mounting the Lens Cover" on page 51. 2 Remove the lens mount cap. (1) Rotate the release lever clockwise in the upward direction. The lens stopper will be released. (2) Rotate the lens mount cap counterclockwise and remove it. Keep the lens mount cap in a safe place for later use. (1) (2) 3 Remove the lens cap from the rear end of the lens unit. Keep the lens cap in a safe place for later use. 95
-
 1
1 -
2
-
3
-
4
-
5
-
6
-
7
-
8
-
9
-
10
-
11
-
12
-
13
-
14
-
15
-
16
-
17
-
18
-
19
-
20
-
21
-
22
-
23
-
24
-
25
-
26
-
27
-
28
-
29
-
30
-
31
-
32
-
33
-
34
-
35
-
36
-
37
-
38
-
39
-
40
-
41
-
42
-
43
-
44
-
45
-
46
-
47
-
48
-
49
-
50
-
51
-
52
-
53
-
54
-
55
-
56
-
57
-
58
-
59
-
60
-
61
-
62
-
63
-
64
-
65
-
66
-
67
-
68
-
69
-
70
-
71
-
72
-
73
-
74
-
75
-
76
-
77
-
78
-
79
-
80
-
81
-
82
-
83
-
84
-
85
-
86
-
87
-
88
-
89
-
 90
90 -
 91
91 -
 92
92 -
 93
93 -
 94
94 -
 95
95 -
 96
96 -
 97
97 -
 98
98 -
 99
99 -
 100
100 -
101
-
102
-
103
-
104
-
105
-
106
-
107
-
108
-
109
-
110
-
111
-
112
-
113
-
114
-
115
-
116
-
117
-
118
-
119
-
120
-
121
-
122
-
123
-
124
-
125
-
126
-
127
-
128
-
129
-
130
-
131
-
132
-
133
-
134
-
135
-
136
-
137
-
138
-
139
-
140
-
141
-
142
-
143
-
144
-
145
-
146
-
147
-
148
-
149
-
150
 |
 |

95
Setting Up Your Projector
This chapter illustrates the factory default settings.
2-7-1. Part names of Lens Mount
Release lever
Lens unit fall prevention metal fitting
Lens control connector
Lens mount cap
Lens stopper
1
Remove the lens cover.
For removing the lens cover, refer to “1-5-1. Removing and Mounting the Lens Cover” on page
51
.
2
Remove the lens mount cap.
(1)
Rotate the release lever clockwise in the upward
direction.
The lens stopper will be released.
(2) Rotate the lens mount cap counterclockwise
and remove it.
Keep the lens mount cap in a safe place for later
use.
(
1
)
(
2
)
3
Remove the lens cap from the rear end
of the lens unit.
Keep the lens cap in a safe place for later use.