NEC PX-42XM2A 42VP4/42XM2/50XM3/61XM2 - Page 26
Information - stand for
 |
View all NEC PX-42XM2A manuals
Add to My Manuals
Save this manual to your list of manuals |
Page 26 highlights
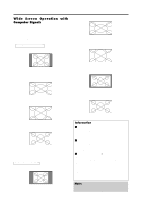
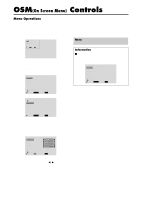
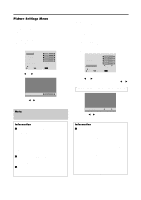
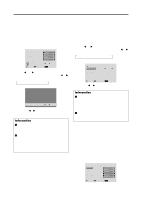
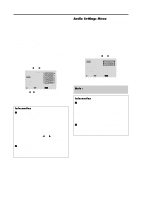
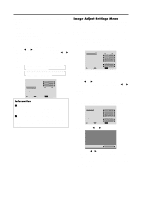
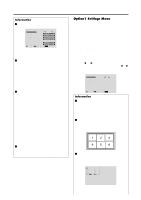
Reducing noise in the picture Use these settings if the picture has noise due to poor reception or when playing video tapes on which the picture quality is poor. Example: Setting "NR-3" 1. On the MAIN MENU, select "PICTURE", then press the MENU/ENTER button. The "PICTURE" screen appears. 2. Use the v and w buttons to select "NR". PICTURE 1 / 2 CONTRAST BRIGHTNESS SHARPNESS COLOR TINT PICTURE MODE : NORMAL NR : OFF NEXT PAGE SEL. ADJ. EXIT RETURN 3. Use the ᮤ and ᮣ buttons to select "NR-3". The mode switches as follows each time the ᮤ or ᮣ button is pressed: → OFF ↔ NR-1 ↔ NR-2 ↔ NR-3 ← NR : NR-3 * If neither the ᮤ or ᮣ button is pressed within 5 seconds, the current selection is set and the previous screen reappears. Information Ⅵ NR * "NR" stands for Noise Reduction. * This function reduces noise in the picture. Ⅵ Types of noise reduction There are three types of noise reduction. Each has a different level of noise reduction. The effect becomes stronger as the number increases (in the order NR-1 → NR-2 → NR-3). OFF Turns the noise reduction function off. Setting the color temperature Use this procedure to set color tone produced by the plasma display. Example: Setting "HIGH" 1. On the MAIN MENU, select "PICTURE", then press the MENU/ENTER button. The "PICTURE" screen appears. 2. Use the v and w buttons to select "COLOR TEMP.". 3. Use the ᮤ and ᮣ buttons to select "HIGH". The mode switches as follows each time the ᮤ or ᮣ button is pressed: → LOW ↔ MID LOW ↔ MID ↔ HIGH ← * See below to set "WHITE BALANCE". PICTURE 2 / 2 PREVIOUS PAGE COLOR TEMP. : HIGH GAMMA : 2 LOW TONE : AUTO COLOR TUNE SEL. ADJ. EXIT RETURN * If neither the ᮤ or ᮣ button is pressed within 5 seconds, the current selection is set and the previous screen reappears. Information Ⅵ Setting the color temperature LOW Redder MID LOW ......... Slightly redder MID Standard (slightly bluer) HIGH Bluer Ⅵ Restoring the factory default settings Select "ALL RESET" under the OPTION1 menu. Note that this also restores other settings to the factory defaults. Adjusting the color to the desired level Use this procedure to adjust the white balance for each color temperature to achieve the desired color quality. Example: Adjusting the "GAIN RED" of "HIGH" color temperature Set "ADVANCED OSM" to "ON" in the main menu (1/ 2), then perform the following operations. Perform Steps 1-3 of COLOR TEMP., then... 4. Press the MENU/ENTER button. The "WHITE BALANCE" screen appears. 5. Use the v and w buttons to select "GAIN RED". WHITE BALANCE COLOR TEMP. HIGH GAIN RED GAIN GREEN GAIN BLUE BIAS RED BIAS GREEN BIAS BLUE RESET : OFF SEL. ADJ. EXIT RETURN 19
-
 1
1 -
2
-
3
-
4
-
5
-
6
-
7
-
8
-
9
-
10
-
11
-
12
-
13
-
14
-
15
-
16
-
17
-
18
-
19
-
20
-
 21
21 -
 22
22 -
 23
23 -
 24
24 -
 25
25 -
 26
26 -
 27
27 -
 28
28 -
 29
29 -
 30
30 -
 31
31 -
32
-
33
-
34
-
35
-
36
-
37
-
38
-
39
-
40
-
41
-
42
-
43
-
44
-
45
-
46
-
47
-
48
-
49
-
50
-
51
-
52
 |
 |
