NaceCare TTB516 TTB1840 / TTB516 Owners Manual - Page 15
Regular Maintenance
 |
View all NaceCare TTB516 manuals
Add to My Manuals
Save this manual to your list of manuals |
Page 15 highlights
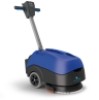
Regular Maintenance ! ALWAYS ENSURE THAT THE BATTERY IS DISCONNECTED PRIOR TO ANY MAINTENANCE OPERATION ! The TTB 516 has been designed with ease of use in mind, this included easy stripping-down and cleaning. After use, empty waste-water tank using emptying hose and flush-out with clean A water. A Fig 28 Fig 29 Remove the two hoses to disconnect the separator from the machine (Fig 28). Lift off the separator. The separator has a sealing-rubber which should be examined at every clean-down (Fig 29). Rinse using clean water. Fig 30 Fig 30a Fig 31 Remove the two filters clipped into the separator and flush with clean water (Fig 30)(Fig 30a). Replace by fitting the rear of the filter first then clipping the front to lock in place (Fig 31) (Fig 32). Fig 32 Disconnect and remove the battery before proceeding with tank removal (Fig 33). Once emptied the top waste-water tank can simply be lifted off. (Fig 33a). Fig 33 Fig 33a The clean-water tank can be drained via the yellow cap fitted to the left hand side of the machine. The cap has a rubber seal and might require a spanner to remove. (Fig 34). Fig 34 NOTE: Avoid over tightening the clean water draining cap. 15 233969 / 01/13 (A20)
-
 1
1 -
2
-
3
-
4
-
5
-
6
-
7
-
8
-
9
-
 10
10 -
 11
11 -
 12
12 -
 13
13 -
 14
14 -
 15
15 -
 16
16 -
 17
17 -
 18
18 -
 19
19 -
 20
20 -
21
-
22
-
23
-
24
 |
 |
