Netgear DGN2200v1 DG series - Configuration with ProSafe Client - Page 3
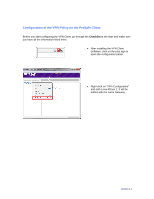
Configuration of the VPN Policy on the DSL Gateway - router
 |
View all Netgear DGN2200v1 manuals
Add to My Manuals
Save this manual to your list of manuals |
Page 3 highlights
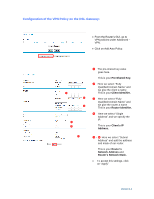
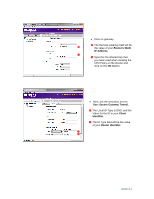
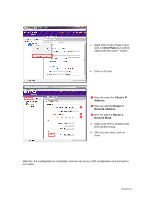
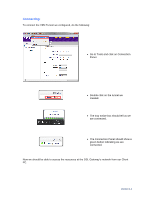
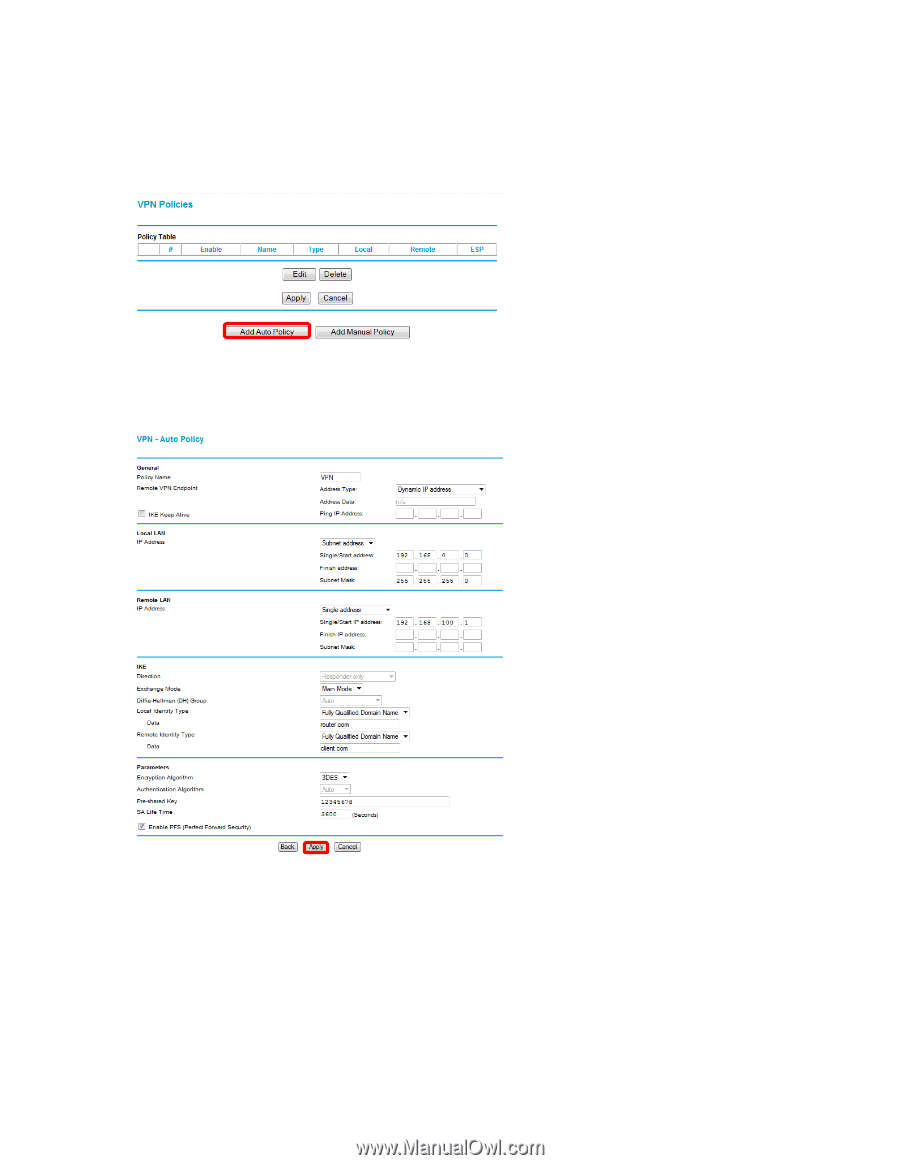
Configuration of the VPN Policy on the DSL Gateway: From the Router's GUI, go to VPN policies under Advanced - VPN. Click on Add Auto Policy. ➎ ➏ ➍ ➌ ➋ ➊ ➊ The pre-shared key value goes here. This is your Pre-Shared Key. ➋ Here we select "Fully Qualified Domain Name" and we give the client a name This is your Client Identifier. ➌ Here we select "Fully Qualified Domain Name" and we give the router a name This is your Router Identifier. ➍ Here we select "Single Address" and we specify the IP. This is your Client's IP Address. ➎ - ➏ Here we select "Subnet Address" and add the address and mask of our router. This is your Router's Network Address and Router's Network Mask. To accept this settings, click on "Apply" Version 1.1
-
 1
1 -
 2
2 -
 3
3 -
 4
4 -
 5
5 -
 6
6 -
 7
7
 |
 |
Version 1.1
Configuration of the VPN Policy on the DSL Gateway:
From the Router’s GUI, go to
VPN policies under Advanced
–
VPN.
Click on Add Auto Policy.
➊
The pre-shared key value
goes here.
This is your
Pre-Shared Key.
➋
Here we select
“
Fully
Qualified Domain Name
”
and
we give the client a name
This is your
Client Identifier.
➌
Here we select
“
Fully
Qualified Domain Name
”
and
we give the router a name
This is your
Router Identifier.
➍
Here we select
“
Single
Address
”
and we specify the
IP.
This is your
Client
’
s IP
Address.
➎
-
➏
Here we select
“
Subnet
Address
”
and add the address
and mask of our router.
This is your
Router
’
s
Network Address
and
Router
’
s Network Mask.
To accept this settings, click
on
“
Apply
”
➋
➌
➊
➏
➎
➍