Netgear GS748TS GS7xxTS Hardware manual - Page 21
Step 7: Applying AC Power, NETGEAR Smart Switch User Guide - stacking cable
 |
UPC - 606449049480
View all Netgear GS748TS manuals
Add to My Manuals
Save this manual to your list of manuals |
Page 21 highlights
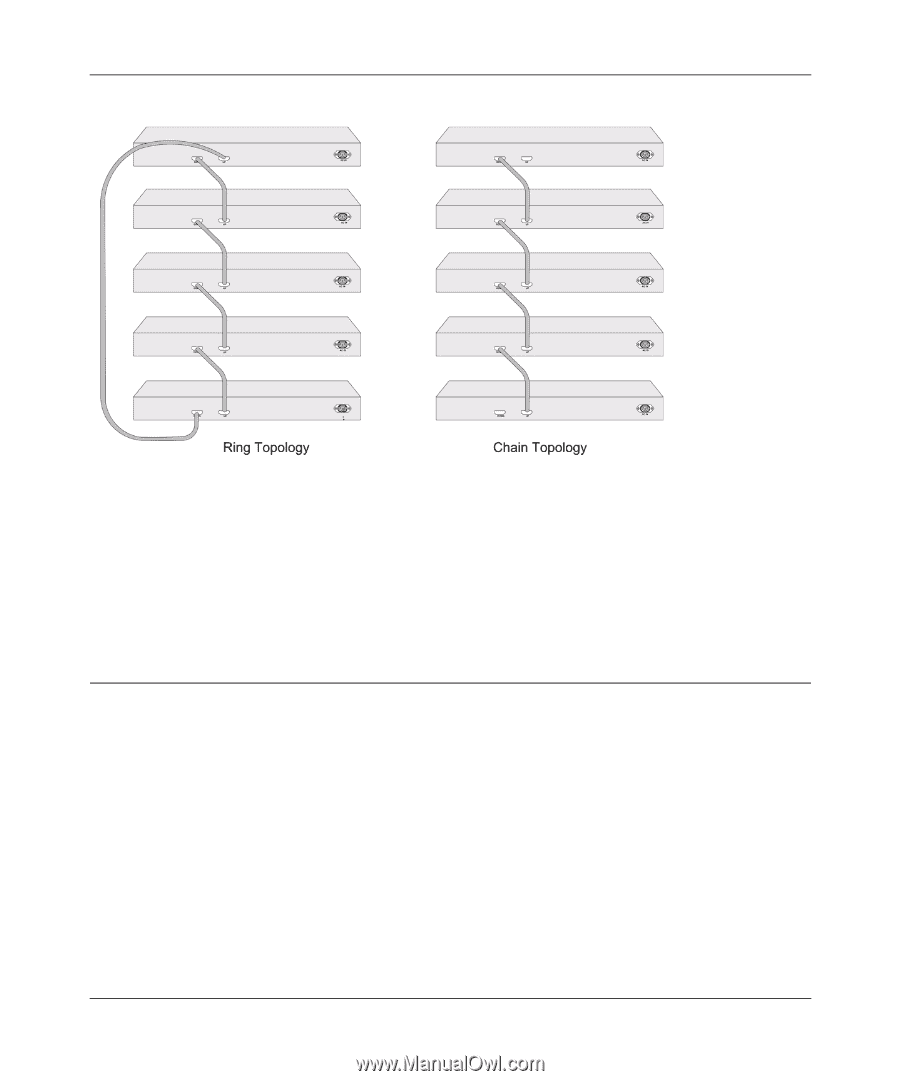
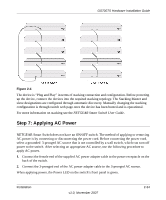
GS700TS Hardware Installation Guide Figure 2-4 The device is "Plug and Play" in terms of stacking connection and configuration. Before powering up the device, connect the devices into the required stacking topology. The Stacking Master and slave designations are configured through automatic discovery. Manually changing the stacking configuration is through switch web page once the device has been booted and is operational. For more information on stacking see the NETGEAR Smart Switch User Guide. Step 7: Applying AC Power NETGEAR Smart Switch does not have an ON/OFF switch. The method of applying or removing AC power is by connecting or disconnecting the power cord. Before connecting the power cord, select a grounded 3-pronged AC source that is not controlled by a wall switch, which can turn off power to the switch. After selecting an appropriate AC source, use the following procedure to apply AC power. 1. Connect the female end of the supplied AC power adapter cable to the power receptacle on the back of the switch. 2. Connect the 3-pronged end of the AC power adapter cable to the 3-pronged AC source. When applying power, the Power LED on the switch's front panel is green. Installation v1.0, November 2007 2-34
-
 1
1 -
2
-
3
-
4
-
5
-
6
-
7
-
8
-
9
-
10
-
11
-
12
-
13
-
14
-
15
-
 16
16 -
 17
17 -
 18
18 -
 19
19 -
 20
20 -
 21
21 -
 22
22 -
 23
23 -
 24
24 -
 25
25 -
 26
26 -
27
-
28
-
29
-
30
-
31
-
32
-
33
-
34
-
35
-
36
-
37
-
38
 |
 |