Nikon S520 S520 User's Manual - Page 21
The Multi Selector, For Shooting, For Playback, For the Menu Screen - standard
 |
UPC - 018208261123
View all Nikon S520 manuals
Add to My Manuals
Save this manual to your list of manuals |
Page 21 highlights
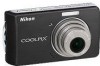
Introduction Basic Operations The Multi Selector This section describes standard uses of the multi selector to select modes, select menu options and to apply selection. For Shooting Display m (flash mode) (A 28) menu/ Select the option above. Display n (self-timer) (A 30) menu. Display o (exposure compensation) (A 32) menu. Apply selection. Flash mode Display p (macro mode) (A 31) menu/ Select the option below. For Playback Select previous picture. 15/05/2008 15:30 0004.JPG For the Menu Screen Select next picture. Select the option above. 44 Shooting Select the option on the left/ Return to the previous screen. Select the option on the right/ Go to next screen (Apply selection) Select the option Apply selection below. (go to next screen). Shooting menu Image mode White balance Continuous ISO sensitivity Color options Exit C Notes on the Multi Selector • In many cases, you can choose how to use the multi selector to perform an operation. For example, rotating the selector clockwise and pressing the selector right may produce the same results. Since the selector can be used in various ways, concrete descriptions such as "Press the multi selector K" are included only in cases where necessary. • In the manual, the button indicating up, down, left and right of the multi selector is shown as H, I, J and K. 9
-
 1
1 -
2
-
3
-
4
-
5
-
6
-
7
-
8
-
9
-
10
-
11
-
12
-
13
-
14
-
15
-
 16
16 -
 17
17 -
 18
18 -
 19
19 -
 20
20 -
 21
21 -
 22
22 -
 23
23 -
 24
24 -
 25
25 -
 26
26 -
27
-
28
-
29
-
30
-
31
-
32
-
33
-
34
-
35
-
36
-
37
-
38
-
39
-
40
-
41
-
42
-
43
-
44
-
45
-
46
-
47
-
48
-
49
-
50
-
51
-
52
-
53
-
54
-
55
-
56
-
57
-
58
-
59
-
60
-
61
-
62
-
63
-
64
-
65
-
66
-
67
-
68
-
69
-
70
-
71
-
72
-
73
-
74
-
75
-
76
-
77
-
78
-
79
-
80
-
81
-
82
-
83
-
84
-
85
-
86
-
87
-
88
-
89
-
90
-
91
-
92
-
93
-
94
-
95
-
96
-
97
-
98
-
99
-
100
-
101
-
102
-
103
-
104
-
105
-
106
-
107
-
108
-
109
-
110
-
111
-
112
-
113
-
114
-
115
-
116
-
117
-
118
-
119
-
120
-
121
-
122
-
123
-
124
-
125
-
126
-
127
-
128
-
129
-
130
-
131
-
132
-
133
-
134
-
135
-
136
-
137
-
138
-
139
-
140
-
141
-
142
-
143
-
144
-
145
-
146
-
147
-
148
-
149
-
150
-
151
-
152
-
153
-
154
 |
 |
