Nokia Display Car Kit CK-600 User Guide - Page 43
Microphone MP-2, ISO cable CA-152, Insert the microphone plug into the microphone connector on
 |
View all Nokia Display Car Kit CK-600 manuals
Add to My Manuals
Save this manual to your list of manuals |
Page 43 highlights
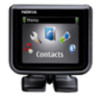
Installation Microphone MP-2 Select the mounting location of the microphone carefully to increase the quality of voice transmission. The best place to mount the microphone is close to the rear view mirror. Mount the microphone so that it points toward the driver's mouth and at least 1 metre (3 feet) from the car kit loudspeaker to avoid audio feedback. Ensure that the microphone cable reaches to the hands-free unit for connection. Mount the microphone so that it is not exposed to air streams from the vents. Do not place the microphone cable in the heating, ventilation, or air-conditioning system. Use the supplied double-sided adhesive tape to fix the microphone to reduce the amount of background noise of the car that can interfere with your calls. Insert the microphone plug into the microphone connector on the hands-free unit, and turn the plug clockwise to lock it firmly. Use of any other microphone than the supplied microphone may impact the audio quality. ISO cable CA-152 If the ISO cable CA-152 is supplied with the car kit, you can use it to easily connect the car kit to a car radio that has ISO connectors. See "Integration with a car radio system", p. 32. 43
-
 1
1 -
2
-
3
-
4
-
5
-
6
-
7
-
8
-
9
-
10
-
11
-
12
-
13
-
14
-
15
-
16
-
17
-
18
-
19
-
20
-
21
-
22
-
23
-
24
-
25
-
26
-
27
-
28
-
29
-
30
-
31
-
32
-
33
-
34
-
35
-
36
-
37
-
 38
38 -
 39
39 -
 40
40 -
 41
41 -
 42
42 -
 43
43 -
 44
44 -
 45
45 -
 46
46 -
 47
47 -
 48
48 -
49
-
50
-
51
-
52
-
53
-
54
-
55
-
56
-
57
-
58
-
59
-
60
-
61
-
62
-
63
-
64
-
65
-
66
-
67
-
68
-
69
-
70
-
71
-
72
-
73
-
74
-
75
-
76
-
77
-
78
-
79
-
80
-
81
-
82
-
83
-
84
-
85
-
86
-
87
-
88
-
89
-
90
-
91
-
92
-
93
-
94
-
95
-
96
-
97
-
98
-
99
-
100
-
101
-
102
-
103
-
104
-
105
-
106
-
107
-
108
-
109
-
110
-
111
-
112
-
113
-
114
-
115
-
116
-
117
-
118
-
119
-
120
-
121
-
122
-
123
-
124
-
125
-
126
-
127
-
128
-
129
-
130
-
131
-
132
-
133
-
134
-
135
-
136
-
137
-
138
-
139
-
140
-
141
-
142
-
143
-
144
-
145
-
146
-
147
-
148
-
149
-
150
-
151
-
152
-
153
-
154
-
155
-
156
-
157
-
158
-
159
-
160
-
161
-
162
-
163
-
164
-
165
-
166
-
167
-
168
-
169
-
170
-
171
-
172
-
173
-
174
-
175
-
176
-
177
-
178
-
179
-
180
-
181
-
182
-
183
-
184
-
185
-
186
-
187
-
188
-
189
-
190
-
191
-
192
-
193
-
194
-
195
-
196
-
197
-
198
-
199
-
200
-
201
-
202
-
203
-
204
-
205
-
206
 |
 |
