NordicTrack Walkfit 5500 Treadmill English Manual - Page 11
Using, WalkFit
 |
View all NordicTrack Walkfit 5500 Treadmill manuals
Add to My Manuals
Save this manual to your list of manuals |
Page 11 highlights
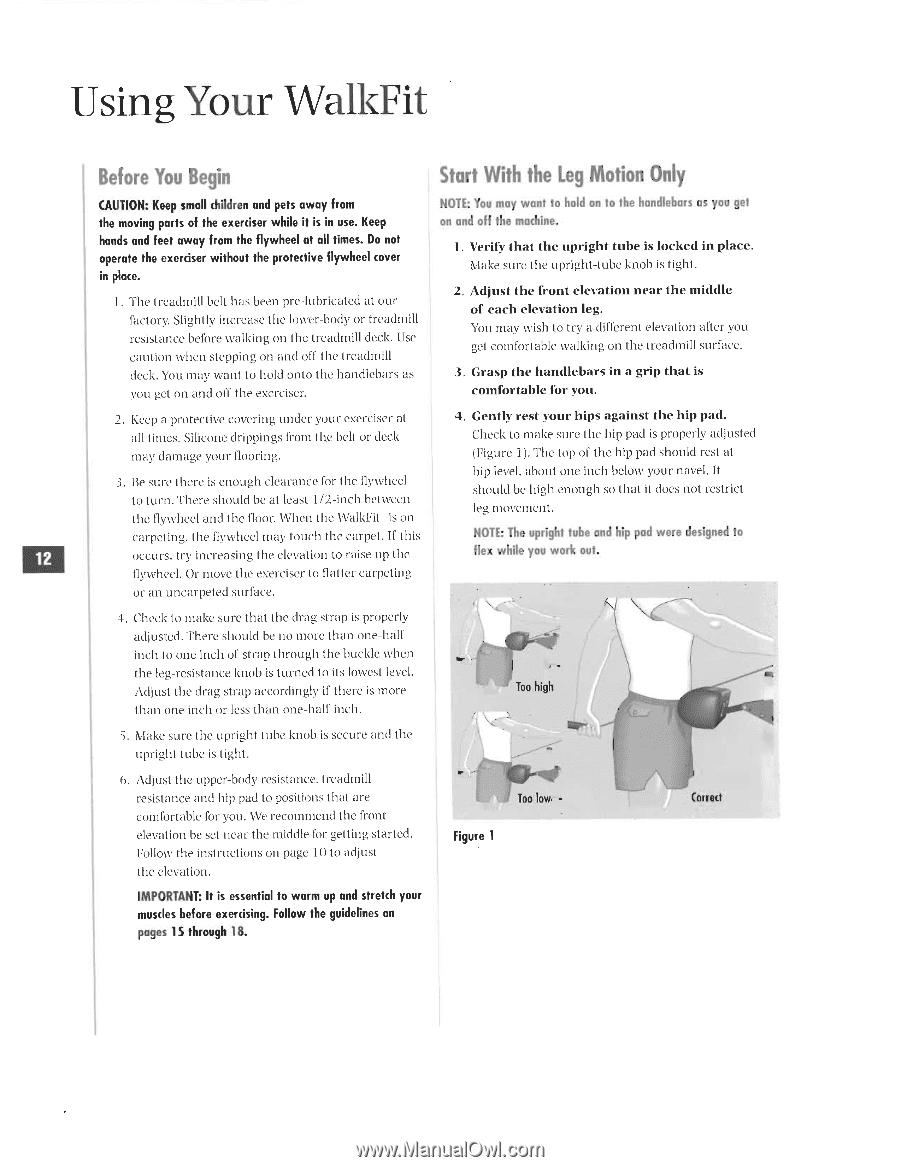
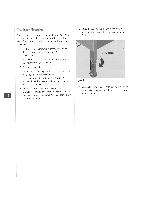
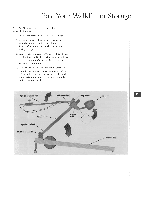
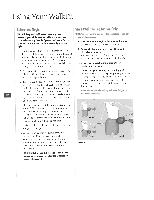
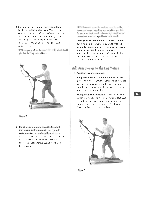
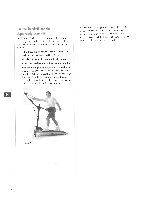
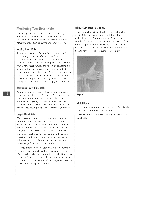
Using Your WalkFit Before You Begin CAUTION: Keep small children and pets away from the moving parts of the exerciser while it is in use. Keep hands and feet away from the flywheel at all times. Do not operate the exerciser without the protective flywheel cover in place. 1. The treadmill belt has been pre-lubricated at our factory. Slightly increase the lower-body or treadmill resist kinee. before walking on the treadmill deck. [Ise caution when stepping on and off Illy treadmill deck. You may want to hold onto the handlebars as you get on and off the exerciser. 2, Keep a protective covering under your exerciser at all times. Silicone drippings from the belt or cleck may damage your Iloox1ng. J. sure there is enough clearance for Ilse flywheel to turn. There should heal least 1 /2-inch between the flywheel and the floor. When the Walkfil • is on carpeting. Ilw flywheel may touch the carpel. if Ibis occurs. try increasing the elevation lo raise up the flywheel. Or move the exerciser to natter carpel ing or an UnCarpeied surface. 4. Check to make sun.- !hat the drag strap is properly adjusted. There should be no more than one-half inch to one inch of strap through the buckle when the leg-resistance knob is turned to its lowest level. Adjust the drag strap accordingly if there is more than one inch or less than one-half inch. 5. Make sure tEu upright I ube knob is secure and Ihe upright tube is tight. 6. Adlust the upper-body resistance, treadmill resistance kind hip pad to positions that are comfortable for you. We recommend the front elevation be set near the middle for getting started. Follow the instructions on page 11) to adjust the elevation. IMPORTANT: It is essential to warm up and stretch your muscles before exercising. Follow the guidelines on pages 15 through 18. Start With the Leg Motion Only NOTE: You may want to hold on to the handlebars as you get on and off the machine. 1. Verify that the upright tube is locked in place. Make sure the upright-tube knob is tighl. 2. Adjust the front elevation near the middle of each elevation leg. You may wish to try a different elevation alter you get comfortable walking on the treadmill surface. 3. Grasp the handlebars in a grip that is comfortable for you. 4. Gently rest your hips against the hip pad. (h to make sure the lip pad is properly adjusted (Figure ). The lop of the hip pad should rest at hip level. about one inch below your navel. It should be high enough so that it does not restrict leg movement. NOTE: The upright tube and hip pad were designed to flex while you work out. "Too high Too low, - Figure 1 Correct
-
 1
1 -
2
-
3
-
4
-
5
-
 6
6 -
 7
7 -
 8
8 -
 9
9 -
 10
10 -
 11
11 -
 12
12 -
 13
13 -
 14
14 -
 15
15 -
 16
16 -
17
-
18
-
19
-
20
-
21
-
22
-
23
-
24
-
25
-
26
 |
 |