NordicTrack Walkfit 5500 Treadmill English Manual - Page 4
Assembly
 |
View all NordicTrack Walkfit 5500 Treadmill manuals
Add to My Manuals
Save this manual to your list of manuals |
Page 4 highlights
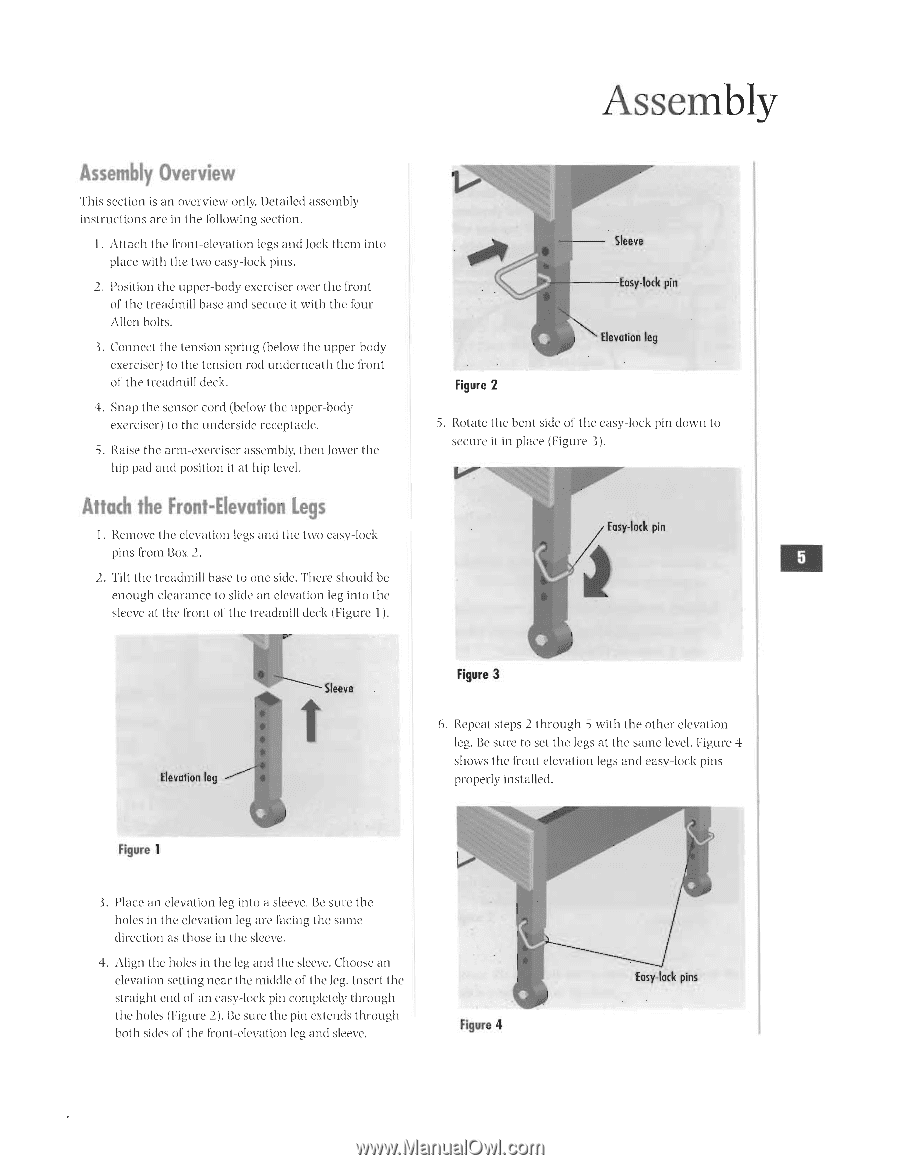
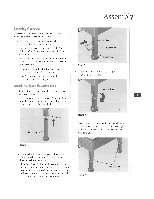
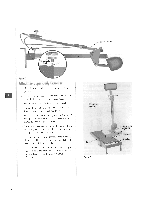
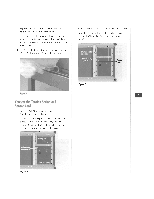
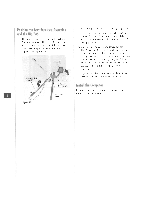
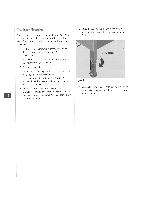
Assembly Assembly Overview This section is an overview only. Detailed assembly instructions are in the following section. 1 . Attach the front-elevation legs and lock them into place with the two easy-lock pins. ). Position the upper-body exerciser over the front of the treadmill base and secure it with the four Allen bolts. 3. Connect the tension spring (below the upper-body exerciser) to the tension rod underneath the front of the treadmill deck. 4. Snap the sensor cord (below the upper-body exerciser) to the underside receptacle. 5. Raise the arm-exerciser assembly, then lower the hip pad and position it at hip level. Attach the Front-Elevation Legs 1. Remove the elevation legs and the two easy-lock pins from Box 2. 2. Tilt the treadmill base to one side. There should be enough clearance to slide an elevation leg into the sleeve at the front of the treadmill deck (Figure 1). issap Sleeve Easy-lock phi Elevation leg Figure 2 5. Rotate the bent side of the easy-lock pin down to secure it in place (Figure 3). Easy-lack pi Elevation leg Figure 3 6. Repeat steps 2 through 5 with the other elevation leg. Be sure to set the legs at the same level. Figure 4 shows the front elevation legs and easy-lock pins properly installed. Figure 1. I. Place an elevation leg into a sleeve. Be sure the holes in the elevation leg are facing the same direction as those in the sleeve. 4. Align the holes in the leg and the sleeve. Choose an elevation setting near the middle of the leg. Insert the straight end of an easy-lock pin completely through the holes (Figure 2). Be sure the pin extends through both sides of the front-elevation leg and sleeve. Figure 4 Easy-lock pins
-
 1
1 -
 2
2 -
 3
3 -
 4
4 -
 5
5 -
 6
6 -
 7
7 -
 8
8 -
 9
9 -
 10
10 -
11
-
12
-
13
-
14
-
15
-
16
-
17
-
18
-
19
-
20
-
21
-
22
-
23
-
24
-
25
-
26
 |
 |