Oki C5300n C5300 Computer Connections & Software Install Guide - Page 4
Network Install: Software, Network Client Distribution, Configuring the Print Server via, - driver
 |
View all Oki C5300n manuals
Add to My Manuals
Save this manual to your list of manuals |
Page 4 highlights
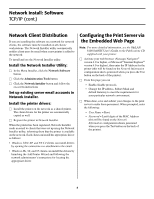
Network Install: Software TCP/IP (cont.) Network Client Distribution If you are installing the software on a network for network clients, the software must be installed on all clients' workstations. The Network Installer utility automatically notifies client users by email when a new printer is added to the network. To install and use the Network Installer utility: Install the Network Installer Utility: □ In the Menu Installer, click the Network Software button. □ Click the Administration Tools button. □ Click the Network Installer button and follow the on-screen instructions Set up existing server email accounts in Network Installer. Install the printer drivers: □ Install the printer on the network as a shared printer. The client drivers for the printer are automatically copied as well. □ Register the printer in Network Installer. When the printer has been registered, Network Installer sends an email to clients that were set up using the Network Installer utility, informing them that the printer is available on the network. Each client can install the appropriate driver as follows: • Windows 2000, XP, and NT 4.0 clients can install drivers by opening the connectme.exe attachment to the email. • Windows Me, 98, and 95 clients can install the drivers by launching the Add Printer Wizard and following the network administrator's instructions for locating the appropriate driver. Configuring the Print Server via the Embedded Web Page Note: For more detailed information, see the OkiLAN 8100 SoftNIC User's Guide on the Publications CD supplied with your printer. □ Activate your web browser (Netscape Navigator® version 4.0 or higher, or Microsoft® Internet Explorer® version 4.0 or higher), then enter the IP Address for the printer (this will be found on the Network Information configuration sheets generated when you press the Test button on the back of the printer). □ From this page you can • Enable/disable protocols. • Change the IP address, Subnet Mask and default Gateway to meet the requirements for your particular network environment. □ When done, save and submit your changes to the print server to make them permanent. When prompted, enter the following: • User Name = Root. • Password = Last 6 digits of the MAC Address (this will be found on the Network Information configuration sheets generated when you press the Test button on the back of the printer). 4
-
 1
1 -
 2
2 -
 3
3 -
 4
4 -
 5
5 -
 6
6 -
 7
7 -
 8
8 -
 9
9 -
 10
10 -
11
-
12
-
13
-
14
-
15
-
16
-
17
-
18
-
19
-
20
-
21
-
22
-
23
-
24
 |
 |
