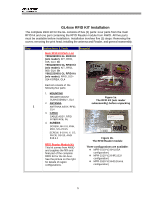
Oki GL408e GL408e/GL412e RFID Kit Install Guide - Page 6
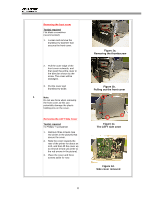
a., Removing the thumbscrew, b., Pulling out the front cover, c., The LEFT
 |
View all Oki GL408e manuals
Add to My Manuals
Save this manual to your list of manuals |
Page 6 highlights
Removing the front cover Tool(s) required Flat blade screwdriver (recommended) 1. Loosen and remove the thumbscrew fastener that secures the front cover. 2. Pull the outer edge of the front cover outwards, and then push the entire cover in the direction shown by the arrow. The cover will be dislodged. 3. Put the cover and thumbscrew aside. 1 Note: Do not use force when removing the front cover as this can potentially damage the plastic holding pins on the cover. Removing the LEFT Side Cover Tool(s) required #1 Phillips + screwdriver 1. Remove three screws (see red circles in the picture) that secure the cover. 2. Slide the cover towards the rear of the printer for about an inch, and then lift the cover up to remove it from unit (refer to the red arrows in the picture). 3. Place the cover and three screws aside for now. Figure 1a. Removing the thumbscrew Figure 1b. Pulling out the front cover Figure 1c. The LEFT side cover Figure 1d. Side cover removed 6
-
 1
1 -
 2
2 -
 3
3 -
 4
4 -
 5
5 -
 6
6 -
 7
7 -
 8
8 -
 9
9 -
 10
10 -
 11
11
 |
 |
