Olympus 135291 P-440 Reference Manual (English) - Page 49
A. Selecting the Background Image, the background image in the LCD panel
 |
UPC - 050332135284
View all Olympus 135291 manuals
Add to My Manuals
Save this manual to your list of manuals |
Page 49 highlights
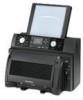
POWER ON Setup Input Selection Paper Selection Picture Selection Printing Modes A. Selecting the Background Image It is possible to use the image data included when this printer was shipped as a background image. It is also possible to use any other image data that you may like. 1 Scroll through the pictures using the left and right arrow buttons. Pressing the right arrow button advances to the next picture, while pressing the left arrow button moves back to the previous picture. Pressing the up arrow button jumps to the next set of 10 pictures, while pressing the down arrow button jumps back to the previous set of 10 pictures. Tips • Holding down the left or right arrow button for over 1 second will start automatic advancement of the picture file name (forward with the right arrow button and backward with the left arrow button). When you reach the desired file name, release the button to stop automatic advancement. The desired picture is displayed. • The background image can also be selected from the index display. Refer to "3. Picture Selection and Setting" (page 79) for information on accessing the index display. The background image, however, can not be rotated. • An enlarged picture can also be used as a background image. Refer to "3. Picture Selection and Setting" (page 79) for information on enlarging pictures. The background image, however, can not be rotated. 2 Confirm the picture that you want to use as the background image in the LCD panel, and then press the OK/SELECT button. The picture is registered as a background image and is displayed in the Register Background menu. ➜ 49
-
 1
1 -
2
-
3
-
4
-
5
-
6
-
7
-
8
-
9
-
10
-
11
-
12
-
13
-
14
-
15
-
16
-
17
-
18
-
19
-
20
-
21
-
22
-
23
-
24
-
25
-
26
-
27
-
28
-
29
-
30
-
31
-
32
-
33
-
34
-
35
-
36
-
37
-
38
-
39
-
40
-
41
-
42
-
43
-
 44
44 -
 45
45 -
 46
46 -
 47
47 -
 48
48 -
 49
49 -
 50
50 -
 51
51 -
 52
52 -
 53
53 -
 54
54 -
55
-
56
-
57
-
58
-
59
-
60
-
61
-
62
-
63
-
64
-
65
-
66
-
67
-
68
-
69
-
70
-
71
-
72
-
73
-
74
-
75
-
76
-
77
-
78
-
79
-
80
-
81
-
82
-
83
-
84
-
85
-
86
-
87
-
88
-
89
-
90
-
91
-
92
-
93
-
94
-
95
-
96
-
97
-
98
-
99
-
100
-
101
-
102
-
103
-
104
-
105
-
106
-
107
-
108
-
109
-
110
-
111
-
112
-
113
-
114
-
115
-
116
-
117
-
118
-
119
-
120
-
121
-
122
-
123
-
124
-
125
-
126
-
127
-
128
-
129
-
130
-
131
-
132
-
133
-
134
-
135
-
136
-
137
-
138
-
139
-
140
-
141
-
142
-
143
-
144
-
145
-
146
-
147
-
148
-
149
-
150
-
151
-
152
-
153
-
154
-
155
-
156
 |
 |
