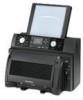
Olympus 135291 P-440 Reference Manual (English) - Page 9
Printer Installation, Printer Installation Site, Installing the Ink Ribbon
 |
UPC - 050332135284
View all Olympus 135291 manuals
Add to My Manuals
Save this manual to your list of manuals |
Page 9 highlights
Printer Installation qPrinter Installation Site Provide a location for installing the printer that is flat and stable and ensures adequate installation space. Install the printer in a location that is able to withstand weight of approximately 15 kg (30 lbs). Provide enough space in front of the printer so that the paper output tray can be pulled out. qInstalling the Ink Ribbon When actually installing the printer, allow enough room around the printer so that it is at least 10 cm (4˝) away from the wall. Caution • P-400 ink ribbon P-RBN cannot be used in this printer for printing. 1 Tear off the center strip on the back of the ink ribbon package along the tear line shown. 2 Open one of the flaps. Caution • When cutting open the cover sheet and tearing back the flaps, do not remove the flaps completely from the package. Removal of the flaps will prevent you from determining the installation direction of the ink cassette (ribbon holder). 9
-
 1
1 -
2
-
3
-
 4
4 -
 5
5 -
 6
6 -
 7
7 -
 8
8 -
 9
9 -
 10
10 -
 11
11 -
 12
12 -
 13
13 -
 14
14 -
15
-
16
-
17
-
18
-
19
-
20
-
21
-
22
-
23
-
24
-
25
-
26
-
27
-
28
-
29
-
30
-
31
-
32
-
33
-
34
-
35
-
36
-
37
-
38
-
39
-
40
-
41
-
42
-
43
-
44
-
45
-
46
-
47
-
48
-
49
-
50
-
51
-
52
-
53
-
54
-
55
-
56
-
57
-
58
-
59
-
60
-
61
-
62
-
63
-
64
-
65
-
66
-
67
-
68
-
69
-
70
-
71
-
72
-
73
-
74
-
75
-
76
-
77
-
78
-
79
-
80
-
81
-
82
-
83
-
84
-
85
-
86
-
87
-
88
-
89
-
90
-
91
-
92
-
93
-
94
-
95
-
96
-
97
-
98
-
99
-
100
-
101
-
102
-
103
-
104
-
105
-
106
-
107
-
108
-
109
-
110
-
111
-
112
-
113
-
114
-
115
-
116
-
117
-
118
-
119
-
120
-
121
-
122
-
123
-
124
-
125
-
126
-
127
-
128
-
129
-
130
-
131
-
132
-
133
-
134
-
135
-
136
-
137
-
138
-
139
-
140
-
141
-
142
-
143
-
144
-
145
-
146
-
147
-
148
-
149
-
150
-
151
-
152
-
153
-
154
-
155
-
156
 |
 |
