Olympus Stylus 1020 Stylus 1010 Instruction Manual (English) - Page 25
Combine In Pc] - underwater
 |
View all Olympus Stylus 1020 manuals
Add to My Manuals
Save this manual to your list of manuals |
Page 25 highlights
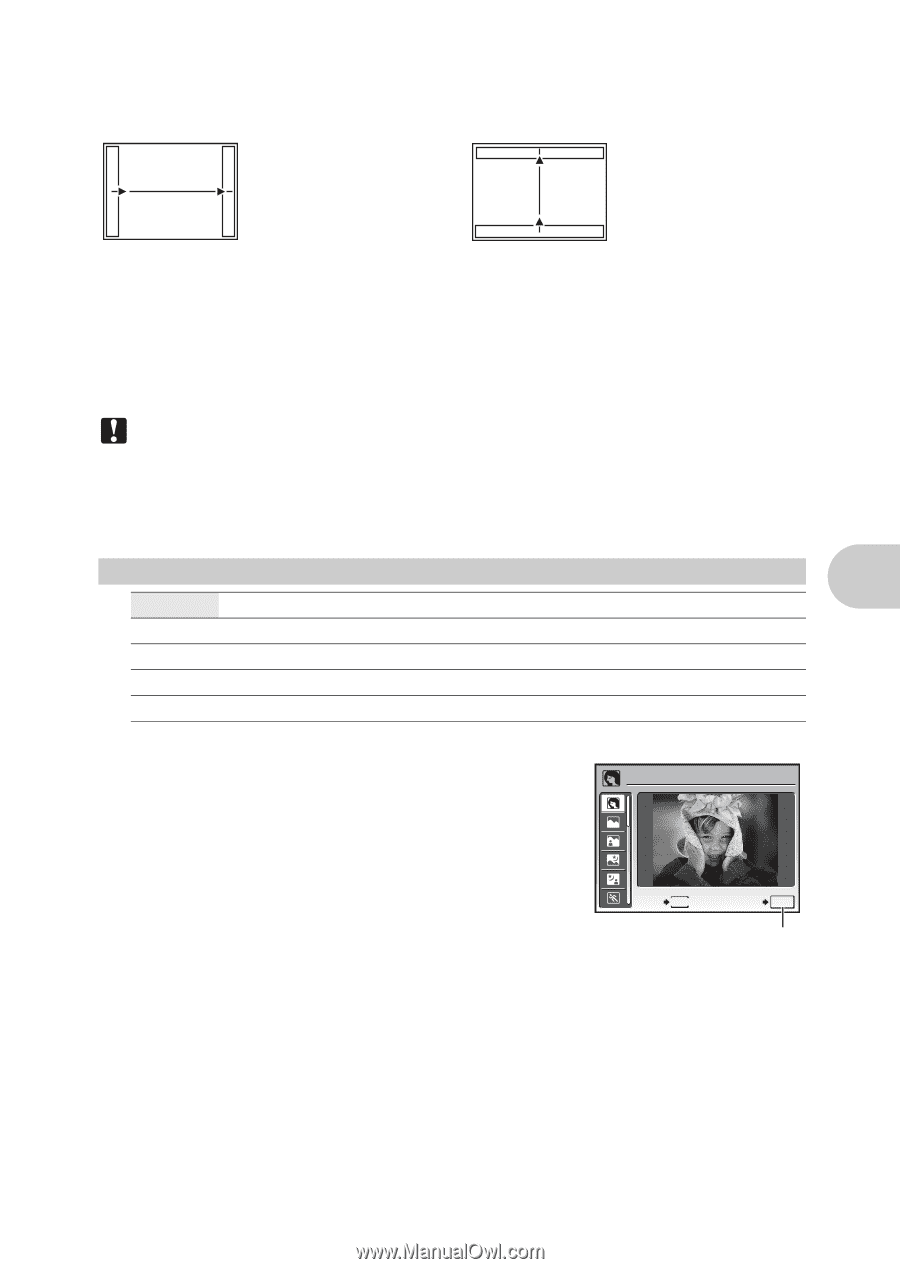
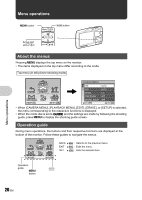
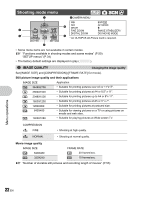
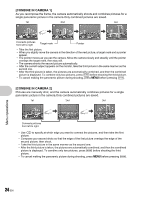
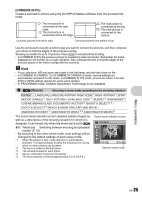
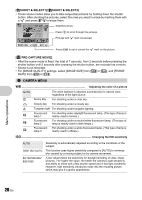
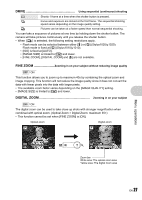
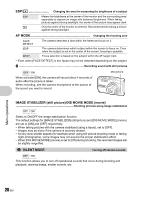
[COMBINE IN PC] Create a panoramic picture using the OLYMPUS Master software from the provided CDROM. 3 :The next picture is connected at the right edge. 4 :The next picture is connected at the left edge. 1 :The next picture is connected at the top. 2 :The next picture is connected at the bottom. Connects pictures from left to right Connects pictures from bottom to top Use the arrow pad to specify at which edge you want to connect the pictures, and then compose your shots so that the edges of the pictures overlap. Shooting is possible for up to 10 pictures. Press e to exit panorama shooting. • In [COMBINE IN PC] the previous picture for positioning does not remain. Remember the frame displayed on the monitor as a rough indication, then compose the shot so that the edges of the previous picture in the frame overlap with the next shot. Note • Focus, exposure, WB and zoom are locked in the first frame, and the flash does not fire. • In [COMBINE IN CAMERA 1] or [COMBINE IN CAMERA 2] mode, camera settings are automatically optimized for this mode. In [COMBINE IN PC] mode, pictures are taken in the last [ISO] or [SCN] settings (except for some scene modes). g • In PANORAMA mode, Shadow Adjustment Technology is not available. 4 s (Scene) Selecting a scene mode according to the shooting situation PORTRAIT /LANDSCAPE /LANDSCAPE+PORTRAIT /NIGHT SCENE*1 /NIGHT+PORTRAIT*1 /SPORT / INDOOR /CANDLE*1 /SELF PORTRAIT /AVAILABLE LIGHT*1 /SUNSET*1 /FIREWORKS*1/ CUISINE /BEHIND GLASS /DOCUMENTS /AUCTION*2 /SHOOT & SELECT1*2 / SHOOT & SELECT2*3 /BEACH & SNOW /PRE-CAPTURE MOVIE / UNDERWATER WIDE1*4 /UNDERWATER WIDE2*4*5 /UNDERWATER MACRO*4 The scene mode selection screen displays sample images as well as a description of the shooting situation for which it is designed. It can be set only when the mode dial is set to s. g "Mode dial Switching between shooting and playback modes" (P.12) • By switching to the other scene mode, most settings will be changed to the default settings of each scene mode. *1 When the subject is dark, noise reduction is automatically activated. This approximately doubles the shooting time, during which no other pictures can be taken. *2 The focus is locked at the first frame. *3 The camera focuses for each frame. *4 Use an underwater housing in this setting. *5 The focus distance is fixed at approximately 5.0 m (16.4 ft.). Scene mode selection screen PORTRAIT EXIT MENU SET OK Sets the scene mode. Menu operations EN 25
-
 1
1 -
2
-
3
-
4
-
5
-
6
-
7
-
8
-
9
-
10
-
11
-
12
-
13
-
14
-
15
-
16
-
17
-
18
-
19
-
 20
20 -
 21
21 -
 22
22 -
 23
23 -
 24
24 -
 25
25 -
 26
26 -
 27
27 -
 28
28 -
 29
29 -
 30
30 -
31
-
32
-
33
-
34
-
35
-
36
-
37
-
38
-
39
-
40
-
41
-
42
-
43
-
44
-
45
-
46
-
47
-
48
-
49
-
50
-
51
-
52
-
53
-
54
-
55
-
56
-
57
-
58
-
59
-
60
-
61
-
62
-
63
-
64
-
65
-
66
-
67
-
68
-
69
-
70
-
71
-
72
-
73
-
74
-
75
-
76
-
77
-
78
-
79
-
80
-
81
-
82
-
83
-
84
 |
 |