Optoma PT105 User's Manual - Page 7
Using, Projector
 |
View all Optoma PT105 manuals
Add to My Manuals
Save this manual to your list of manuals |
Page 7 highlights
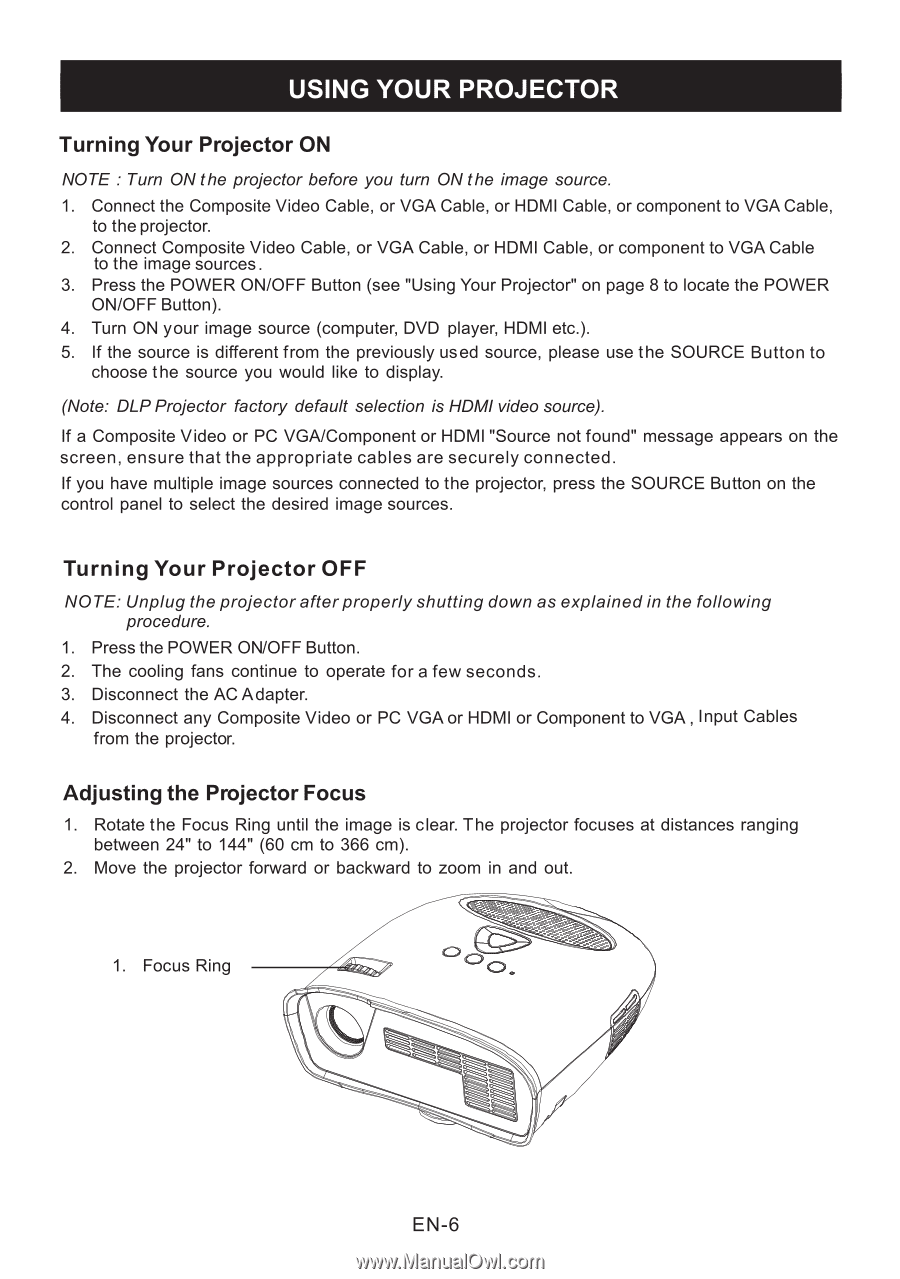
USING YOUR PROJECTOR Turning Your Projector ON NOTE : Turn ON the projector before you turn ON the image source. 1. Connect the Composite Video Cable, or VGA Cable, or HDMI Cable, or component to VGA Cable, to the projector. 2. Connect Composite Video Cable, or VGA Cable, or HDMI Cable, or component to VGA Cable to the image sources. 3. Press the POWER ON/OFF Button (see "Using Your Projector" on page 8 to locate the POWER ON/OFF Button). 4. Turn ON your image source (computer, DVD player, HDMI etc.). 5. If the source is different from the previously used source, please use the SOURCE Button to choose the source you would like to display. (Note: DLPProjector factory default selection is HDMI video source). If a Composite Video or PC VGA/Component or HDMI "Source not found" message appears on the screen, ensure that the appropriate cables are securely connected. If you have multiple image sources connected to the projector, press the SOURCE Button on the control panel to select the desired image sources. Turning Your Projector OFF NOTE: Unplug the projector after properly shutting down as explained in the following procedure. 1. Press the POWER ON/OFF Button. 2. The cooling fans continue to operate for a few seconds. 3. Disconnect the AC Adapter. 4. Disconnect any Composite Video or PC VGA or HDMI or Component to VGA , Input Cables from the projector. Adjusting the Projector Focus 1. Rotate the Focus Ring until the image is clear. The projector focuses at distances ranging between 24" to 144" (60 cm to 366 cm). 2. Move the projector forward or backward to zoom in and out. 1. Focus Ring EN-6
-
 1
1 -
 2
2 -
 3
3 -
 4
4 -
 5
5 -
 6
6 -
 7
7 -
 8
8 -
 9
9 -
 10
10 -
 11
11 -
 12
12 -
13
-
14
 |
 |