Panasonic CF-19CHGACJM Reference Manual - Page 125
Set the Product Recovery DVD-ROM into the CD/DVD drive., Click [Continue] again.
 |
UPC - 092281871011
View all Panasonic CF-19CHGACJM manuals
Add to My Manuals
Save this manual to your list of manuals |
Page 125 highlights
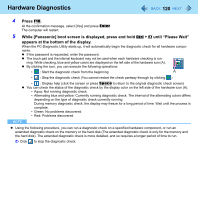
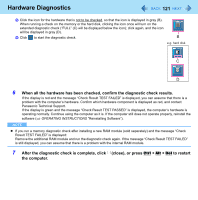
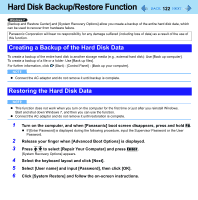
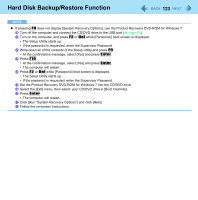
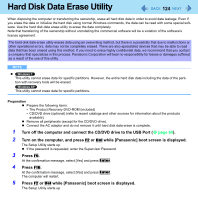
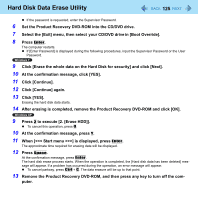
Hard Disk Data Erase Utility 125 If the password is requested, enter the Supervisor Password. 6 Set the Product Recovery DVD-ROM into the CD/DVD drive. 7 Select the [Exit] menu, then select your CD/DVD drive in [Boot Override]. 8 Press Enter. The computer restarts. If [Enter Password] is displayed during the following procedures, input the Supervisor Password or the User Password. 9 Click [Erase the whole data on the Hard Disk for security] and click [Next]. 10 At the confirmation message, click [YES]. 11 Click [Continue]. 12 Click [Continue] again. 13 Click [YES]. Erasing the hard disk data starts. 14 After erasing is completed, remove the Product Recovery DVD-ROM and click [OK]. 9 Press 2 to execute [2. [Erase HDD]]. To cancel this operation, press 0. 10 At the confirmation message, press Y. 11 When [>] is displayed, press Enter. The approximate time required for erasing data will be displayed. 12 Press Space. At the confirmation message, press Enter. The hard disk erase process starts. When the operation is completed, the [Hard disk data has been deleted] message will appear. If a problem has occurred during the operation, an error message will appear. To cancel partway, press Ctrl + C. The data erasure will be up to that point. 13 Remove the Product Recovery DVD-ROM, and then press any key to turn off the com- puter.
-
 1
1 -
2
-
3
-
4
-
5
-
6
-
7
-
8
-
9
-
10
-
11
-
12
-
13
-
14
-
15
-
16
-
17
-
18
-
19
-
20
-
21
-
22
-
23
-
24
-
25
-
26
-
27
-
28
-
29
-
30
-
31
-
32
-
33
-
34
-
35
-
36
-
37
-
38
-
39
-
40
-
41
-
42
-
43
-
44
-
45
-
46
-
47
-
48
-
49
-
50
-
51
-
52
-
53
-
54
-
55
-
56
-
57
-
58
-
59
-
60
-
61
-
62
-
63
-
64
-
65
-
66
-
67
-
68
-
69
-
70
-
71
-
72
-
73
-
74
-
75
-
76
-
77
-
78
-
79
-
80
-
81
-
82
-
83
-
84
-
85
-
86
-
87
-
88
-
89
-
90
-
91
-
92
-
93
-
94
-
95
-
96
-
97
-
98
-
99
-
100
-
101
-
102
-
103
-
104
-
105
-
106
-
107
-
108
-
109
-
110
-
111
-
112
-
113
-
114
-
115
-
116
-
117
-
118
-
119
-
 120
120 -
 121
121 -
 122
122 -
 123
123 -
 124
124 -
 125
125 -
 126
126 -
 127
127 -
 128
128 -
 129
129 -
 130
130 -
131
-
132
-
133
-
134
-
135
-
136
-
137
-
138
-
139
-
140
-
141
-
142
-
143
-
144
-
145
-
146
 |
 |
