Panasonic CF-29CRKGZKM Service Manual - Page 16
Test Selection, Input screen startup, End of test, Order of test flow selection
 |
UPC - 092281833422
View all Panasonic CF-29CRKGZKM manuals
Add to My Manuals
Save this manual to your list of manuals |
Page 16 highlights
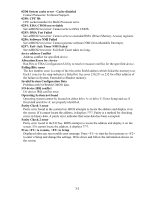
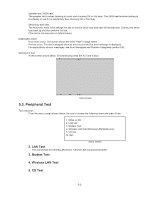
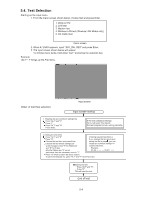
5.4. Test Selection Starting up the input menu 1. From the menu screen shown below, choose Quit and press Enter. 1. DIAG on FD 2. LAN test 3. Modem test 4. Wireless LAN test (Wireless LAN Model only) 5. CD testQ. Quit menu screen 2. When A: \DIAG appears, input "JDG_295, XEX" and press Enter. 3. The input screen shown below will appear. To choose menu items, hold down "ALT" and press the selection key. Example: "ALT" + F brings up the File menu. Order of test flow selection Input screen Input screen startup 1. Reading the test conditions settings file Press "ALT" and "F". Press "L". Press "ALT" and "O". Press Enter. If the test condition settings file is not read, this means the test program is not running correct.ly 2. setting the test items Press "ALT" and "S". [ Saving selected test items ] Press "S". If you change the file name when Choose the test item and press Enter. saving the file in step , you can Choose the test whose settings are- create test condition settings for to be changed, press "A" for Additional- custom test items. and "R" for Erase. Example: All initial VAlues are "0" so set CF-29. * * * TEST1. * * * tests other than the necessary ones to "1". Press "O" twice to return the menu screen. To save the selected list, press "ALT" and "F" at the file menu. Starting the test Press "ALT" and "R". Press "R". This will start the test. End of test 5-4
-
 1
1 -
2
-
3
-
4
-
5
-
6
-
7
-
8
-
9
-
10
-
 11
11 -
 12
12 -
 13
13 -
 14
14 -
 15
15 -
 16
16 -
 17
17 -
 18
18 -
 19
19 -
 20
20 -
 21
21 -
22
-
23
-
24
-
25
-
26
-
27
-
28
-
29
-
30
-
31
-
32
-
33
-
34
-
35
-
36
-
37
-
38
-
39
-
40
-
41
-
42
-
43
-
44
-
45
-
46
-
47
-
48
-
49
-
50
-
51
-
52
-
53
-
54
-
55
-
56
-
57
-
58
-
59
-
60
-
61
-
62
-
63
-
64
-
65
-
66
-
67
-
68
-
69
-
70
-
71
-
72
-
73
-
74
-
75
-
76
-
77
-
78
-
79
-
80
-
81
-
82
-
83
-
84
-
85
-
86
-
87
-
88
-
89
-
90
-
91
-
92
-
93
-
94
-
95
-
96
-
97
-
98
-
99
-
100
-
101
-
102
-
103
-
104
 |
 |