Panasonic CF-W7BWNZZJM Operating Instructions - Page 25
Reinstalling Software
 |
UPC - 092281876474
View all Panasonic CF-W7BWNZZJM manuals
Add to My Manuals
Save this manual to your list of manuals |
Page 25 highlights
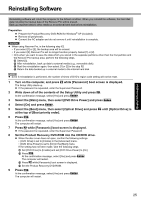
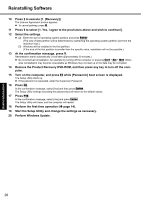
Troubleshooting Useful Information Getting Started Reinstalling Software Reinstalling software will return the computer to the default condition. When you reinstall the software, the hard disk data including the backup data of the Recover Pro will be erased. Back up important data to other media or an external hard disk before reinstallation. Preparation Prepare the Product Recovery DVD-ROM for Windows® XP (included). Remove all peripherals. Connect the AC adaptor and do not remove it until reinstallation is complete. CAUTION When using Recover Pro, in the following step 12, • If you select [1] or [2], the backup area will be erased. • If you select [3], Recover Pro will no longer function properly. Select [1] or [2]. • Only when you want to save the data which you stored in the separate partitions other than the first partition and the Recover Pro backup area, perform the following steps. A Select [3]. B After reinstallation, back up data to external media (e.g., removable disk). C Start the reinstallation again, then select [1] or [2] in the step 12. D Return the data backed up in external media to the internal hard disk. NOTE Even if reinstallation is performed, the number of times of DVD's region code setting will not be reset. 1 Turn on the computer, and press F2 while [Panasonic] boot screen is displayed. The Setup Utility starts up. If the password is requested, enter the Supervisor Password. 2 Write down all of the contents of the Setup Utility and press F9. At the confirmation message, select [Yes] and press Enter. 3 Select the [Main] menu, then select [DVD Drive Power] and press Enter. 4 Select [On] and press Enter. 5 Select the [Boot] menu, then select [Optical Drive] and press F6 until [Optical Drive] is at the top of [Boot priority order]. 6 Press F10. At the confirmation message, select [Yes] and press Enter. The computer will restart. 7 Press F2 while [Panasonic] boot screen is displayed. If the password is requested, enter the Supervisor Password. 8 Set the Product Recovery DVD-ROM into the CD/DVD drive. When the disc cover does not open, confirm the following settings. • [DVD Drive] is set to [Enable] in the [Advanced] menu. • [DVD Drive Power] is set to [On] in the [Main] menu. If the setting has not been made, take the following steps. A Set [DVD Drive] to [Enable] and set [DVD Drive Power] to [On]. B Press F10. At the confirmation message, select [Yes] and press Enter. The computer will restart. C Press F2 while [Panasonic] boot screen is displayed. D Set the Product Recovery DVD-ROM. 9 Press F10. At the confirmation message, select [Yes] and press Enter. The computer will restart. 25 Appendix
-
 1
1 -
2
-
3
-
4
-
5
-
6
-
7
-
8
-
9
-
10
-
11
-
12
-
13
-
14
-
15
-
16
-
17
-
18
-
19
-
 20
20 -
 21
21 -
 22
22 -
 23
23 -
 24
24 -
 25
25 -
 26
26 -
 27
27 -
 28
28 -
 29
29 -
 30
30 -
31
-
32
-
33
-
34
-
35
-
36
-
37
-
38
-
39
-
40
-
41
-
42
-
43
 |
 |
