Panasonic DMP-BD70 Owners Manual - Page 19
Inserting or removing media
 |
View all Panasonic DMP-BD70 manuals
Add to My Manuals
Save this manual to your list of manuals |
Page 19 highlights
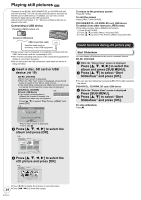
Getting started Inserting or removing media Inserting or removing a disc 1 Press [< OPEN/CLOSE] to open the disc tray. 2 Insert or remove the disc ≥Press [< OPEN/CLOSE] again to close the disc tray. ≥DVD-RAM: Remove discs from their cartridges before use. ≥Insert double-sided discs so the label for the side you want to play is facing up. Inserting or removing an SD card Inserting an SD card Insert the card's label up, positioning the cut off corner to the right. 1 Pull to flip down the front panel. 2 Insert the SD card into the SD card slot. ≥Press on the center of the card until it clicks into place. Removing the SD card Press on the center of the card and pull it straight out. ≥When the card indicator ("SD") on the unit's display is flashing, the card is being read from or written to. Do not turn off the unit or remove the card. Such action may result in malfunction or loss of the card's contents. Inserting or removing a USB device Inserting a USB device ≥Before inserting any USB device into this unit, ensure that the data stored therein has been backed up. ≥Check the orientation of the USB connector and insert it straight in. ≥Some USB devices inserted into this unit may cause this unit to stop operating. Such USB devices cannot be used on this unit. 1 Pull to flip down the front panel. 2 Insert the USB device into the USB port. Removing the USB device Complete all USB device-related operations and pull the USB device straight out. ≥When the USB access lamp is flashing, the USB device is being read from. Do not turn off the unit or remove the USB device. Such action may result in malfunction or loss of the USB device's contents. Since the physical size of USB devices can vary, please consider its width when connecting any USB device to this unit. It is possible that some devices may accidentally activate the playback button and cause this unit to not operate properly. - In such cases we recommend using a USB extension cable (not included). Inserting or ejecting a video cassette Inserting a video cassette - The unit turns on automatically. Ejecting the video cassette From the main unit ≥Press [< EJECT] on the main unit. - The unit turns on automatically. From the remote control ≥Press [DRIVE SELECT] to select "VHS" and press and hold [∫] for 3 or more seconds. 19 RQT9412
-
 1
1 -
2
-
3
-
4
-
5
-
6
-
7
-
8
-
9
-
10
-
11
-
12
-
13
-
 14
14 -
 15
15 -
 16
16 -
 17
17 -
 18
18 -
 19
19 -
 20
20 -
 21
21 -
 22
22 -
 23
23 -
 24
24 -
25
-
26
-
27
-
28
-
29
-
30
-
31
-
32
-
33
-
34
-
35
-
36
-
37
-
38
-
39
-
40
-
41
-
42
-
43
-
44
-
45
-
46
-
47
-
48
-
49
-
50
-
51
-
52
 |
 |
