Panasonic DMRE500 DMRE500 User Guide - Page 10
Connections For The Network Function
 |
View all Panasonic DMRE500 manuals
Add to My Manuals
Save this manual to your list of manuals |
Page 10 highlights
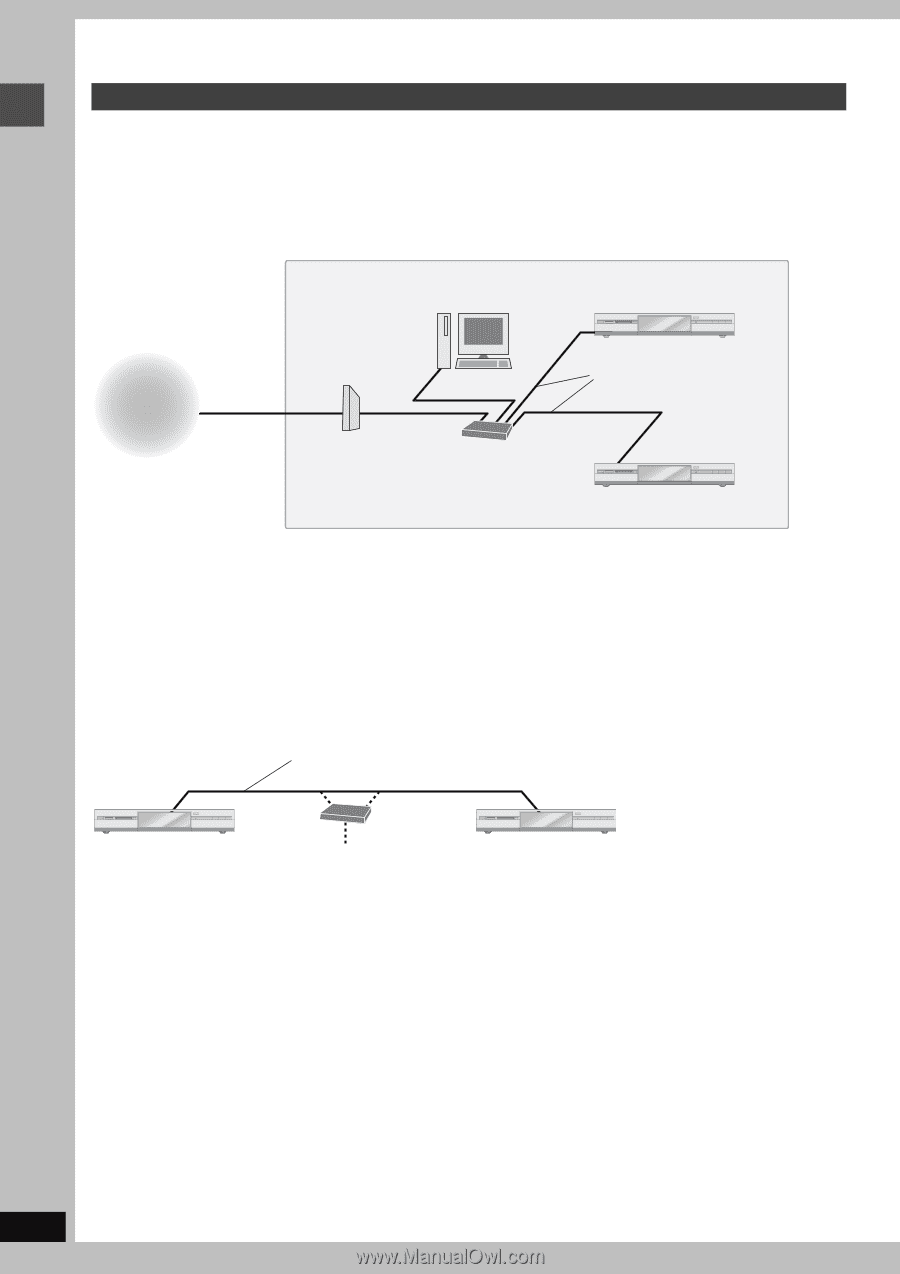
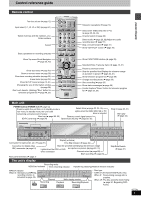
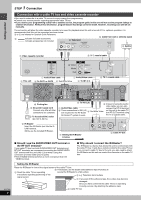
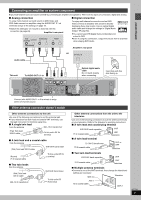
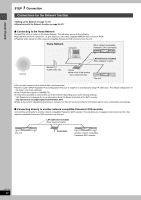
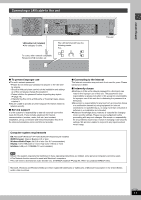
Getting started STEP 1 Connection Connections for the Network function ≥Setting up the Network (➡ page 16-19) ≥Operations with the Network function (➡ page 56-57) ∫ Connecting to the Home Network Connect this unit to a router on the Home Network. This will allow you to do the following: ≥Operate this unit from a computer, i.e. give names to video titles, playback MPEG4 titles, and view JPEG. ≥Playback video stored on other network compatible Panasonic DVD recorders from this unit. Home Network Computer Other network compatible Panasonic DVD recorder(s) HDD DVD SD PC Internet Modem (Cable, DSL, etc) LAN cable (not included) ≥Use category 5 cable. Router ≥Use a hub if the modem has a router function. HDD DVD SD PC This unit ≥You can also connect to the network with a wireless router. ≥Set the router's DHCP (Dynamic Host Configuration Protocol) to enable it to automatically assign IP addresses. The default configuration of the router is normally sufficient. ≥Use a router that supports 100BASE-TX. ≥It may not be possible to connect this unit to the Internet depending upon router security settings. Visit Panasonic's homepage for more information about the Network function of the DVD recorder. http://panasonic.co.jp/pavc/global/cs/dvd/index.html ≥Refer to the router's operating instructions or contact your Internet service provider for information about router connections and settings. ∫ Connecting directly to another network compatible Panasonic DVD recorder Connect this unit directly to another network compatible Panasonic DVD recorder. This will allow you to playback video stored on the other network compatible Panasonic DVD recorder from this unit. LAN cable (not included) ≥Use category 5 cable. This unit HDD DVD SD PC Router/Hub HDD DVD SD PC Another network compatible Panasonic DVD recorder RQT7394 10
-
 1
1 -
2
-
3
-
4
-
 5
5 -
 6
6 -
 7
7 -
 8
8 -
 9
9 -
 10
10 -
 11
11 -
 12
12 -
 13
13 -
 14
14 -
 15
15 -
16
-
17
-
18
-
19
-
20
-
21
-
22
-
23
-
24
-
25
-
26
-
27
-
28
-
29
-
30
-
31
-
32
-
33
-
34
-
35
-
36
-
37
-
38
-
39
-
40
-
41
-
42
-
43
-
44
-
45
-
46
-
47
-
48
-
49
-
50
-
51
-
52
-
53
-
54
-
55
-
56
-
57
-
58
-
59
-
60
-
61
-
62
-
63
-
64
-
65
-
66
-
67
-
68
-
69
-
70
-
71
-
72
-
73
-
74
-
75
-
76
-
77
-
78
-
79
-
80
-
81
-
82
-
83
-
84
 |
 |