Panasonic KX-HNC200 Installation Guide - Page 10
Connections, Usage area cautions, Note about power connections, Placing the camera on a flat area
 |
View all Panasonic KX-HNC200 manuals
Add to My Manuals
Save this manual to your list of manuals |
Page 10 highlights
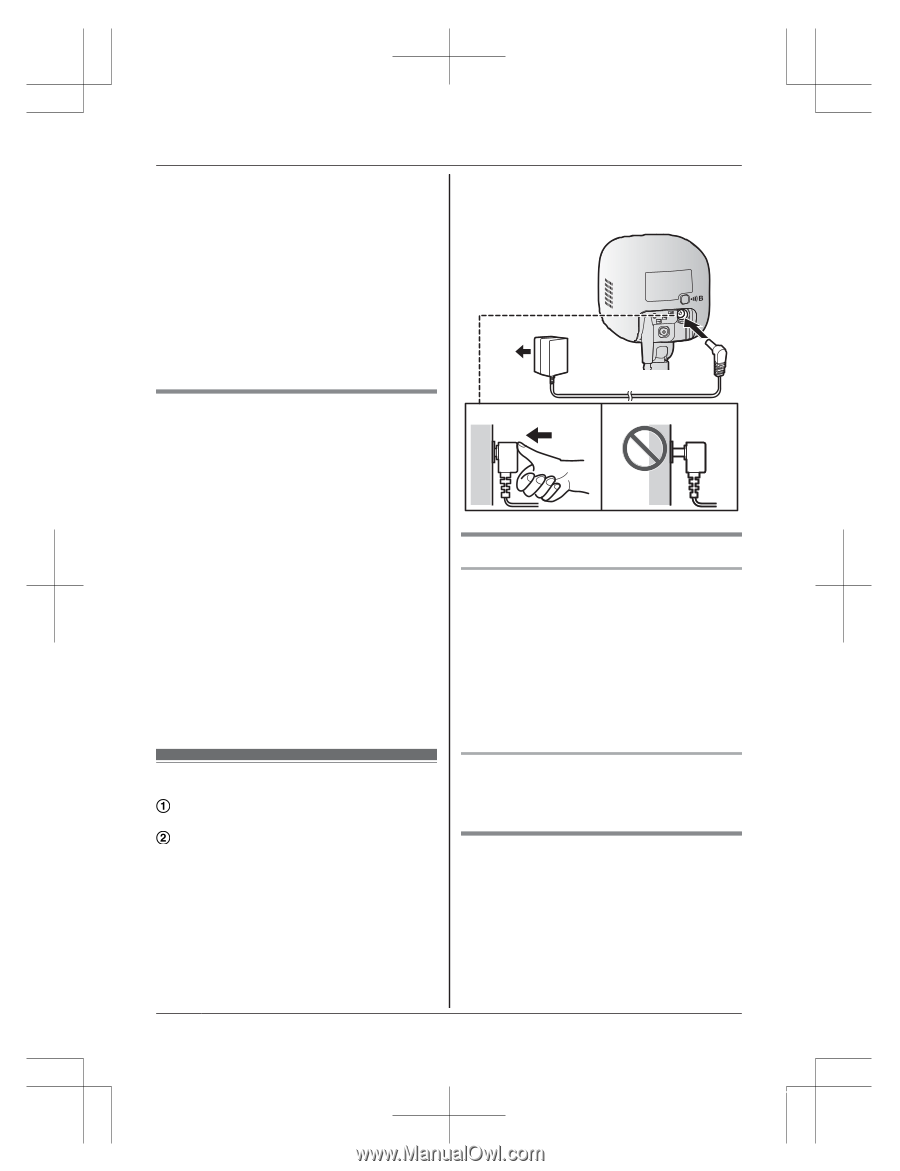
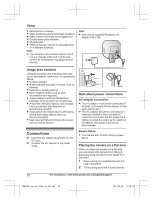
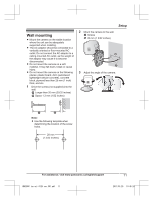
Setup R Metal doors or screens R Walls containing aluminum-sheet insulation R Walls made of concrete or corrugated iron R Double-pane glass windows R Multiple walls R When using each device on separate floors or in different buildings Note: R The camera's LED indicator blinks in red if it is out of range of the hub. In this case, confirm all connections, including those of the hub. Note: R Use only the supplied Panasonic AC adaptor PNLV236. 2 Usage area cautions Using the camera in the following areas may cause deformation, malfunction, or operational failure. R In direct sunlight R Areas exposed to grease or steam, such as kitchens R Near fire or heating devices R Near magnetic fields (such as near microwaves and magnets) R Areas subject to extreme temperature changes, such as next to air conditioners R Areas with reflective objects, such as glass, that can interfere with detection of temperature variation R Areas where the temperature is affected by strong illuminating objects (such as fluorescent lights) R Near devices that emit strong radio waves, such as mobile phones Connections Insert the AC adaptor plug firmly into the DC jack. Connect the AC adaptor to the power outlet. 1 Note about power connections AC adaptor connection R The AC adaptor must remain connected at all times. (It is normal for the adaptor to feel warm during use.) R The AC adaptor should be connected to a vertically oriented or floor-mounted AC outlet. Do not connect the AC adaptor to a ceiling-mounted AC outlet, as the weight of the adaptor may cause it to become disconnected. Power failure R The camera will not work during a power failure. Placing the camera on a flat area When you place the camera on a flat area, you can prevent the camera from falling by passing a string through the hole (page 7) in the stand. 1 Pass a string (not supplied) through the hole in the stand. 2 Tie the string and hook it to the bracket. 10 For assistance, visit www.panasonic.ca/english/support HNC200C_(en_en)_0125_ver.301.pdf 10 2017/01/25 19:45:24
-
 1
1 -
2
-
3
-
4
-
 5
5 -
 6
6 -
 7
7 -
 8
8 -
 9
9 -
 10
10 -
 11
11 -
 12
12 -
 13
13 -
 14
14 -
 15
15 -
16
-
17
-
18
-
19
-
20
-
21
-
22
-
23
-
24
-
25
-
26
-
27
-
28
-
29
-
30
-
31
-
32
 |
 |