Panasonic KX-HNC200 Installation Guide - Page 11
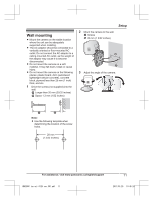
Wall mounting, Setup
 |
View all Panasonic KX-HNC200 manuals
Add to My Manuals
Save this manual to your list of manuals |
Page 11 highlights
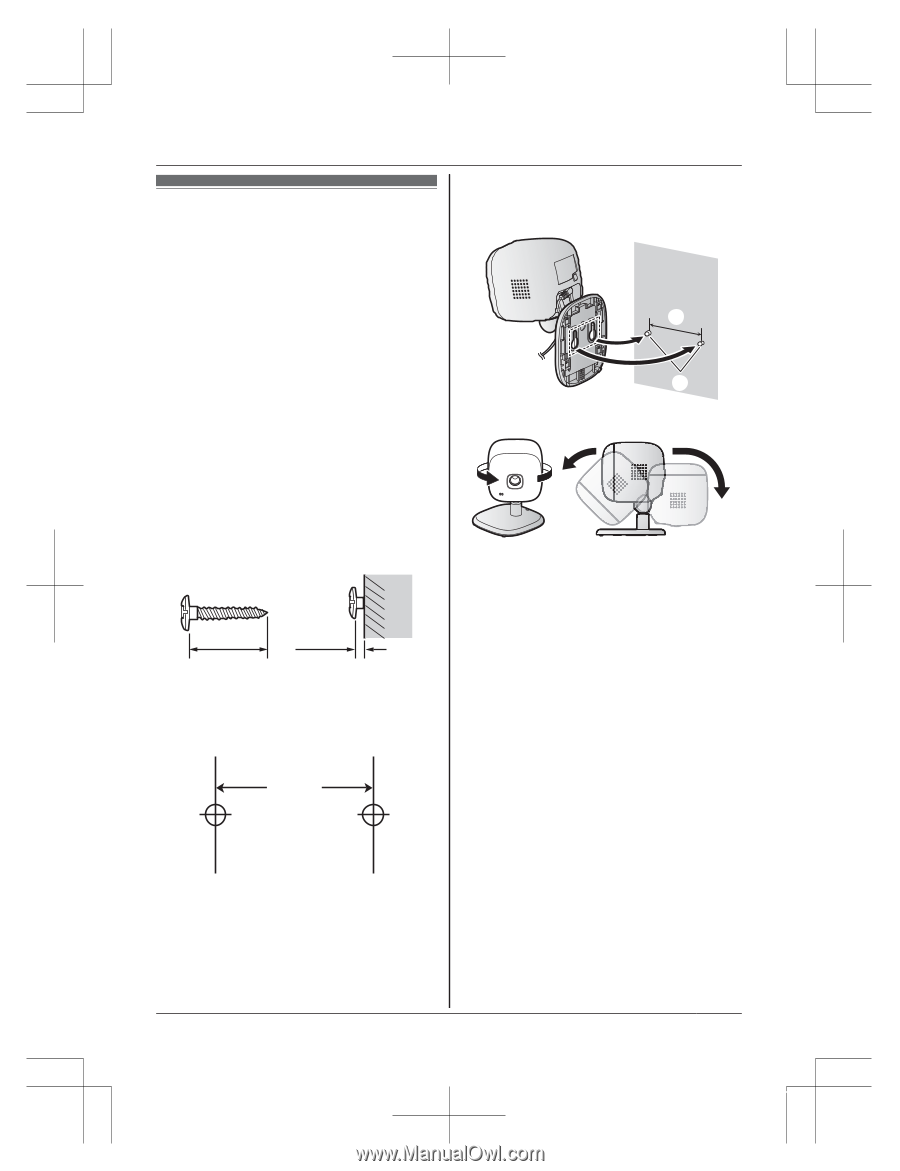
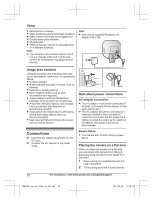
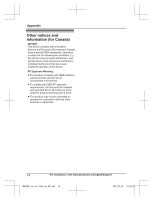
Wall mounting R Mount the camera on the stable location where the unit can be adequately supported when installing. R The AC adaptor should be connected to a vertically oriented or floor-mounted AC outlet. Do not connect the AC adaptor to a ceiling-mounted AC outlet, as the weight of the adaptor may cause it to become disconnected. R Do not mount the camera on a soft material. It may fall down, break or cause injury. R Do not mount the camera on the following places: plaster board, ALC (autoclaved lightweight cellular concrete), concrete block, plywood less than 25 mm (1 inch) thick, and etc. 1 Drive the screws (not supplied) into the wall. 1 Longer than 20 mm (25/32 inches) 2 Space 1.3 mm (1/32 inches) 2 Mount the camera to the wall. 1 Screws 2 28 mm (1 3/32 inches) Setup 2 1 3 Adjust the angle of the camera. 1 2 Note: R Use the following template when determining the location of the screw holes. 28 mm (1 3/32 inches) For assistance, visit www.panasonic.ca/english/support 11 HNC200C_(en_en)_0125_ver.301.pdf 11 2017/01/25 19:45:24
-
 1
1 -
2
-
3
-
4
-
5
-
 6
6 -
 7
7 -
 8
8 -
 9
9 -
 10
10 -
 11
11 -
 12
12 -
 13
13 -
 14
14 -
 15
15 -
 16
16 -
17
-
18
-
19
-
20
-
21
-
22
-
23
-
24
-
25
-
26
-
27
-
28
-
29
-
30
-
31
-
32
 |
 |