Panasonic KX-HNS101 Operating Instructions US
Panasonic KX-HNS101 Manual
 |
View all Panasonic KX-HNS101 manuals
Add to My Manuals
Save this manual to your list of manuals |
Panasonic KX-HNS101 manual content summary:
- Panasonic KX-HNS101 | Operating Instructions US - Page 1
Home Network System Window/Door Sensor Model No. KX-HNS101 Thank you for purchasing a Panasonic product. This document explains how to install the window/door sensor properly. For details about how to use the system, refer to the User's Guide (page 17). Please read this document before using the - Panasonic KX-HNS101 | Operating Instructions US - Page 2
About this system 4 For your safety 4 Important safety instructions ......5 For best performance 5 Other information 6 Setup Part Network] app 17 Accessing the User's Guide ....17 Specifications 18 FCC and other information ......19 Customer services 21 Warranty (For United States and Puerto - Panasonic KX-HNS101 | Operating Instructions US - Page 3
are subject to change without notice. R The illustrations in these instructions may vary slightly from the actual product. Trademarks R iPhone and iPad are registered trademarks of Apple Inc. R Android™ is a trademark of Google Inc. For assistance, please visit www.panasonic.com/support 3 - Panasonic KX-HNS101 | Operating Instructions US - Page 4
115 mW. R Do not use the product in health care facilities if any regulations posted in the area instruct you not to do so. Hospitals or health care facilities may be using equipment that could be sensitive water, and then consult a doctor. 4 For assistance, please visit www.panasonic.com/support - Panasonic KX-HNS101 | Operating Instructions US - Page 5
local codes for possible special disposal instructions. SAVE THESE INSTRUCTIONS For best performance Hub location/avoiding noise The hub and other compatible Panasonic devices use radio waves to communicate transmitters, such as external For assistance, please visit www.panasonic.com/support 5 - Panasonic KX-HNS101 | Operating Instructions US - Page 6
of disposal. Other information CAUTION: Risk of explosion if battery is replaced by an incorrect type. Dispose of used batteries according to the instructions. Routine care R Wipe the outer surface of the product with a soft moist cloth. 6 For assistance, please visit www.panasonic.com/support - Panasonic KX-HNS101 | Operating Instructions US - Page 7
Notice Important Information For assistance, please visit www.panasonic.com/support 7 - Panasonic KX-HNS101 | Operating Instructions US - Page 8
sure you can access the system using your mobile device. For details, refer to the System Setup Guide included with your hub. 2 Insert the battery The window/door sensor is battery powered. 3 Registration on the same position where proper 8 For assistance, please visit www.panasonic.com/support - Panasonic KX-HNS101 | Operating Instructions US - Page 9
app When you register the window/door sensor by using the [Home Network] app, you can assign a name to your For assistance, please visit www.panasonic.com/support 9 - Panasonic KX-HNS101 | Operating Instructions US - Page 10
functions as a window sensor or as a door sensor. For more information, refer to the User's Guide (page 17). Wireless communication range The wireless communication range of each device in the system from the hub of range of the hub. 10 For assistance, please visit www.panasonic.com/support - Panasonic KX-HNS101 | Operating Instructions US - Page 11
in red even if the " " marks point directly at each other and are no more than 25.4 mm (1 inch) apart. For assistance, please visit www.panasonic.com/support 11 - Panasonic KX-HNS101 | Operating Instructions US - Page 12
too high/too low. {xC} {xC} GREEN 1 2 RED 3 " " marks are aligned but units are too far apart. {xC} RED 3 12 For assistance, please visit www.panasonic.com/support - Panasonic KX-HNS101 | Operating Instructions US - Page 13
is too high/too low. 1 GREEN {xC} 2 RED {xC} 3 " " marks are aligned but units are too far apart. 3 RED {xC} For assistance, please visit www.panasonic.com/support 13 - Panasonic KX-HNS101 | Operating Instructions US - Page 14
with screws 1 Remove the covers from each unit. R Lift from the indented area (A) and open the sensor unit cover (B). 2 2 1 1 14 For assistance, please visit www.panasonic.com/support - Panasonic KX-HNS101 | Operating Instructions US - Page 15
the magnet unit so that they point directly at each other and are no more than 25.4 mm (1 inch) apart. For assistance, please visit www.panasonic.com/support 15 - Panasonic KX-HNS101 | Operating Instructions US - Page 16
thread tight and use it to cut the double-sided tape, and then remove any excess tape. 1 Excess tape 1 16 For assistance, please visit www.panasonic.com/support - Panasonic KX-HNS101 | Operating Instructions US - Page 17
in the app's home screen. Android™ devices Tap or press your mobile device's menu button in the app's home screen. 2 Tap [User's Guide]. Note: R You can also access the User's Guide at the web page listed below. www.panasonic.net/pcc/support/tel/ homenetwork/manual/ For assistance, please visit www - Panasonic KX-HNS101 | Operating Instructions US - Page 18
inches ´ 9/16 inches) R Mass (weight) Sensor unit: Approx. 39 g (0.09 lb), excluding the battery Magnet unit: Approx. 8 g (0.02 lb) 18 For assistance, please visit www.panasonic.com/support - Panasonic KX-HNS101 | Operating Instructions US - Page 19
radiate radio frequency energy and, if not installed and used in accordance with the instructions, may cause harmful interference to radio communications. However, there is no guarantee that compliance with FCC RF exposure requirements. For assistance, please visit www.panasonic.com/support 19 - Panasonic KX-HNS101 | Operating Instructions US - Page 20
Appendix Notice: R FCC ID can be found inside the sensor unit. 20 For assistance, please visit www.panasonic.com/support - Panasonic KX-HNS101 | Operating Instructions US - Page 21
Operating Assistance; locate your nearest Dealer or Service Center; purchase Parts and Accessories; or make Customer Service and Literature requests by visiting our Web Site at: www.panasonic.com/support or, contact us via the web at: www.panasonic.com/contactinfo You may also contact us directly - Panasonic KX-HNS101 | Operating Instructions US - Page 22
year parts and labor Limited Warranty. For Limited Warranty service for headsets if a headset is included with this product please follow instructions above. IF REPAIR IS NEEDED DURING THE LIMITED WARRANTY PERIOD SUCH PROOF OF PURCHASE. 22 For assistance, please visit www.panasonic.com/support - Panasonic KX-HNS101 | Operating Instructions US - Page 23
, travel to and from the servicer. The items listed are not problem with this product develops during or after the Limited Warranty period, you may contact your dealer or Service Center. If the problem Panasonic Exchange Center, prepaid and adequately insured. ȷDo not send your unit to Panasonic - Panasonic KX-HNS101 | Operating Instructions US - Page 24
Use CR2 lithium battery. 2 Use the Home Network app to access the User's Guide and refer to the Troubleshooting section. Visit our Web site: www.panasonic.com/support LFAQ and troubleshooting hints are available. For your future reference We recommend keeping a record of the following information - Panasonic KX-HNS101 | Operating Instructions US - Page 25
red doméstico Sensor para ventana/puerta Modelo n° KX-HNS101 Gracias por adquirir un producto Panasonic. Este documento explica como instalar el sensor para Para obtener ayuda, visite nuestro sitio web: www.panasonic.com/support para clientes en los EE. UU. o Puerto Rico (solo en inglés). Por - Panasonic KX-HNS101 | Operating Instructions US - Page 26
Tabla de Contenido Configuración Nombres de los componentes y funciones 3 Acerca del Led indicador 3 Resumen de configuración 3 Insertar la pila 4 Registro del sensor para ventana/ puerta 4 Cambio de tipo de sensor 5 Alcance de la comunicación inalámbrica 5 Colocación temporal 6 Instalación - Panasonic KX-HNS101 | Operating Instructions US - Page 27
la información de este documento para confirmar que el área de instalación deseada sea la adecuada para el correcto funcionamiento. Para obtener ayuda, visite www.panasonic.com/support 3 - Panasonic KX-HNS101 | Operating Instructions US - Page 28
, oprima M N en el hub y en el sensor para ventana/ puerta. R Si el registro falla, el hub emitirá varios pitidos cortos. 4 Para obtener ayuda, visite www.panasonic.com/support - Panasonic KX-HNS101 | Operating Instructions US - Page 29
de forma adecuada con el hub. Si el Led indicador parpadea en rojo, se encuentra fuera de alcance del hub. Para obtener ayuda, visite www.panasonic.com/support 5 - Panasonic KX-HNS101 | Operating Instructions US - Page 30
podría iluminarse en rojo aunque las marcas " " apunten la una a la otra y estén a no más de 25.4 mm (1 pulgada) de distancia. 6 Para obtener ayuda, visite www.panasonic.com/support - Panasonic KX-HNS101 | Operating Instructions US - Page 31
án está muy alta/muy baja. {xC} VERDE 2 1 ROJO 3 Las marcas " " están alineadas, pero las unidades están muy separadas. {xC} ROJO 3 Para obtener ayuda, visite www.panasonic.com/support 7 - Panasonic KX-HNS101 | Operating Instructions US - Page 32
alta/muy baja. (1 pulgada). 1 VERDE 2 ROJO {xC} {xC} 3 Las marcas " " están alineadas, pero las unidades están muy separadas. 3 ROJO {xC} 8 Para obtener ayuda, visite www.panasonic.com/support - Panasonic KX-HNS101 | Operating Instructions US - Page 33
con tornillos 1 Quite las tapas de cada unidad. R Levante del área concava (A) y abra la tapa de la unidad del sensor (B). 2 2 1 1 Para obtener ayuda, visite www.panasonic.com/support 9 - Panasonic KX-HNS101 | Operating Instructions US - Page 34
unidad del imán de forma tal que se apunten la una a la otra y estén a no más de 25.4 mm (1 pulgada). 10 Para obtener ayuda, visite www.panasonic.com/support - Panasonic KX-HNS101 | Operating Instructions US - Page 35
la unidad del imán de forma tal que se apunten la una a la otra y estén a no más de 25.4 mm (1 pulgada). Para obtener ayuda, visite www.panasonic.com/support 11 - Panasonic KX-HNS101 | Operating Instructions US - Page 36
del hilo y úselo para cortar la cinta de doble cara, y luego elimine cualquier exceso de cinta. 1 Exceso de cinta 1 12 Para obtener ayuda, visite www.panasonic.com/support - Panasonic KX-HNS101 | Operating Instructions US - Page 37
del imán (página 6). Apéndice Nota: R También puede acceder a la Guía del usuario mediante la página web a continuación. www.panasonic.net/pcc/support/tel/ homenetwork/manual/ Acceso a la Guía del usuario La Guía del usuario es una colección de documentación en línea que lo ayuda a aprovechar al - Panasonic KX-HNS101 | Operating Instructions US - Page 38
Notas 14 - Panasonic KX-HNS101 | Operating Instructions US - Page 39
Notas 15 - Panasonic KX-HNS101 | Operating Instructions US - Page 40
Notas 16
-
 1
1 -
 2
2 -
 3
3 -
 4
4 -
 5
5 -
 6
6 -
 7
7 -
8
-
9
-
10
-
11
-
12
-
13
-
14
-
15
-
16
-
17
-
18
-
19
-
20
-
21
-
22
-
23
-
24
-
25
-
26
-
27
-
28
-
29
-
30
-
31
-
32
-
33
-
34
-
35
-
36
-
37
-
38
-
39
-
40
 |
 |

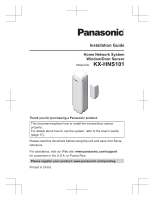
Installation Guide
Home Network System
Window/Door Sensor
Model No.
KX-HNS101
Thank you for purchasing a Panasonic product.
This document explains how to install the window/door sensor
properly.
For details about how to use the system, refer to the User’s Guide
(page 17).
Please read this document before using the unit and save it for future
reference.
For assistance, visit our Web site:
www.panasonic.com/support
for customers in the U.S.A. or Puerto Rico.
Please register your product: www.panasonic.com/prodreg
Printed in China