Panasonic KXTS620 One Line Phn W/tam-l - Page 52
Useful Information, Wall Mounting
 |
View all Panasonic KXTS620 manuals
Add to My Manuals
Save this manual to your list of manuals |
Page 52 highlights
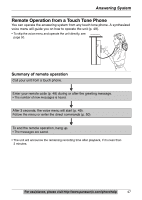
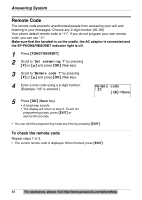
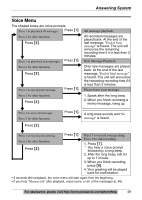
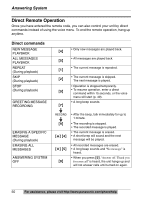
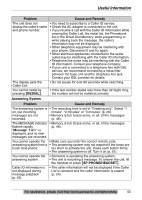
Useful Information Wall Mounting This unit can be mounted on a wall. 1 Press the tabs in the direction of the arrows (1), then remove the wall mounting adaptor (2). 2 Connect the AC adaptor. Tuck the telephone line cord inside the wall mounting adaptor, and push it in the direction of the arrow. • "UP WALL" should be facing upward. To power Outlet 3 Drive screws (not included) into the wall using the wall template below. Connect the telephone line cord. Mount the unit, and slide it down. Screws 8.3 cm (3 9/32") To Single-Line Telephone Jack To temporarily set the handset down during a conversation, place it as shown in this picture. Wall Template 52 8.3 cm (3 9/32")
-
 1
1 -
2
-
3
-
4
-
5
-
6
-
7
-
8
-
9
-
10
-
11
-
12
-
13
-
14
-
15
-
16
-
17
-
18
-
19
-
20
-
21
-
22
-
23
-
24
-
25
-
26
-
27
-
28
-
29
-
30
-
31
-
32
-
33
-
34
-
35
-
36
-
37
-
38
-
39
-
40
-
41
-
42
-
43
-
44
-
45
-
46
-
 47
47 -
 48
48 -
 49
49 -
 50
50 -
 51
51 -
 52
52 -
 53
53 -
 54
54 -
 55
55 -
 56
56 -
 57
57 -
58
-
59
-
60
-
61
-
62
-
63
-
64
 |
 |
52
Wall Mounting
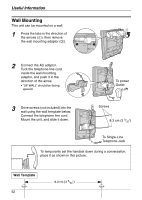
This unit can be mounted on a wall.
1
Press the tabs in the direction of
the arrows (
1
), then remove
the wall mounting adaptor (
2
).
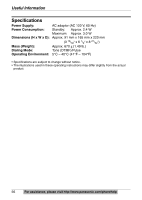
2
Connect the AC adaptor.
Tuck the telephone line cord
inside the wall mounting
adaptor, and push it in the
direction of the arrow.
• “UP WALL” should be facing
upward.
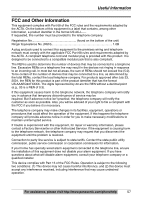
3
Drive screws (not included) into the
wall using the wall template below.
Connect the telephone line cord.
Mount the unit, and slide it down.
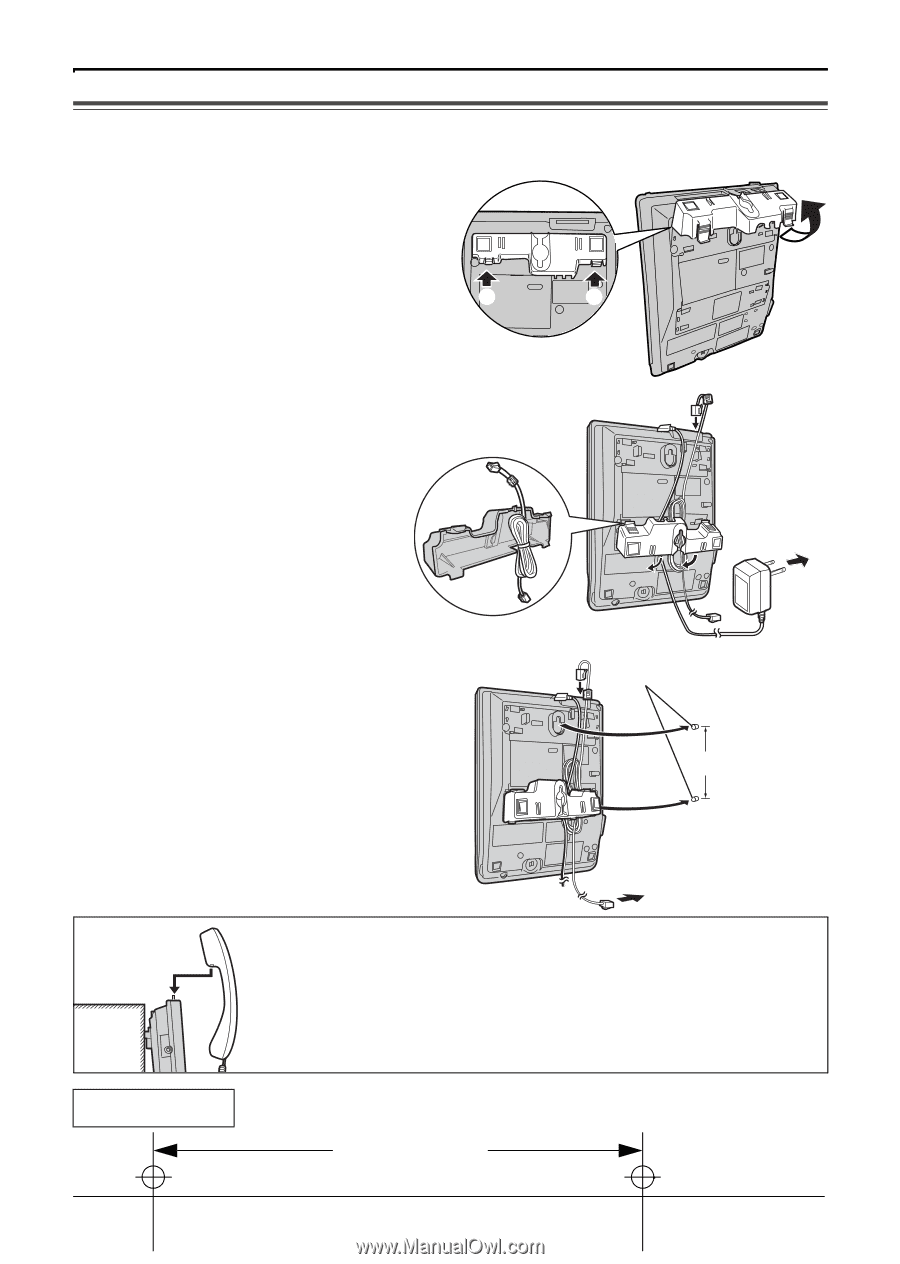
To temporarily set the handset down during a conversation,
place it as shown in this picture.
Wall Template
±
²
²
To power
Outlet
Screws
To Single-Line
Telephone Jack
8.3 cm (3
9
/
32
"
)
8.3 cm
(
3
9
/
32
"
)
Useful Information