Panasonic LB60U Operating Instructions - Page 16
Connector panel, SERIAL connector, PC 1 IN connector, DIRECT INPUT SELECT buttons, SHUTTER button - pt remote
 |
UPC - 791871111284
View all Panasonic LB60U manuals
Add to My Manuals
Save this manual to your list of manuals |
Page 16 highlights
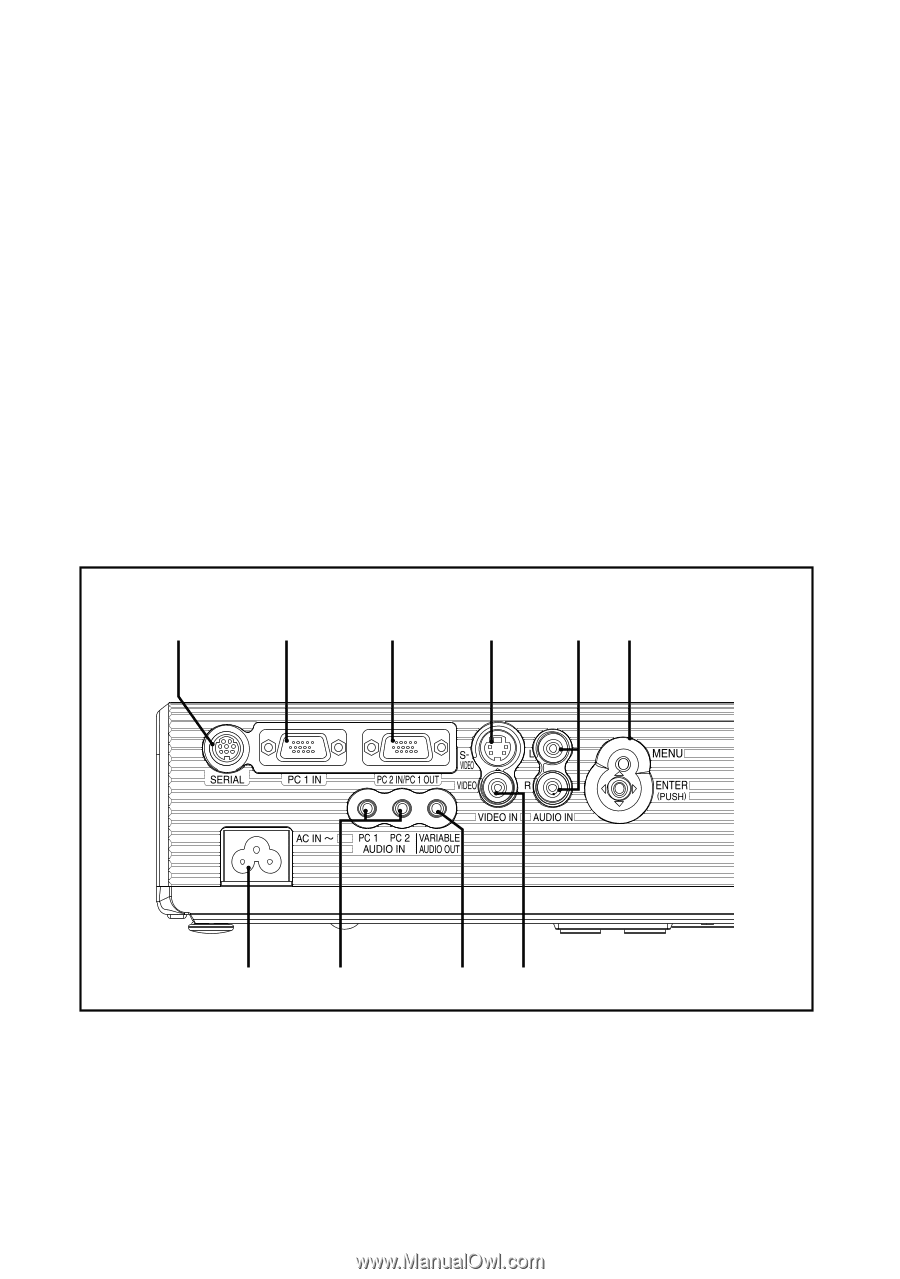
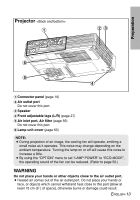
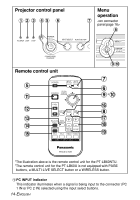
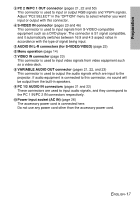
(continued from previous page) 1 DIRECT INPUT SELECT buttons (pages 27 and 30) You can select the input signal directly by pushing these buttons (the WIRELESS button is for the PT-LB60NTU only). 2 SHUTTER button (page 32) This button is used to momentarily turn off the picture and sound. You can also select this function from the on-screen menu (refer to page 53). 3 DEFAULT button (page 39) This button is used to reset the projector adjustment values to the factory default settings. 4 VOLUME +/- buttons (page 32) These buttons are used to adjust the volume of the sound that is output from the projector's built-in speaker and VARIABLE AUDIO OUT connector. Refer to page 52 for details on how to adjust the volume without using the remote control unit. 5 DIGITAL ZOOM +/- buttons (page 33) These buttons are used to enlarge the projected image. Connector panel # $ % & '( ,+ *) # SERIAL connector (pages 21, 22, 23 and 70) This connector is used to connect a personal computer to the projector in order to control the projector externally. (RS-232C compatible) $ PC 1 IN connector (pages 21 and 22) This connector is used to input RGB signals and YPBPR signals. 16-ENGLISH
-
 1
1 -
2
-
3
-
4
-
5
-
6
-
7
-
8
-
9
-
10
-
 11
11 -
 12
12 -
 13
13 -
 14
14 -
 15
15 -
 16
16 -
 17
17 -
 18
18 -
 19
19 -
 20
20 -
 21
21 -
22
-
23
-
24
-
25
-
26
-
27
-
28
-
29
-
30
-
31
-
32
-
33
-
34
-
35
-
36
-
37
-
38
-
39
-
40
-
41
-
42
-
43
-
44
-
45
-
46
-
47
-
48
-
49
-
50
-
51
-
52
-
53
-
54
-
55
-
56
-
57
-
58
-
59
-
60
-
61
-
62
-
63
-
64
-
65
-
66
-
67
-
68
-
69
-
70
-
71
-
72
-
73
-
74
-
75
-
76
-
77
-
78
-
79
-
80
-
81
-
82
 |
 |