Panasonic LB60U Operating Instructions - Page 41
CONTRAST, BRIGHTNESS, COLOR, TINT, SHARPNESS, COLOR TEMPERATURE, Projecting sRGB-compatible pictures
 |
UPC - 791871111284
View all Panasonic LB60U manuals
Add to My Manuals
Save this manual to your list of manuals |
Page 41 highlights
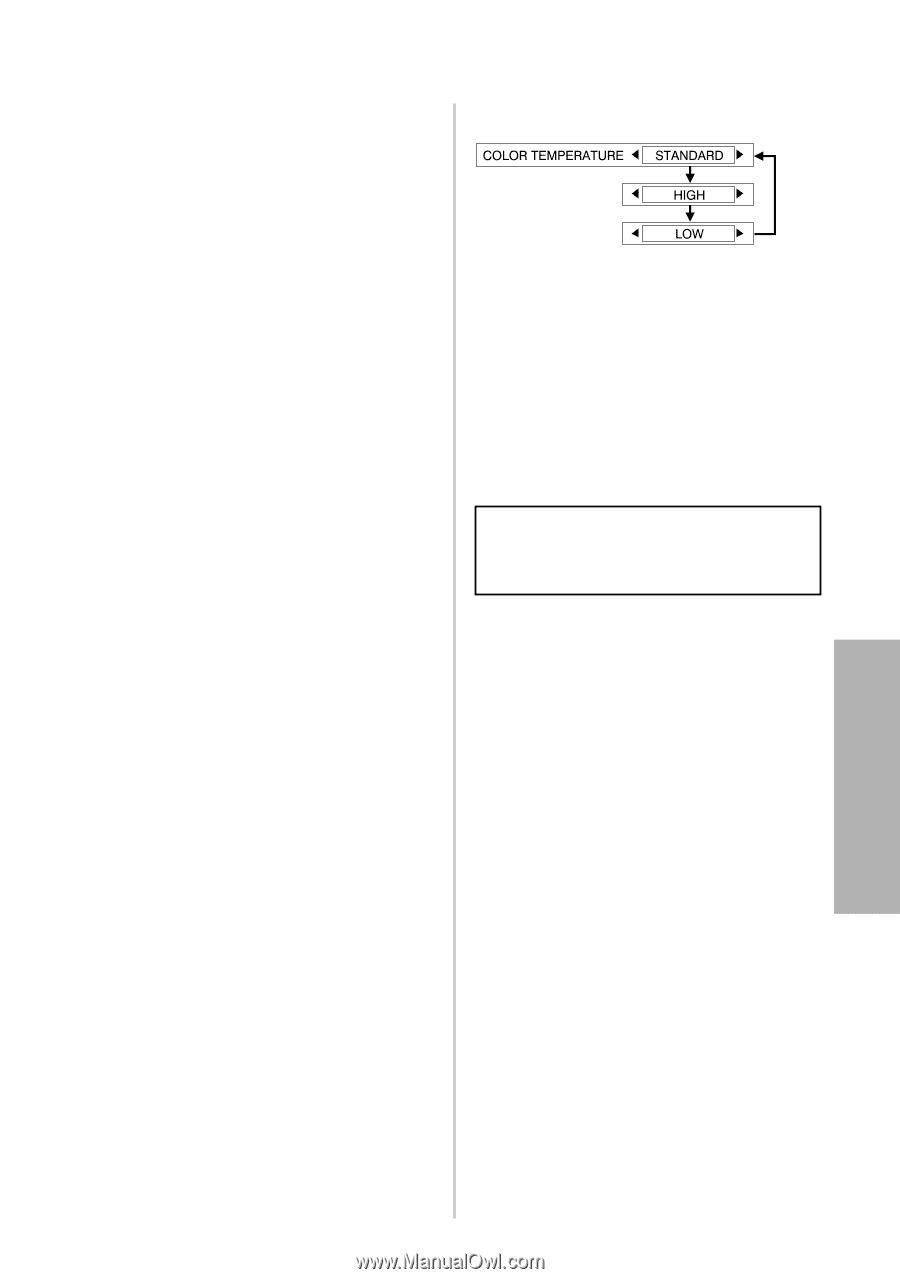
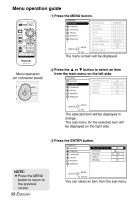
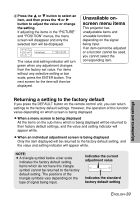
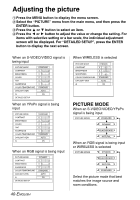
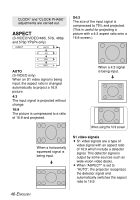
The mode best used in dark rooms is "NATURAL". For rooms having regular lighting conditions in use, select "STANDARD". For exceptionally bright rooms, use "DYNAMIC". "BLACKBOARD" is available only when "BLACKBOARD" in the "OPTION" menu is set to "ON". Select "BLACKBOARD" when projecting onto blackboards. CONTRAST This adjusts the contrast of the picture. (Adjust the "BRIGHTNESS" setting first if required before adjusting the "CONTRAST" setting.) The picture is bright: I button The picture is dark: H button BRIGHTNESS This adjusts the darker areas (black areas) in the picture. Black areas are too light: I button Dark areas are too solid: H button COLOR (S-VIDEO/VIDEO/YPBPR only) The color is too deep: I button The color is too pale: H button TINT (NTSC/NTSC 4.43/YPBPR only) This adjusts the flesh tones in the picture. The flesh tones are greenish: I button The flesh tones are reddish: H button SHARPNESS To soften the picture details: I button To sharpen the picture details: H button COLOR TEMPERATURE This is used to adjust the white areas of the picture if they appear bluish or reddish. Normally "STANDARD" should be selected. If the white areas of the pictures appear reddish, set to "HIGH". If the white areas of the pictures appear bluish, set to "LOW". Projecting sRGBcompatible pictures sRGB is an international color reproduction standard (IEC61966-21) established by the International Electrotechnical Commission (IEC). If you would like the colors in sRGBcompatible pictures to be reproduced more faithfully, make the following settings. # Press the F or G button to select "PICTURE MODE", and then press the I or H button to select "NATURAL". $ Press the DEFAULT button on the remote control unit. % Press the F or G button to select "COLOR TEMPERATURE", and then press the I or H button to select "STANDARD". ENGLISH-41 Adjustments and settings
-
 1
1 -
2
-
3
-
4
-
5
-
6
-
7
-
8
-
9
-
10
-
11
-
12
-
13
-
14
-
15
-
16
-
17
-
18
-
19
-
20
-
21
-
22
-
23
-
24
-
25
-
26
-
27
-
28
-
29
-
30
-
31
-
32
-
33
-
34
-
35
-
 36
36 -
 37
37 -
 38
38 -
 39
39 -
 40
40 -
 41
41 -
 42
42 -
 43
43 -
 44
44 -
 45
45 -
 46
46 -
47
-
48
-
49
-
50
-
51
-
52
-
53
-
54
-
55
-
56
-
57
-
58
-
59
-
60
-
61
-
62
-
63
-
64
-
65
-
66
-
67
-
68
-
69
-
70
-
71
-
72
-
73
-
74
-
75
-
76
-
77
-
78
-
79
-
80
-
81
-
82
 |
 |