Panasonic PT-MZ670 Series Operating Instructions - Page 37
Parts for installation (optional)
 |
View all Panasonic PT-MZ670 manuals
Add to My Manuals
Save this manual to your list of manuals |
Page 37 highlights
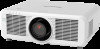
Chapter 2 Getting Started - Setting up rrAngle sensor The range of the installation attitude that is detected by the angle sensor built-in the projector is as follows. Floor standing installation 30° Ceiling mount installation 30° Floor standing installation Projection direction Parts for installation (optional) The optional Ceiling Mount Bracket is required. The Ceiling Mount Bracket (Model No.: ET‑PKD120H (for High Ceilings) or ET‑PKD120S (for Low Ceilings)) is used together with the Ceiling Mount Bracket (Model No.: ET‑PKE301B (Projector Mount Bracket)). Model No.: ET‑PKD120H (for High Ceilings), ET‑PKD120S (for Low Ceilings), ET‑PKE301B (Projector Mount Bracket) When the projector is mounted to the existing Ceiling Mount Bracket (in combination with the Model No.: ET‑PKD120H (for High Ceilings) or ET‑PKD120S (for Low Ceilings), and the Model No.: ET‑PKE300B (Projector Mount Bracket)), it is necessary to replace the drop-prevention wire rope with the one corresponding to this projector. Consult your dealer. Drop-prevention set (service model no.: DPPW1004ZA/X1) ffBe sure to use the Ceiling Mount Bracket specified for this projector. ffRefer to the Installation Instructions of the Ceiling Mount Bracket when installing and setting up the projector. Attention ff To ensure projector performance and security, installation of the Ceiling Mount Bracket must be carried out by your dealer or a qualified technician. ENGLISH - 37
-
 1
1 -
2
-
3
-
4
-
5
-
6
-
7
-
8
-
9
-
10
-
11
-
12
-
13
-
14
-
15
-
16
-
17
-
18
-
19
-
20
-
21
-
22
-
23
-
24
-
25
-
26
-
27
-
28
-
29
-
30
-
31
-
 32
32 -
 33
33 -
 34
34 -
 35
35 -
 36
36 -
 37
37 -
 38
38 -
 39
39 -
 40
40 -
 41
41 -
 42
42 -
43
-
44
-
45
-
46
-
47
-
48
-
49
-
50
-
51
-
52
-
53
-
54
-
55
-
56
-
57
-
58
-
59
-
60
-
61
-
62
-
63
-
64
-
65
-
66
-
67
-
68
-
69
-
70
-
71
-
72
-
73
-
74
-
75
-
76
-
77
-
78
-
79
-
80
-
81
-
82
-
83
-
84
-
85
-
86
-
87
-
88
-
89
-
90
-
91
-
92
-
93
-
94
-
95
-
96
-
97
-
98
-
99
-
100
-
101
-
102
-
103
-
104
-
105
-
106
-
107
-
108
-
109
-
110
-
111
-
112
-
113
-
114
-
115
-
116
-
117
-
118
-
119
-
120
-
121
-
122
-
123
-
124
-
125
-
126
-
127
-
128
-
129
-
130
-
131
-
132
-
133
-
134
-
135
-
136
-
137
-
138
-
139
-
140
-
141
-
142
-
143
-
144
-
145
-
146
-
147
-
148
-
149
-
150
-
151
-
152
-
153
-
154
-
155
-
156
-
157
-
158
-
159
-
160
-
161
-
162
-
163
-
164
-
165
-
166
-
167
-
168
-
169
-
170
-
171
-
172
-
173
-
174
-
175
-
176
-
177
-
178
-
179
-
180
-
181
-
182
-
183
-
184
-
185
-
186
-
187
-
188
-
189
-
190
-
191
-
192
-
193
-
194
-
195
-
196
-
197
-
198
-
199
-
200
-
201
-
202
-
203
-
204
-
205
-
206
-
207
-
208
-
209
-
210
-
211
-
212
-
213
-
214
-
215
-
216
-
217
-
218
-
219
-
220
-
221
-
222
-
223
-
224
-
225
-
226
-
227
-
228
-
229
 |
 |
