Panasonic PT47X54J PT47X54 User Guide - Page 27
Converge Cont., Procedure, Nine Point Convergence Correction, Zoom Adj., Other Adj.
 |
View all Panasonic PT47X54J manuals
Add to My Manuals
Save this manual to your list of manuals |
Page 27 highlights
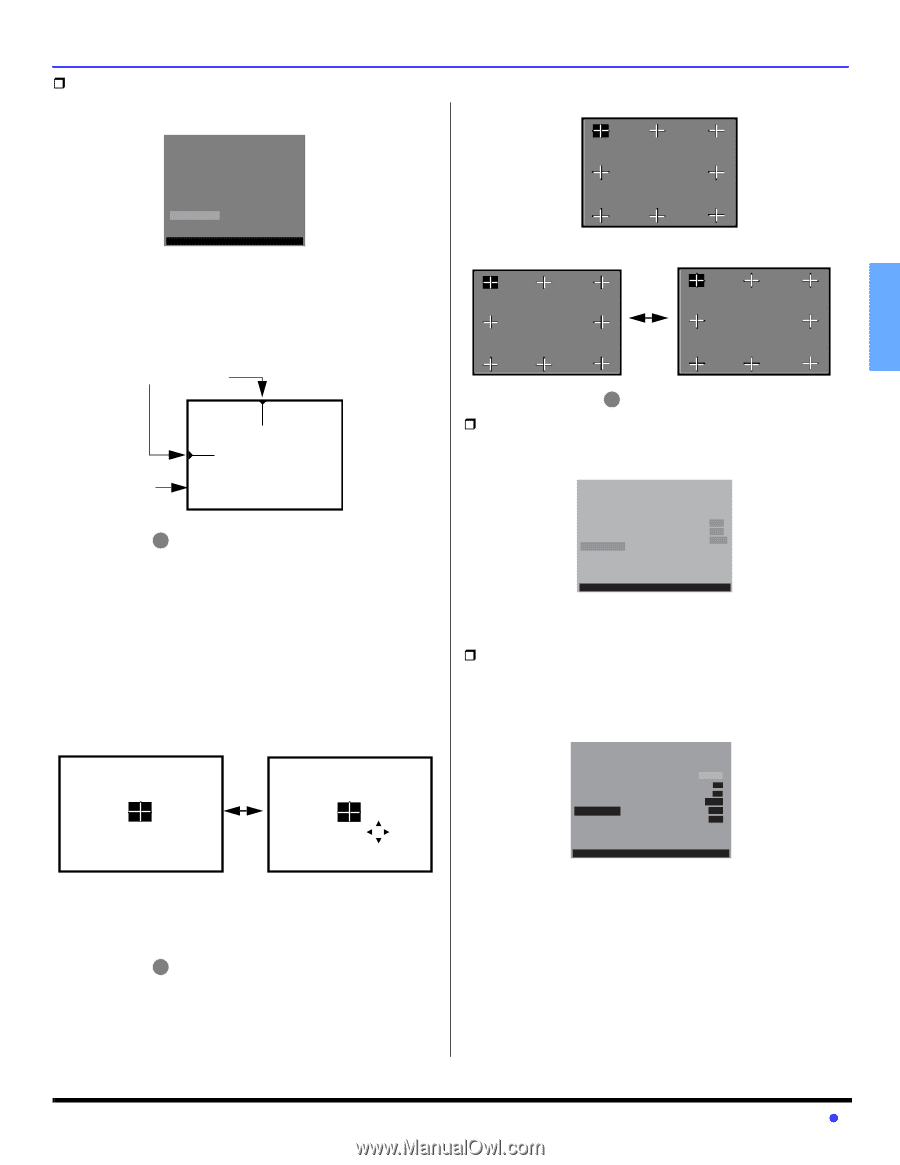
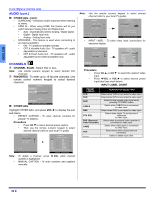
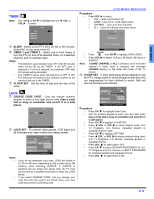
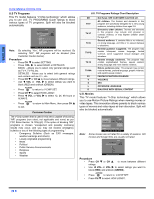
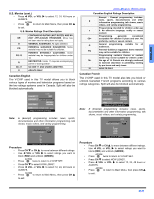
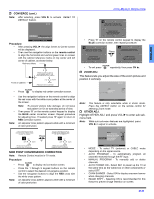
K ENGLISH ˆ CONVERGE (cont.) Note: After selecting, press VOL DEFAULT feature. to activate RESET TO SET UP CONVERGE. CONVERGENCE ADJ. RESET TO DEFAULT PRESS ACTION TO RETURN Procedure • After pressing VOL the align Green to Center screen will be displayed. • Then use the navigation buttons on the remote control to align the horizontal and vertical green lines on screen with the cabinet reference marks on top center and left center of cabinet, as shown below. Reference Marks Front of cabinet PRESS CH AND VOL KEY TO ALIGN GREEN LINES TO THE CENTER MARK ON THE CABINET UP LEFT RIGHT DOWN PRESS ACTION TO CONTINUE ACTION • Press to display red center correction screen. • • Note: Use the navigation buttons on the remote control to align the red cross with the white cross pattern at the center of the screen. Note: To prevent picture tube damage, do not leave test pattern on for an extended period of time. Then press "0" on the remote control keypad to display the BLUE center correction screen. Repeat procedure for adjusting blue. If needed press "0" again to return to RED correction screen. An adjusted cross pattern appears white with a minimum of color protrusion. IF RED IS PROTRUDING FROM CENTER CROSS, PRESS CH AND VOL KEY TO CORRECT UP LEFT RIGHT DOWN PRESS 0 TO ADJUST BLUE PRESS ACTION TO CONTINUE Press "0" IF BLUE IS PROTRUDING FROM CENTER CROSS, PRESS CH AND VOL KEY TO CORRECT UP LEFT K RIGHT K K DOWN PRESS 0 TO ADJUST BLUE PRESS ACTION TO CONTINUE NINE POINT CONVERGENCE CORRECTION Note: Remote Control must be in TV mode. Procedure ACTION • Press to display red correction screen. • Press the 1 through 9 keypad buttons on the remote control to select the desired convergence position. • Use the navigation buttons to align the RED cross with the white cross pattern. Note: An adjusted cross pattern appears white with a minimum of color protrusion. ICON MENUS OPERATION 1 2 3 PRESS # KEY TO SELECT POS. PRESS CH AND VOL KEY TO CORR. 4 6 CORRECTING RED PRPERSESSS0 ATCOTAIODNJUTSOTEBXLITUE PRESS ACTION TO EXIT 7 8 9 • Press "0" on the remote control keypad to display the BLUE correction screen, then repeat procedure. 1 2 3 PRESS # KEY TO SELECT POS. PRESS CH AND VOL KEY TO CORR. 4 6 CORRECTING RED PRPERSESSS0 ATCOTAIODNJUTSOTEBXLITUE PRESS ACTION TO EXIT 7 8 9 Press "0" 1 2 3 PRESS # KEY TO SELECT POS. PRESS CH AND VOL KEY TO CORR. 4 6 CORRECTING BLUE PRPERSESSS0 TAOCTAIODNJUTSOTERXEITD PRESS ACTION TO EXIT 7 8 9 ACTION • To exit press repeatedly, then press CH . ˆ ZOOM ADJ. This feature lets you adjust the size of the zoom picture and position it vertically. SET UP SIZE 4 V-POSITION 0 NORMAL SET ZOOM ADJ. PRESS ACTION TO RETURN Note: This feature is only selectable while in Zoom mode. Press the ASPECT button on the remote control for selecting Zoom mode. ˆ OTHER ADJ. Highlight OTHER ADJ. and press VOL to enter sub submenu field. Note: While sub sub-menu features are highlighted, press VOL to adjust or activate. SET UP MODE CABLE AUTO PROGRAM MANUAL PROGRAM AUTO POWER ON OFF OTHER ADJ. CHAN BANNER ON IMAGE SHIFT ON PRESS ACTION TO RETURN • MODE - To select TV (antenna) or CABLE mode depending on the signal source. • AUTO PROGRAM - To automatically program all channels received through the RF input. • MANUAL PROGRAM - To manually add or delete channels. • AUTO POWER ON - Select SET to power up the TV at the same time as the Cable box or other components or select OFF. • CHAN BANNER - Select ON to display onscreen banner when changing channels. • IMAGE SHIFT - Selecting ON is recommended for this feature to prevent image retention on screen. 25 z
-
 1
1 -
2
-
3
-
4
-
5
-
6
-
7
-
8
-
9
-
10
-
11
-
12
-
13
-
14
-
15
-
16
-
17
-
18
-
19
-
20
-
21
-
 22
22 -
 23
23 -
 24
24 -
 25
25 -
 26
26 -
 27
27 -
 28
28 -
 29
29 -
 30
30 -
 31
31 -
 32
32 -
33
-
34
-
35
-
36
-
37
-
38
-
39
-
40
-
41
-
42
-
43
-
44
-
45
-
46
-
47
-
48
-
49
-
50
-
51
-
52
-
53
-
54
-
55
-
56
-
57
-
58
-
59
-
60
-
61
-
62
-
63
-
64
-
65
-
66
-
67
-
68
-
69
-
70
-
71
-
72
-
73
-
74
-
75
-
76
-
77
-
78
-
79
-
80
-
81
-
82
-
83
-
84
-
85
-
86
-
87
-
88
-
89
-
90
-
91
-
92
-
93
-
94
-
95
-
96
 |
 |