Panasonic PV-DV202 Digital Video Camcorder - Page 43
Types of Digital Functions
 |
UPC - 037988976911
View all Panasonic PV-DV202 manuals
Add to My Manuals
Save this manual to your list of manuals |
Page 43 highlights
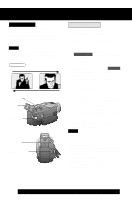
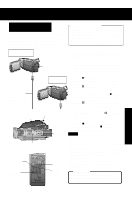
Digital Features Other Digital Functions Use the following features to add interest and professionalism to your recordings or playback. Select from twelve special effects. 3, 4, 5 JOG KEY 2MENU 1POWER Types of Digital Functions MIRROR Symmetrical image from the current camera picture. STROBE The recording appears as a sequence of still frames. MOSAIC The picture appears in a mosaic pattern. SLIM The picture is expanded vertically. TRAIL The subject being recorded creates a trail when in motion. STRETCH The picture is expanded horizontally. MAGICPIX (Not available during playback) Color recording of video or still images onto the Mini DV in low lighting. (p. 41) • Only Manual Focus is available. WIPE Successive scenes are separated in a way which simulates the drawing of a curtain. MIX The current scene is mixed in with the following scene during scene changes. PinP PinP (Still image) is displayed on the Main Picture. SEPIA (Only available during playback) The picture is played back in sepia, a brownish color, giving it an antique look. MONO (Monotone) (Only available during playback) The picture is played back in black-andwhite. 1 Set POWER to CAMERA or VCR. 2 Press MENU to display the menu screen. 3 Rotate JOG KEY to select D.FUNCTION in the CAMERA mode menu screen or PLAY FUNCTION in the VCR mode menu screen, then press JOG KEY to display the CAMERA FUNCTION or VCR PLAY FUNCTION menu screen. 4 Rotate JOG KEY to select D.FUNCTION , and then press JOG KEY repeatedly to select one of the Digital Functions listed on the left. 5 To cancel the Digital Function, press JOG KEY repeatedly to select OFF. Note • The EIS and Digital Zoom features are turned off automatically when one of the Digital Functions listed at left is selected. To use the WIPE function a. In Camera mode, set the "D.FUNCTION" item in the main menu screen to "WIPE". (Menu OSD: p. 108) b.Press REC/PAUSE to start recording. c. Press REC/PAUSE to pause the recording. The last scene will be memorized. d.Press RECORD/PAUSE to start recording again. The new scene will take the place of the memorized scene. To use the MIX function a. In Camera mode, set the "D.FUNCTION" item in the main menu screen to "MIX" (Menu OSD: p. 108). Then, perform steps b-d above. The memorized scene and the new scene will appear mixed as the scene changes from one to the other. Note • When Photo Title is set, WIPE/MIX mode becomes Photo Title. When Photo Title is finished, Digital Function turns OFF. 43 Digital Features
-
 1
1 -
2
-
3
-
4
-
5
-
6
-
7
-
8
-
9
-
10
-
11
-
12
-
13
-
14
-
15
-
16
-
17
-
18
-
19
-
20
-
21
-
22
-
23
-
24
-
25
-
26
-
27
-
28
-
29
-
30
-
31
-
32
-
33
-
34
-
35
-
36
-
37
-
 38
38 -
 39
39 -
 40
40 -
 41
41 -
 42
42 -
 43
43 -
 44
44 -
 45
45 -
 46
46 -
 47
47 -
 48
48 -
49
-
50
-
51
-
52
-
53
-
54
-
55
-
56
-
57
-
58
-
59
-
60
-
61
-
62
-
63
-
64
-
65
-
66
-
67
-
68
-
69
-
70
-
71
-
72
-
73
-
74
-
75
-
76
-
77
-
78
-
79
-
80
-
81
-
82
-
83
-
84
-
85
-
86
-
87
-
88
-
89
-
90
-
91
-
92
-
93
-
94
-
95
-
96
-
97
-
98
-
99
-
100
-
101
-
102
-
103
-
104
-
105
-
106
-
107
-
108
-
109
-
110
-
111
-
112
-
113
-
114
-
115
-
116
-
117
-
118
-
119
-
120
 |
 |