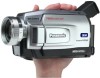
Panasonic PV-DV202 Digital Video Camcorder - Page 47
Copying from Digital, Equipment dubbing
 |
UPC - 037988976911
View all Panasonic PV-DV202 manuals
Add to My Manuals
Save this manual to your list of manuals |
Page 47 highlights
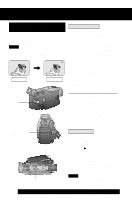
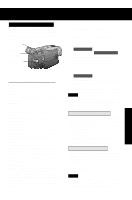
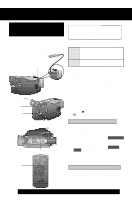
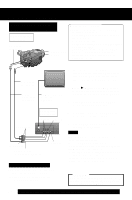
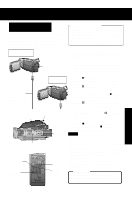
Editing Features Copying from Digital Equipment (dubbing) High quality digital-to-digital copying can be accomplished if both Palmcorders incorporate the DV Input/Output (i.LINK) Connector (DV interface cable (i.LINK) is not supplied). Source (Playing) Palmcorder Before you begin • Connect both Palmcorders to their power sources. • Connect the two Palmcorders using the DV interface cable (i.LINK) (4-pin to 4-pin). • Turn both Palmcorders ON. 1 Insert a pre-recorded tape into the source (playing) Palmcorder, and set POWER to VCR. 2 Insert a blank tape with the record DV Input/Output tab closed into the target (recording) (i.LINK) Connector Palmcorder and set POWER to VCR. Recording Palmcorder 3 Press (PLAY) on the source Palmcorder. When the tape reaches the point you want to start dubbing, press (PAUSE). DV Interface Cable (i.LINK) (optional) 4 Hold down REC and press (PLAY) on the target (recording) Palmcorder or on the remote control. Press (PAUSE) to pause the tape at the starting point of the dub. 3, 4, 5 3, 4PLAY PAUSE 4REC 6STOP 3, 4, 5 PAUSE 6STOP 4REC 3, 4 PLAY 5 Simultaneously, press (PAUSE) on both units to begin dubbing. 6 Press (STOP) on the recording unit, and then press (STOP) on the playing unit to end dubbing. Note • When two Palmcorders are used for dubbing, it is recommended that the Remote Control VCR1 or VCR2 setting be used to avoid improper-operation. • When two Palmcorders are connected using the DV interface cable (i.LINK) (not supplied), a Video Editing Controller cannot be used. • Do not connect both an S-Video Cable or A/V Cable and a DV Interface Cable (i.LINK). CAUTION: Unauthorized exchanging and/or copying of copyrighted recordings may be copyright infringement. Editing Features 47
-
 1
1 -
2
-
3
-
4
-
5
-
6
-
7
-
8
-
9
-
10
-
11
-
12
-
13
-
14
-
15
-
16
-
17
-
18
-
19
-
20
-
21
-
22
-
23
-
24
-
25
-
26
-
27
-
28
-
29
-
30
-
31
-
32
-
33
-
34
-
35
-
36
-
37
-
38
-
39
-
40
-
41
-
 42
42 -
 43
43 -
 44
44 -
 45
45 -
 46
46 -
 47
47 -
 48
48 -
 49
49 -
 50
50 -
 51
51 -
 52
52 -
53
-
54
-
55
-
56
-
57
-
58
-
59
-
60
-
61
-
62
-
63
-
64
-
65
-
66
-
67
-
68
-
69
-
70
-
71
-
72
-
73
-
74
-
75
-
76
-
77
-
78
-
79
-
80
-
81
-
82
-
83
-
84
-
85
-
86
-
87
-
88
-
89
-
90
-
91
-
92
-
93
-
94
-
95
-
96
-
97
-
98
-
99
-
100
-
101
-
102
-
103
-
104
-
105
-
106
-
107
-
108
-
109
-
110
-
111
-
112
-
113
-
114
-
115
-
116
-
117
-
118
-
119
-
120
 |
 |
