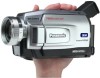
Panasonic PV-DV202 Digital Video Camcorder - Page 73
PHOTOVU/MPEG4 Movie Messenger™ System i.LINK
 |
UPC - 037988976911
View all Panasonic PV-DV202 manuals
Add to My Manuals
Save this manual to your list of manuals |
Page 73 highlights
PHOTOVU/MPEG4 Movie Messenger™ System (i.LINK) Using Tape Image Data By connecting the Palmcorder and PC with the DV Interface Cable (i.LINK), you can transfer Motion images and still images saved on the DV Tape directly to your PC. Note • If PHOTOVU/MPEG4 Movie Messenger™ System does not work, please refer to note on page 72. • Deactivate your PC ScreenSaver or this application may shutdown during image capture. 3Normal 4Movie Capture DV 2 STOP PLAY Before you begin • Insert a recorded Tape. (p. 11) • Make Palmcorder-PC connections. (p. 72) • Turn your PC on. • Set Palmcorder POWER to VCR. • Run the Software after the DV Interface Cable (i.LINK) has been connected to the Palmcorder. 1 Repeat steps 1~4 on page 60 to run the PHOTOVU/MPEG4 Movie Messenger™ System. Note • When the DV Interface Cable (i.LINK) is connected, the input display will automatically become DV. If it is not DV, please confirm the connection. Then, close and restart the software. • When using Windows XP, "Windows Movie Maker" may open automatically. If so, close "Windows Movie Maker" and "Movie Messenger", and open "Movie 2 Messenger" again. Click (PLAY) button on PC screen to playback the DV tape. • Please use the LCD monitor on the Palmcorder or PC screen for confirmation. To capture Motion images [When selecting Normal] 3 Click on [Normal] . 4 Click on [Movie Capture] at the point you wish to capture a Motion image. Click on [STOP] to end capture. • The image is transferred to the PC in real time. • The maximum capture time is approx. 3 minutes. • When capturing data containing changes between 12 bit and 16 bit and/or between SP and LP mode, a separate file will be made for each mode. • Please refer to pages 61~71 for other functions. PC Connection (Continued on next page.) 73
-
 1
1 -
2
-
3
-
4
-
5
-
6
-
7
-
8
-
9
-
10
-
11
-
12
-
13
-
14
-
15
-
16
-
17
-
18
-
19
-
20
-
21
-
22
-
23
-
24
-
25
-
26
-
27
-
28
-
29
-
30
-
31
-
32
-
33
-
34
-
35
-
36
-
37
-
38
-
39
-
40
-
41
-
42
-
43
-
44
-
45
-
46
-
47
-
48
-
49
-
50
-
51
-
52
-
53
-
54
-
55
-
56
-
57
-
58
-
59
-
60
-
61
-
62
-
63
-
64
-
65
-
66
-
67
-
 68
68 -
 69
69 -
 70
70 -
 71
71 -
 72
72 -
 73
73 -
 74
74 -
 75
75 -
 76
76 -
 77
77 -
 78
78 -
79
-
80
-
81
-
82
-
83
-
84
-
85
-
86
-
87
-
88
-
89
-
90
-
91
-
92
-
93
-
94
-
95
-
96
-
97
-
98
-
99
-
100
-
101
-
102
-
103
-
104
-
105
-
106
-
107
-
108
-
109
-
110
-
111
-
112
-
113
-
114
-
115
-
116
-
117
-
118
-
119
-
120
 |
 |
